Disclosure: I sometimes earn products or commissions from affiliate links or partnerships on my blog. I only recommend products and services I trust to serve you. Learn more.
When we decided to build our little cordwood house back in 2014, people gave us lots of side-eye. What do you mean you’re building a house out of short logs? Isn’t that just going to rot? Aren’t termites going to eat that? Weird choice, but okay.
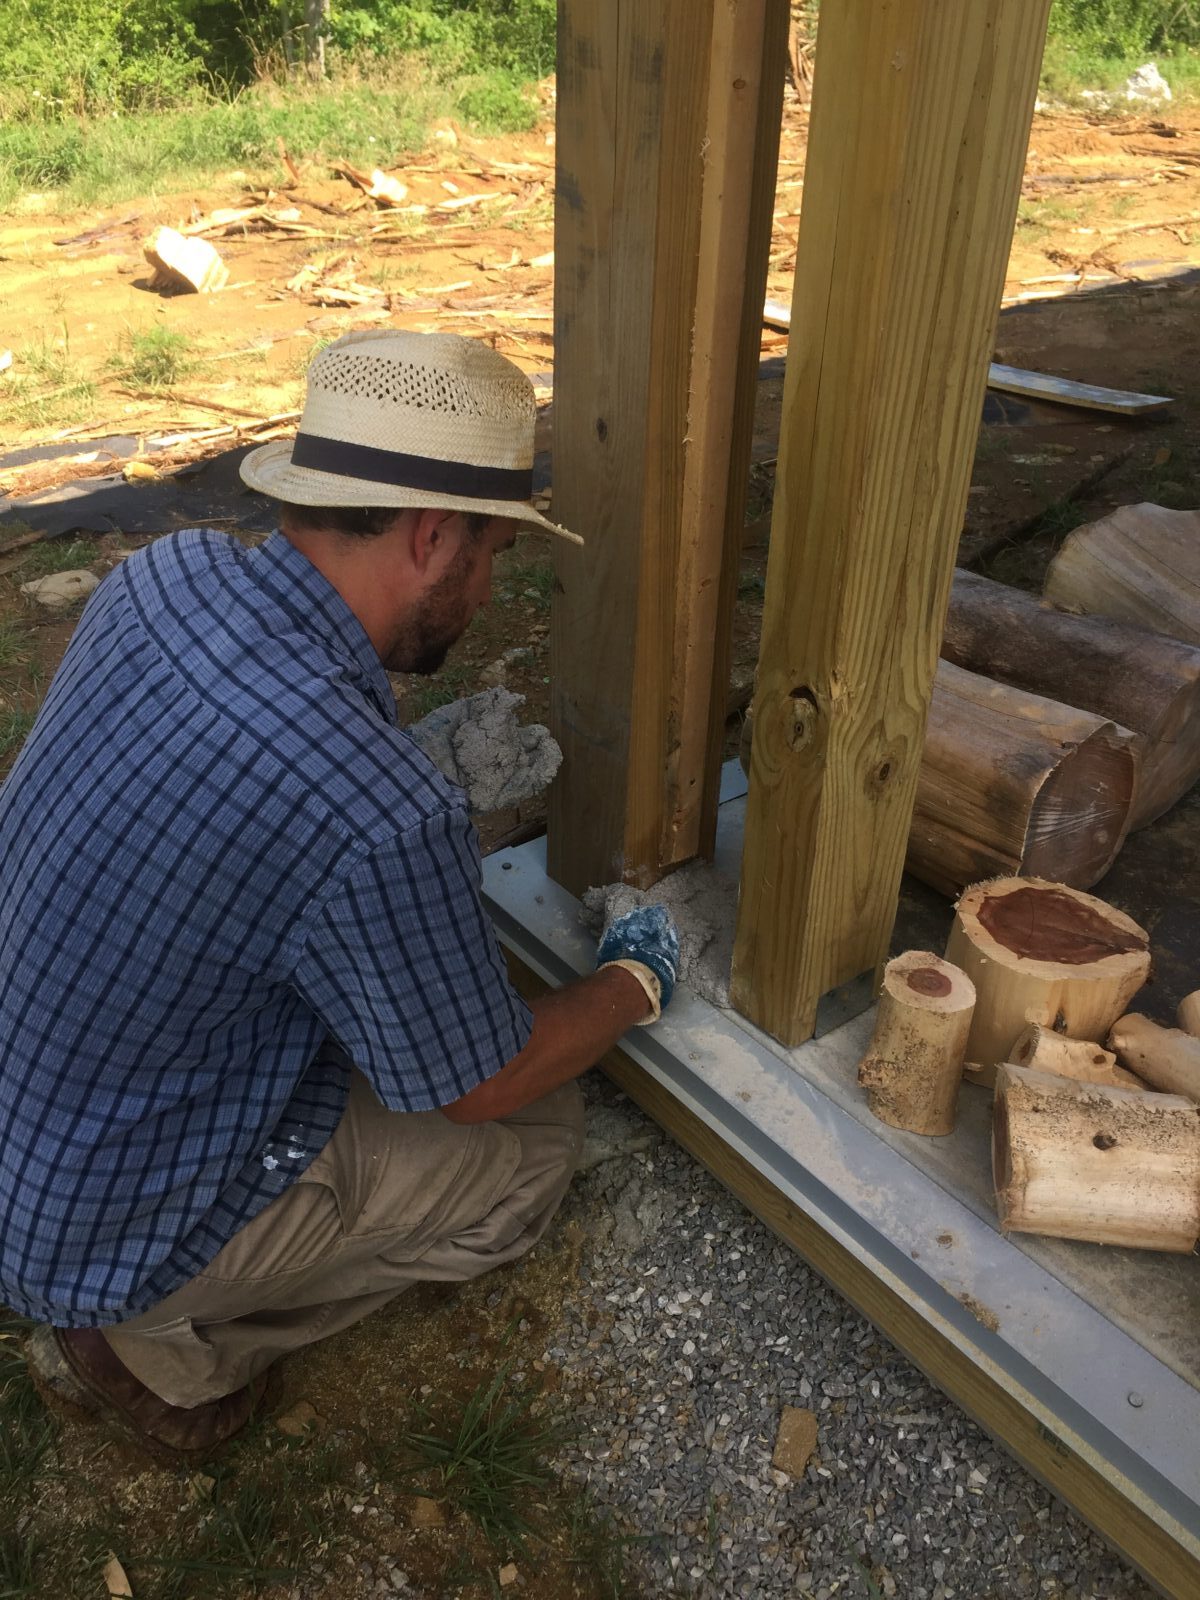
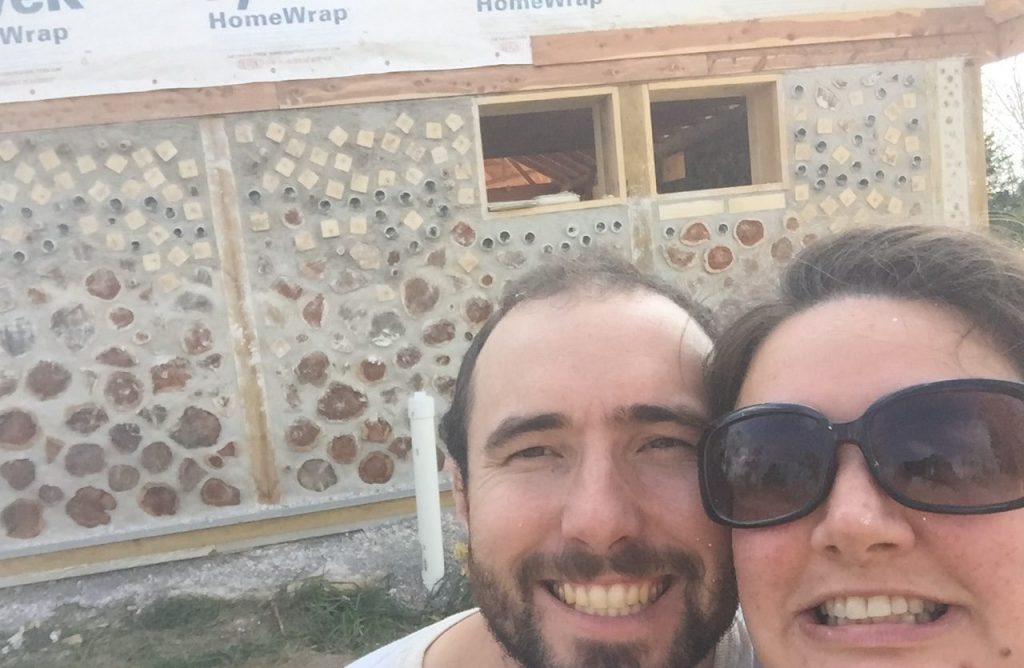
On July 16, 2016, we laid our very first course of cordwood. It was just a little portion of wall, and we mixed the mortar in small batches by hand in a wheelbarrow. It wasn’t much, but it was a beautiful start.
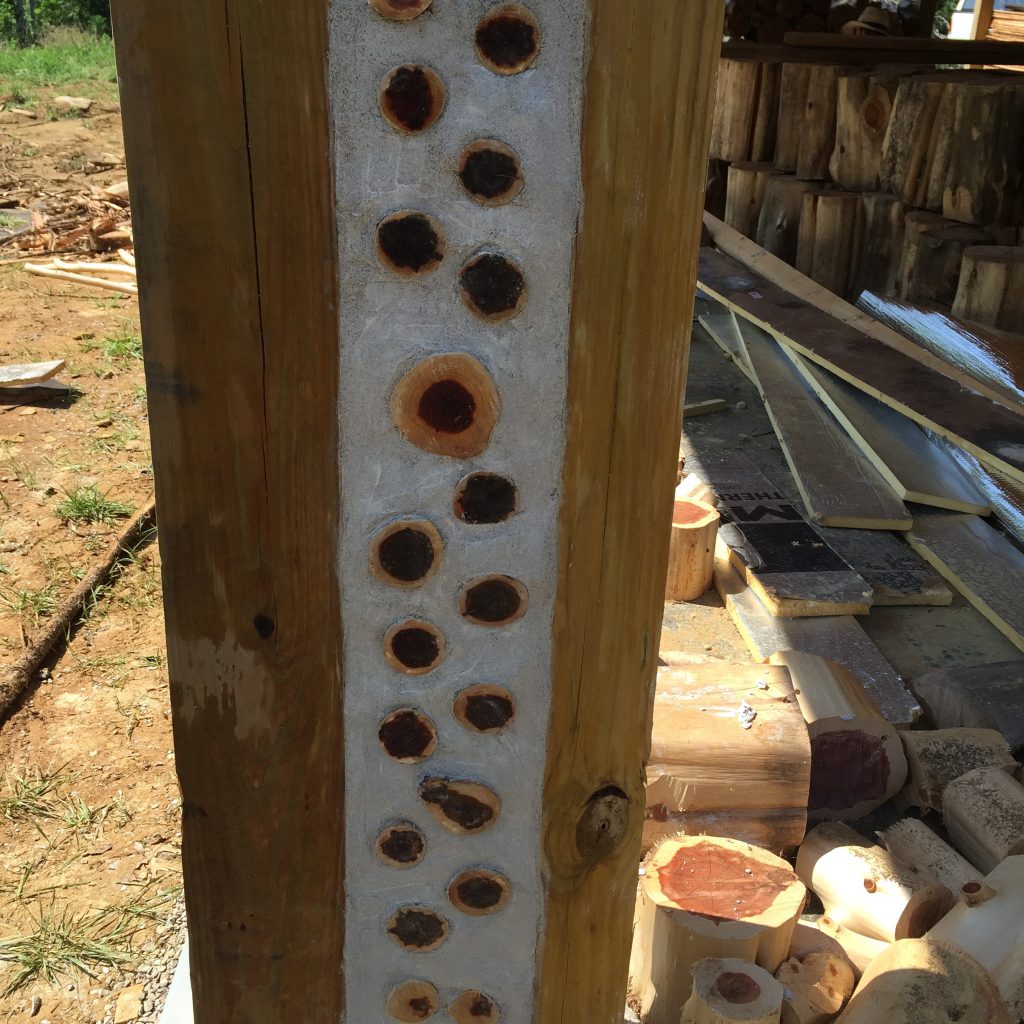
Over the next three months, we would work tirelessly to get the walls done before the first frost. All those efforts paid off, and we finished the walls on October 30, 2016.
I originally started this blog to document the process of building our quirky little off-grid house. Cordwood isn’t a technique that most people have direct experience with. As such, we’ve fielded lots of questions over the years about how well walls like these actually hold up. I had a lot of secondhand knowledge about how well cordwood walls can age, particularly when built with best practices in mind. But secondhand knowledge is no replacement for direct experience.
Now, as we pass the tenth anniversary of building our cordwood walls, I can finally share some real data and experiences. It’s a bit vulnerable sharing it, because I would LOVE for this to be the best, most gorgeous cordwood house you’ve ever seen. But reality is messier than that. There are many finer examples of aging cordwood houses out there, but my goal has never been to show only the glossy Instagram version. My goal is to provide you with real-world examples that you can take and learn from so that you can do an even better job than we did!
So how well do cordwood walls age? What changes have we noticed? Are any of the logs rotting? What problems have we encountered? Is cordwood masonry really all we’ve made it out to be? Let’s dive in and find out.
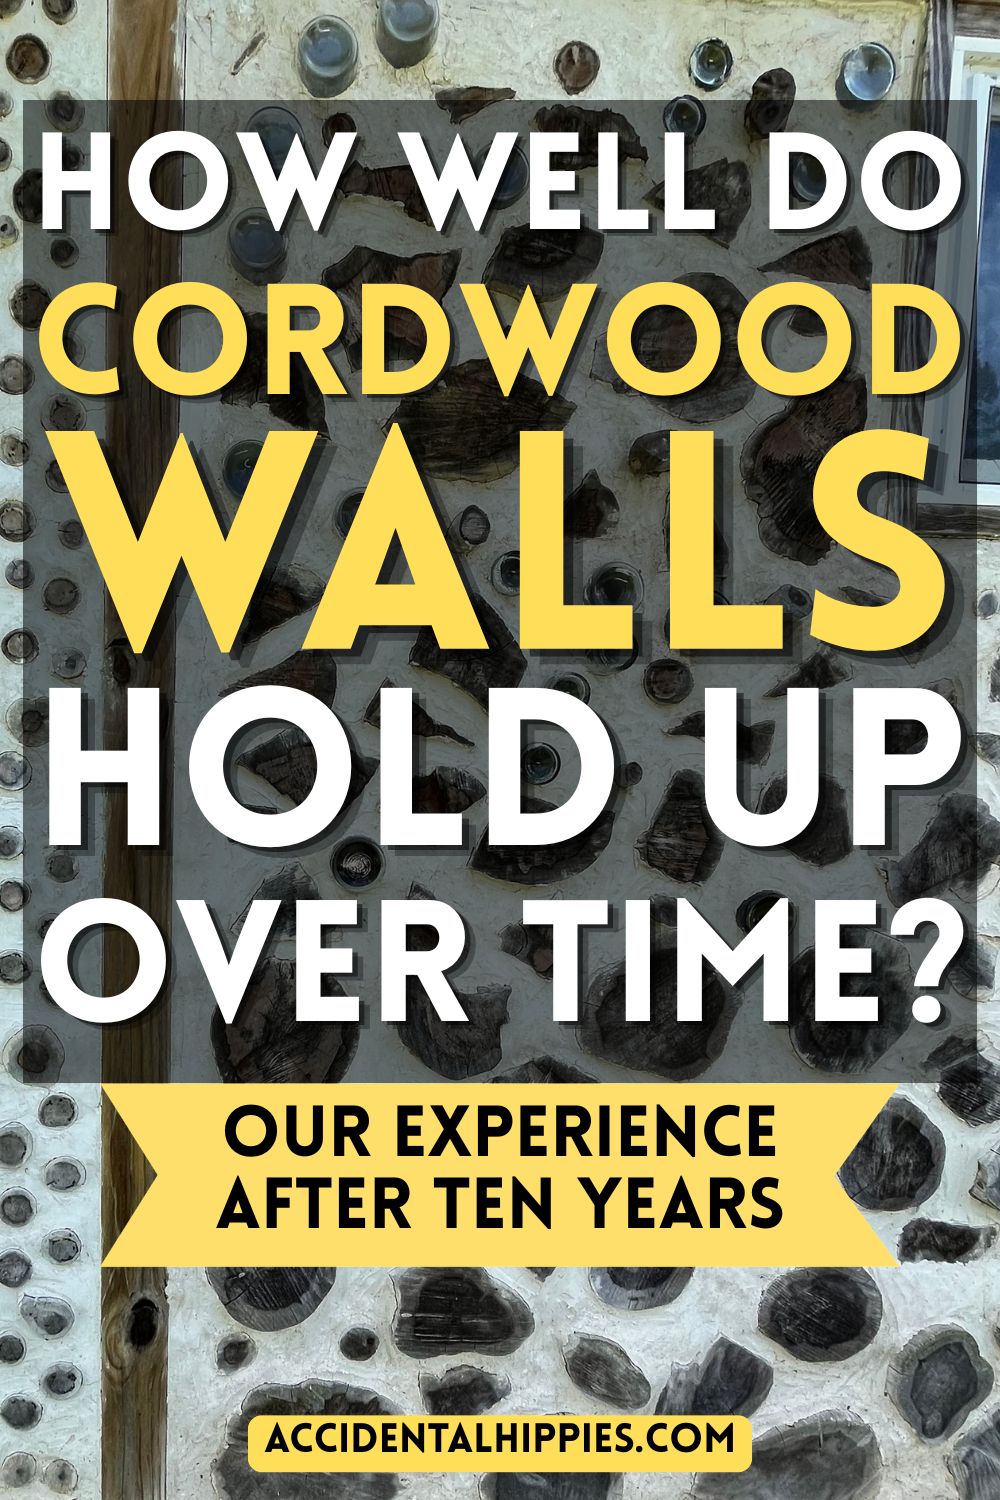
- An Overall Look at Our Cordwood House
- Before and After Shots
- What Has Gone Well
- Issues with Logs
- Issues With Mortar
- Ways Our Walls Have Surprised Us
- What would we do differently?
- Would we build with cordwood again?
- Read More About Our Cordwood Journey
- Join the Email List to Get the Free Cordwood Guide
- Ready to really dig in? Enroll in our Cordwood Building Course!
An Overall Look at Our Cordwood House
First some rough stats:
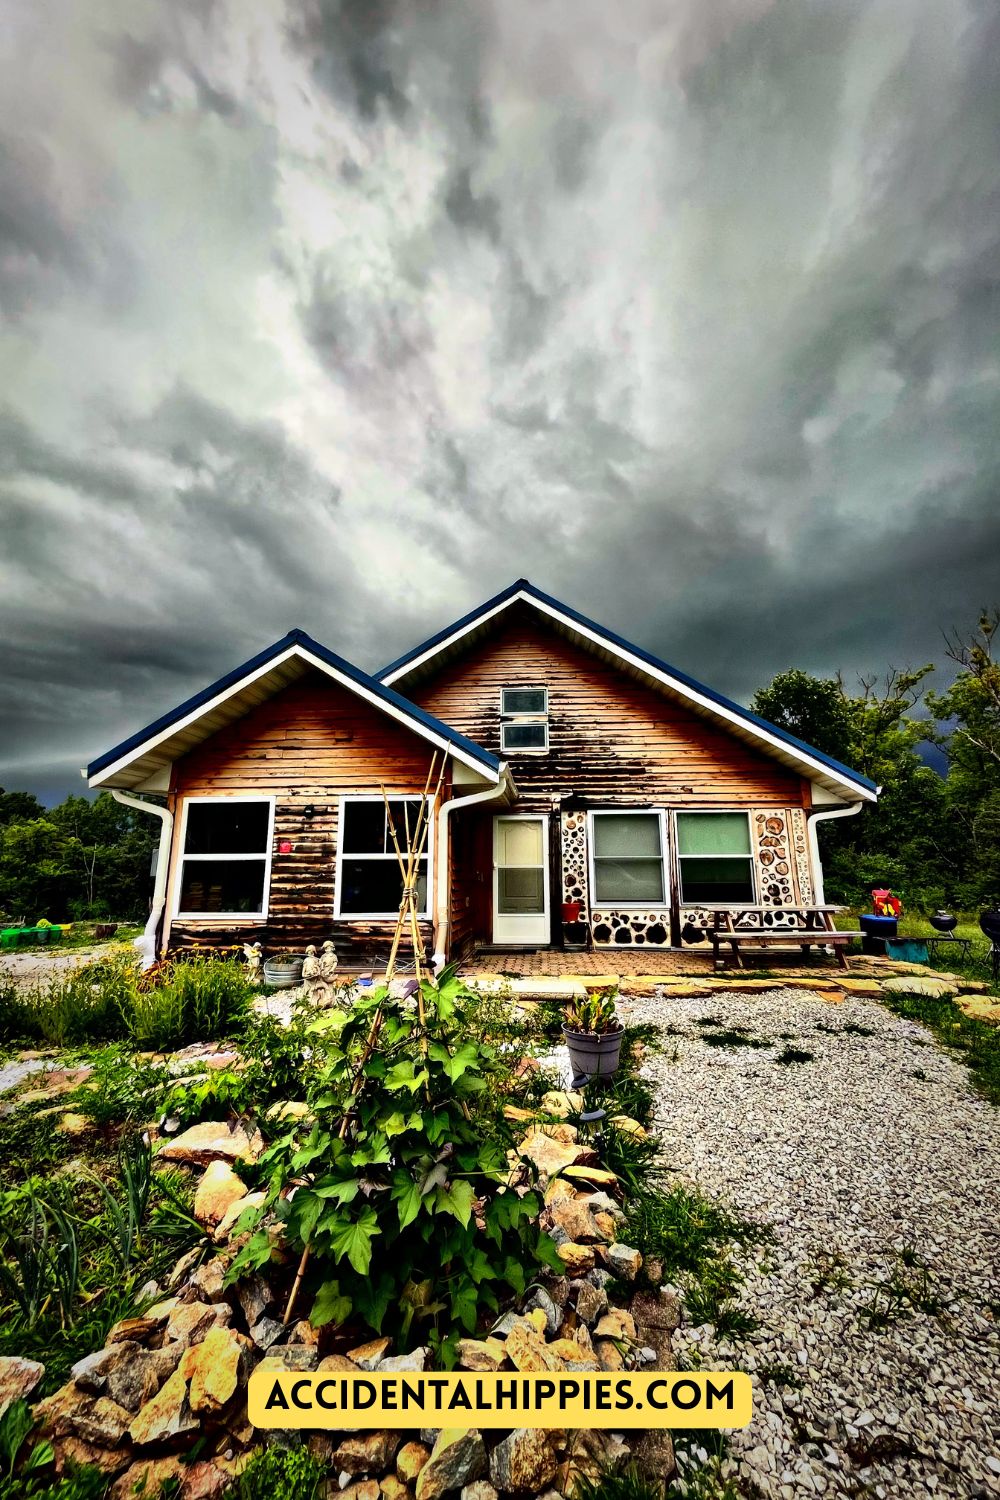
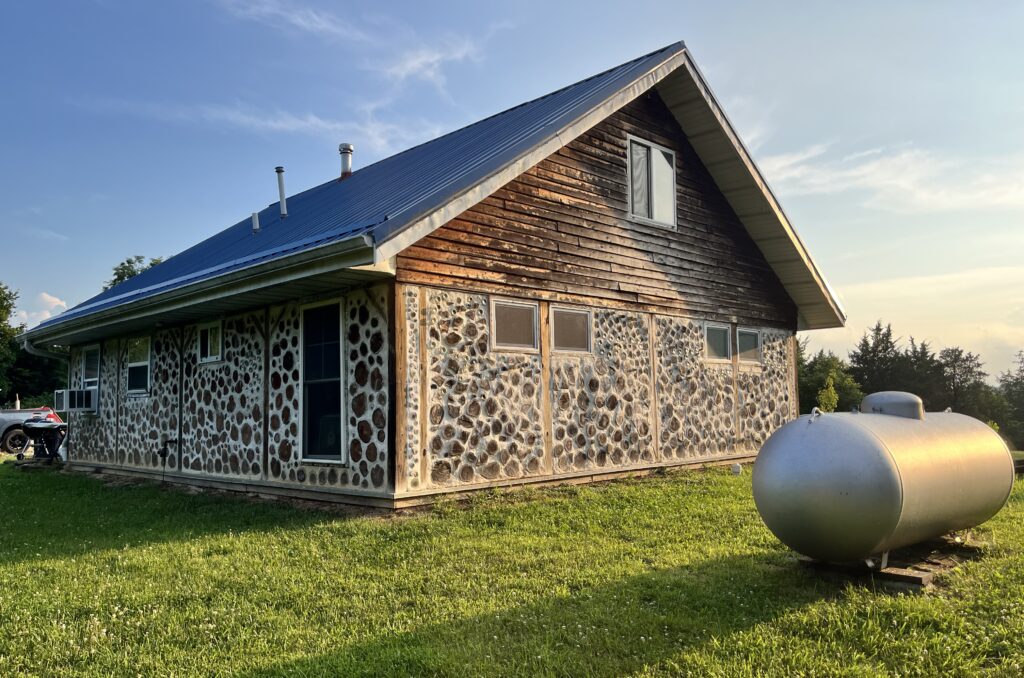
There are a TON of photos throughout this post to highlight specific examples, but first, I want to paint a broad picture of what our home’s walls are like.
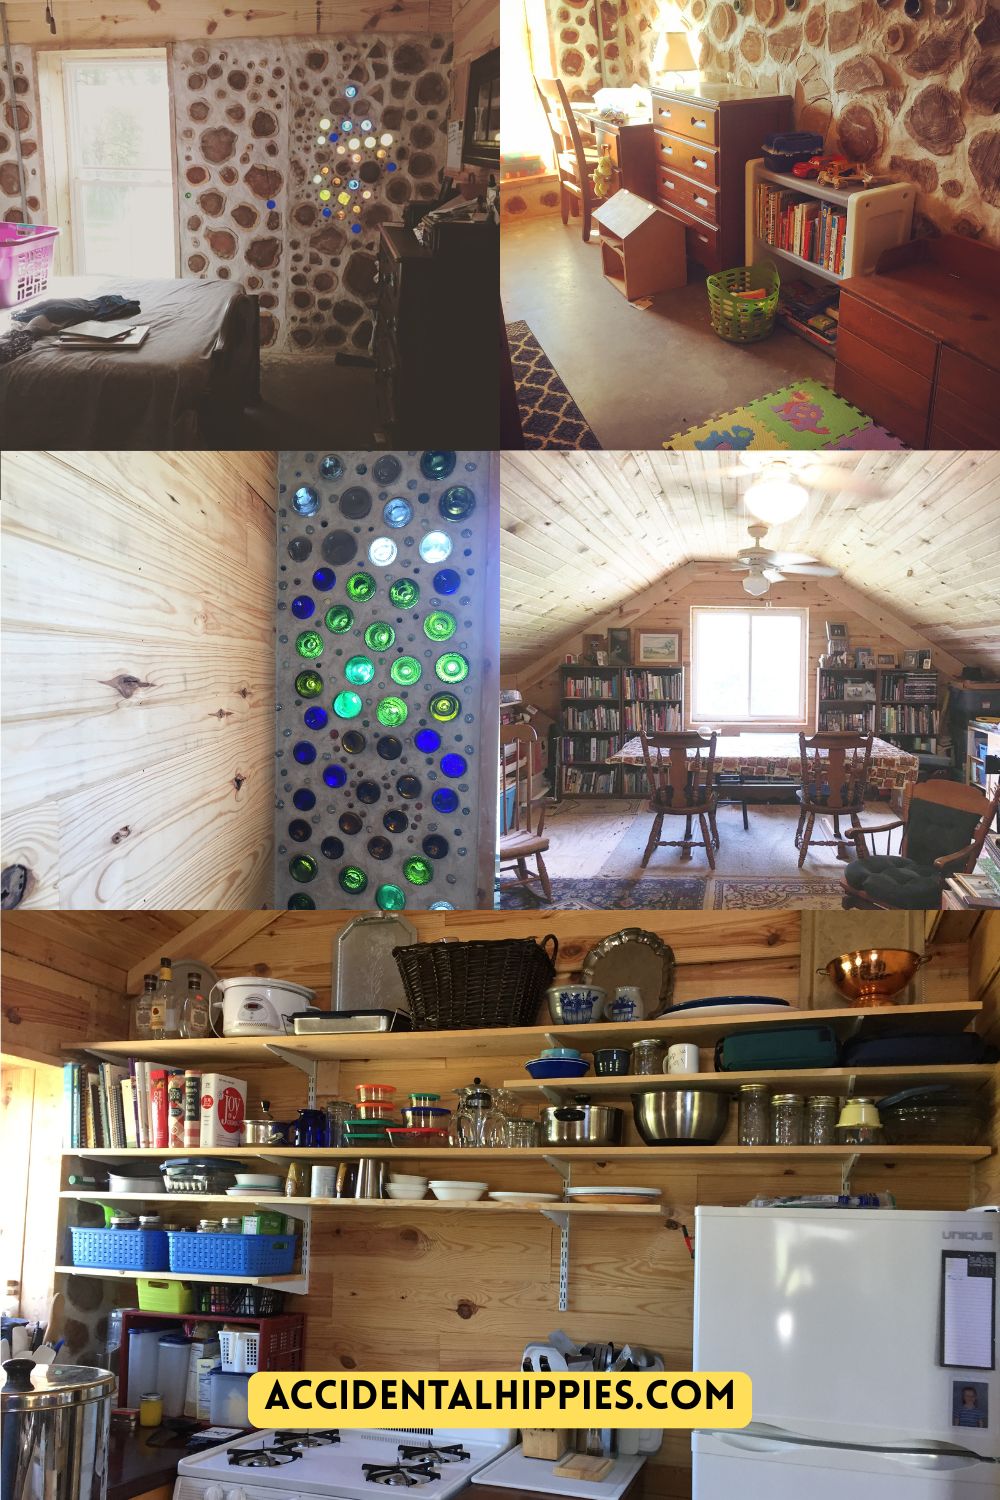
Before and After Shots
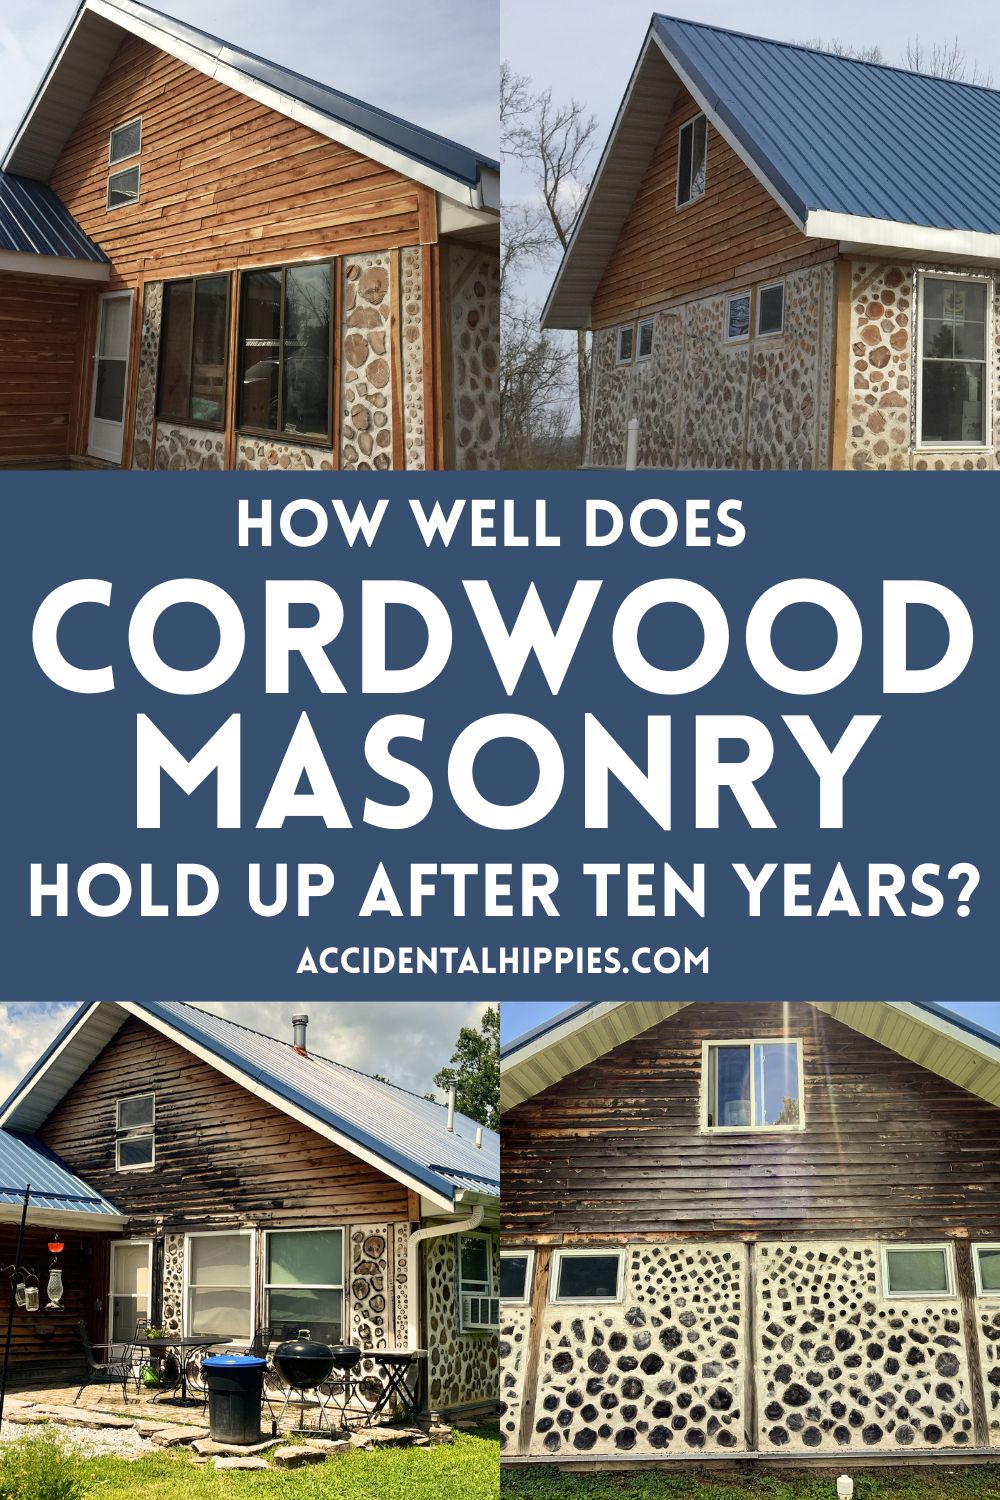
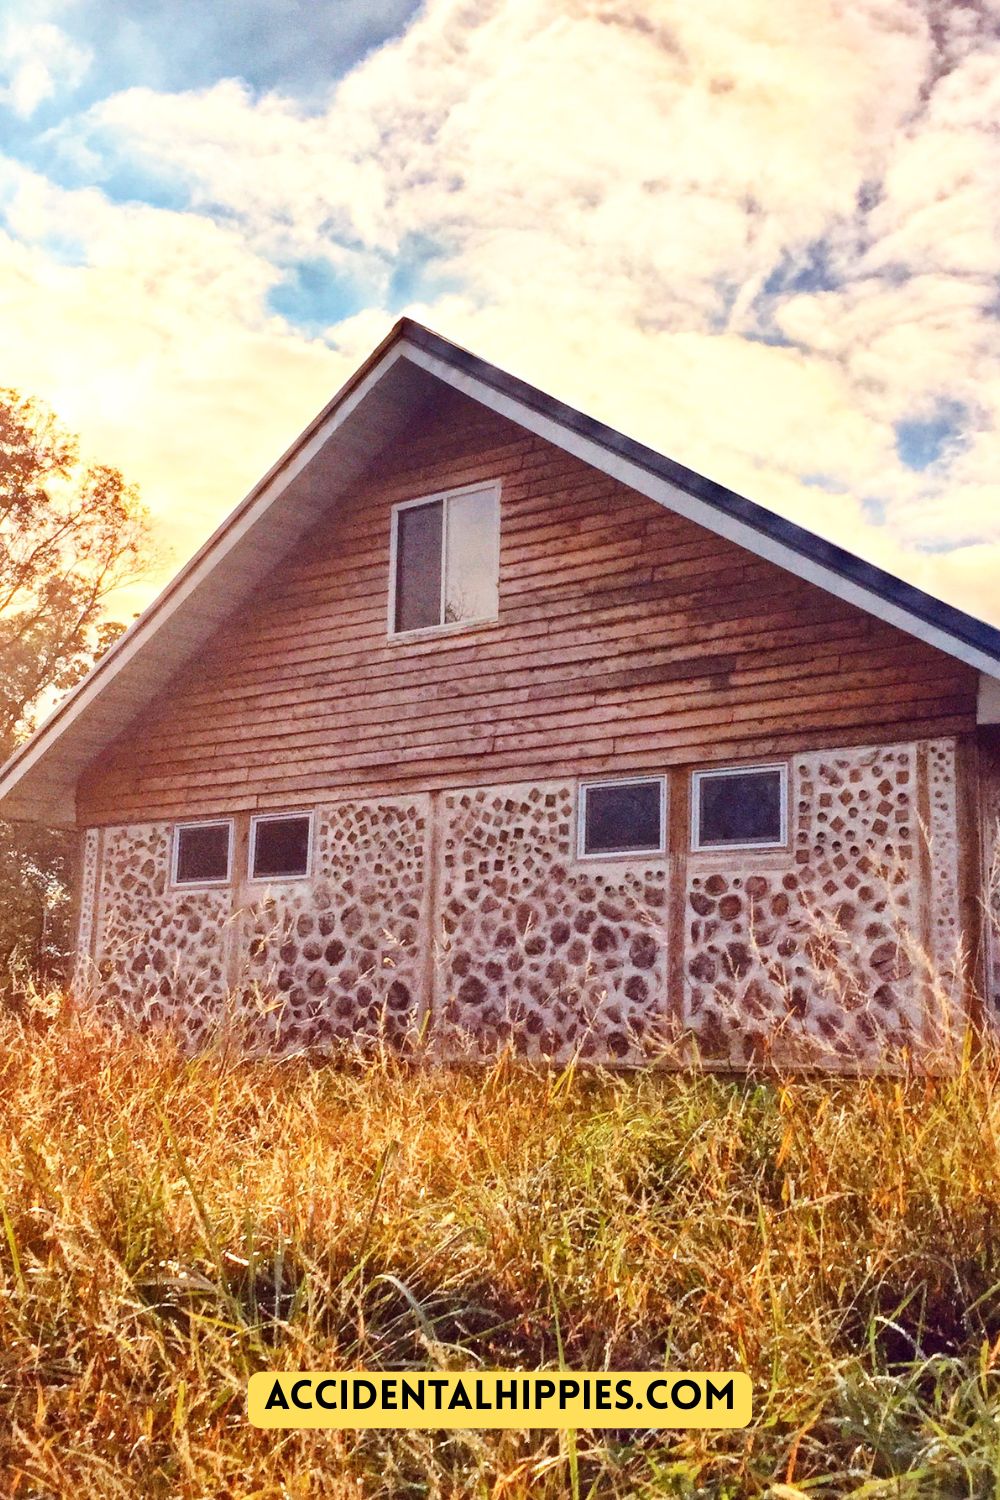
I did my best to document each side of the house to provide a representative before-and-after. The way the house sits relative to the trees, open fields, sunlight, and incoming weather systems has impacted how each wall has aged. The drone photo below shows the house during construction in September 2016: the front of the house and line of cars are pointed due south, for reference.
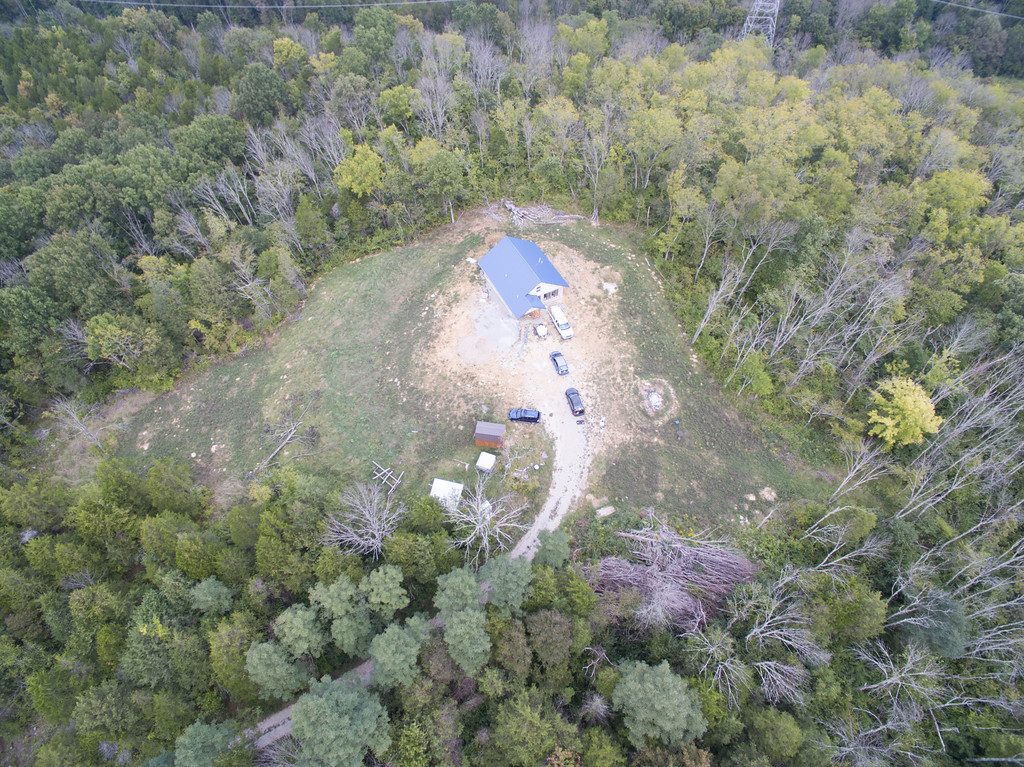
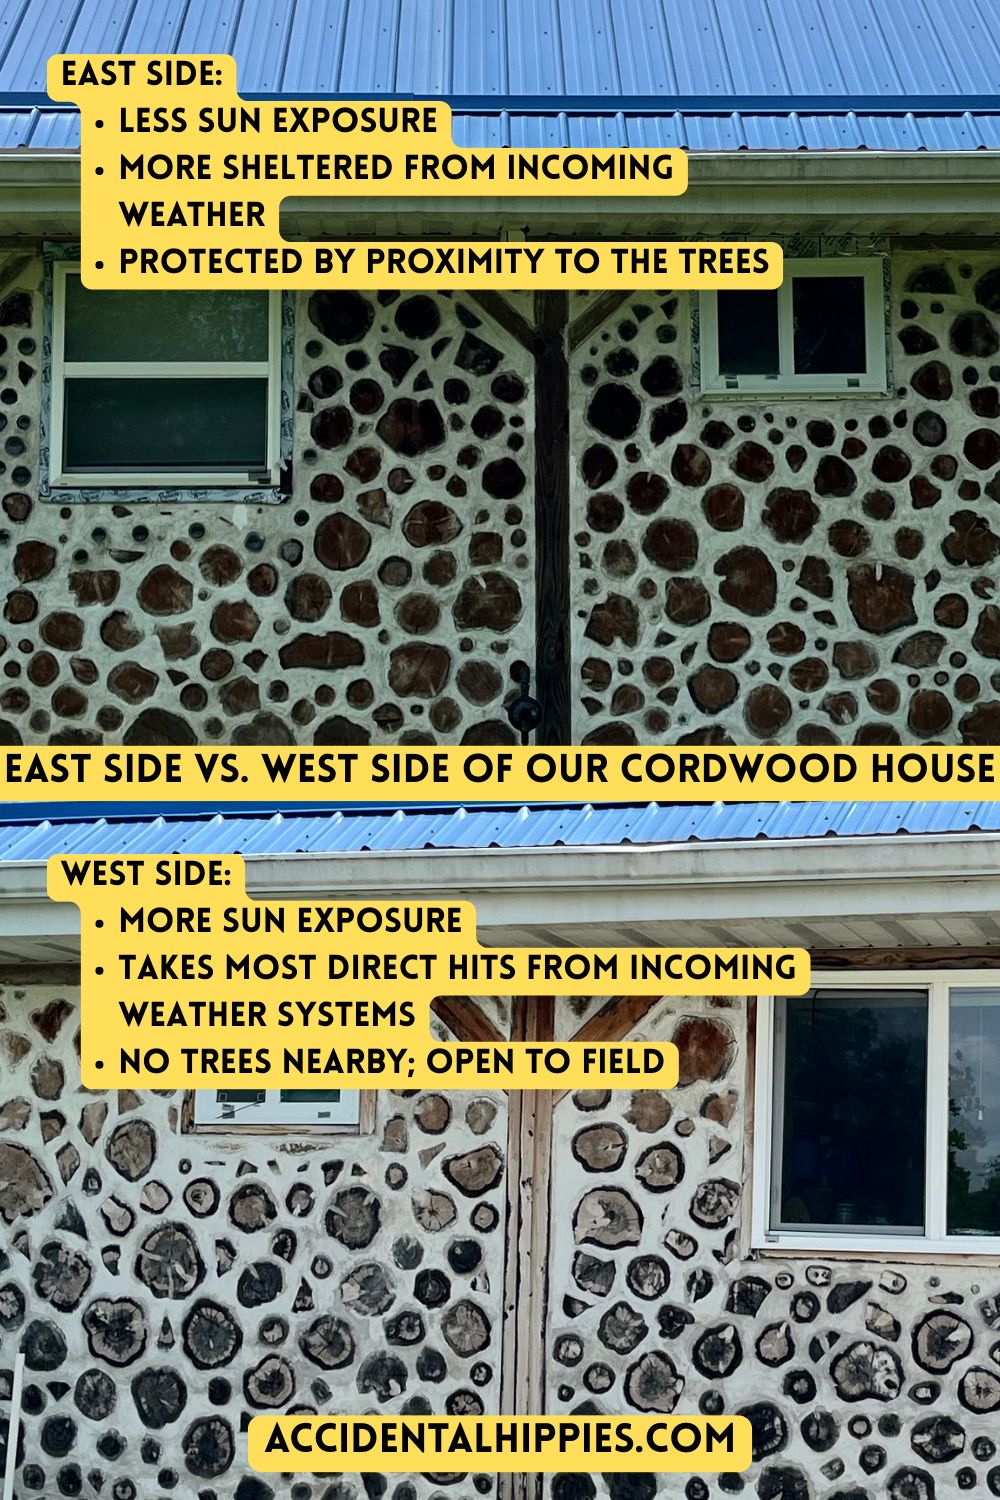
Typically, our weather systems approach from the west, which is the most open part of our property as seen to the left on the above photo. Because we lack the trees to properly buffer the wall on that side, it has taken an unfortunate beating. It’s still in good shape, structurally, but you can tell the logs are fading way faster than the north, south, or east:
West Wall
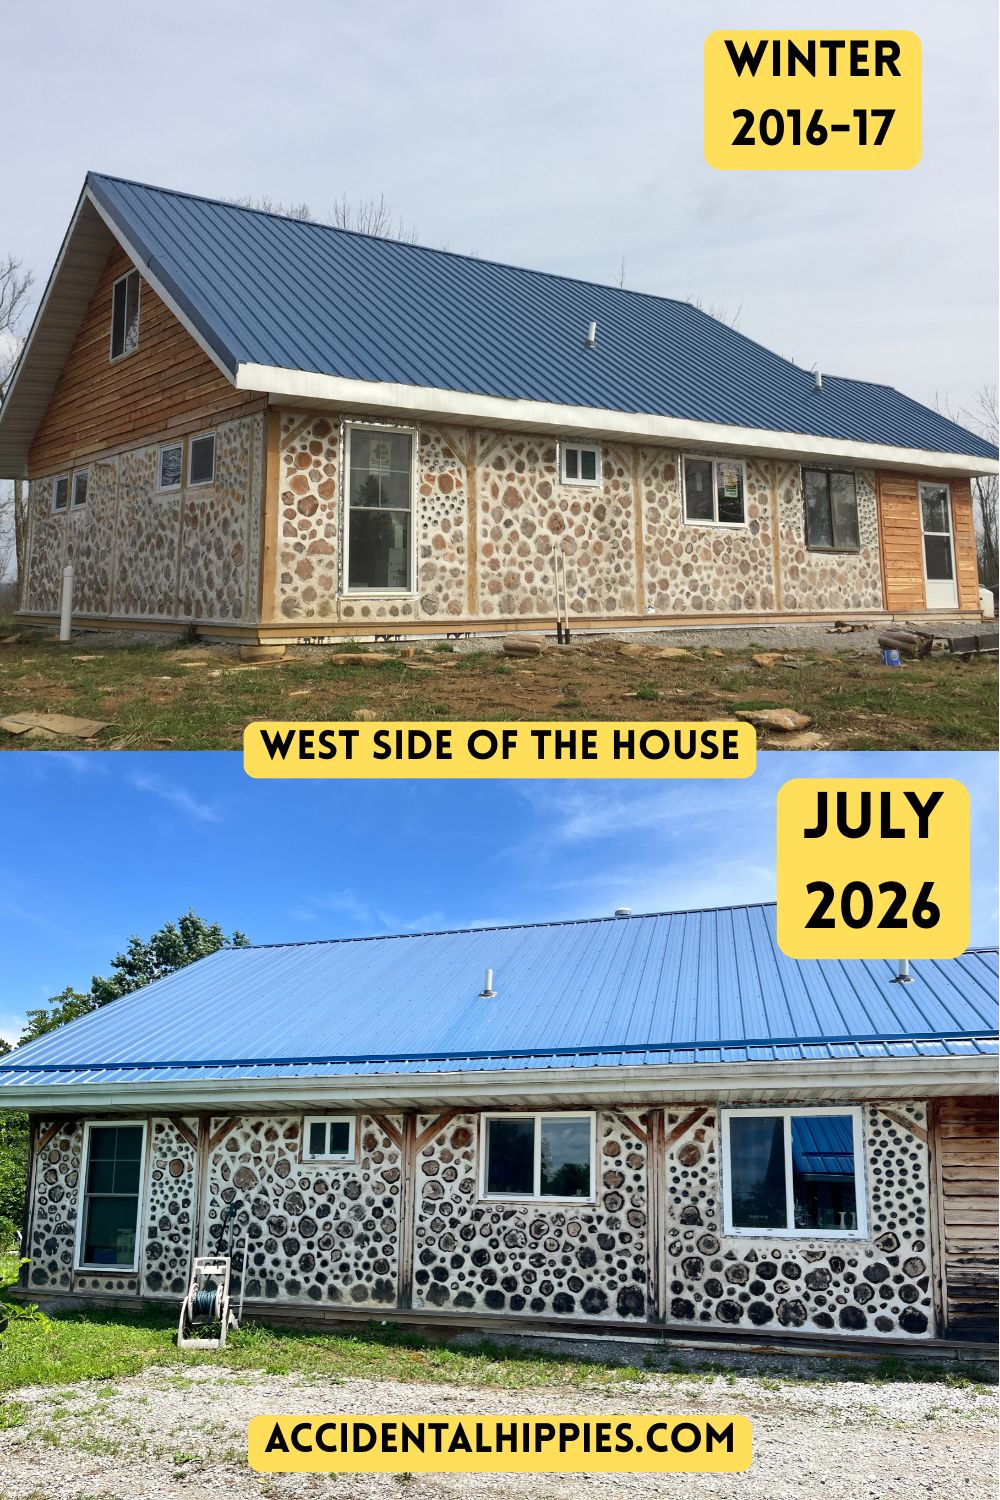
We’d love to put a porch here sooner rather than later. Until then, it’ll remain the least aesthetically pleasing part of the house.
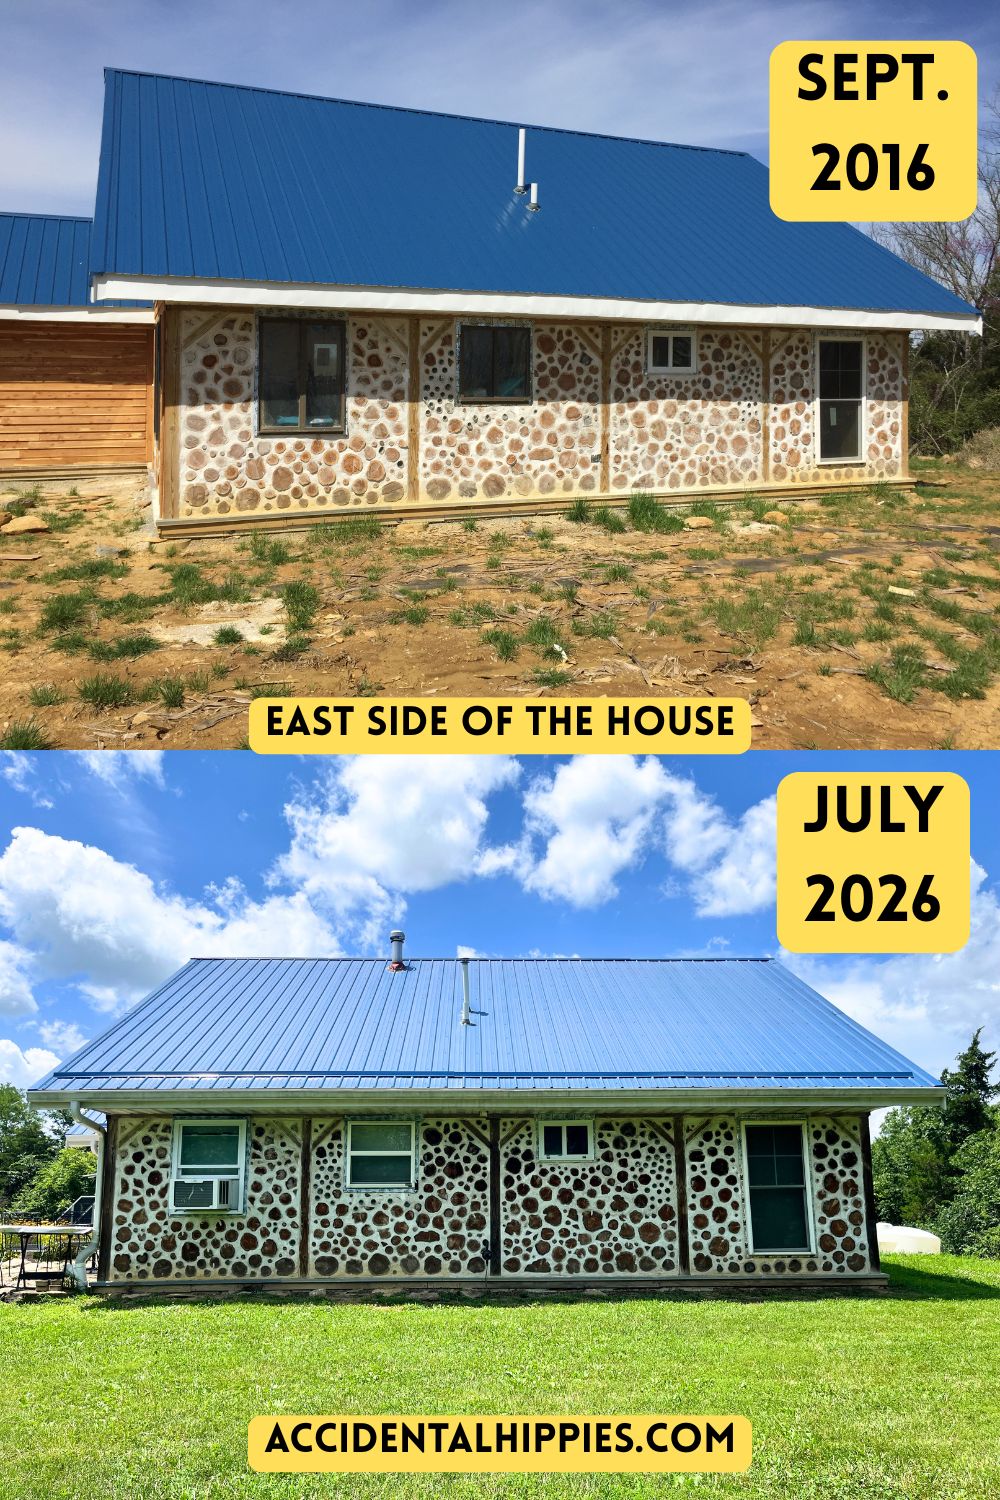
East Wall
The east wall is the opposite story. This side of the house almost never gets the incoming weather systems. It also sits maybe 35 feet away from the tree line, which provides a buffer against the elements and keeps the wall more shaded through the morning.
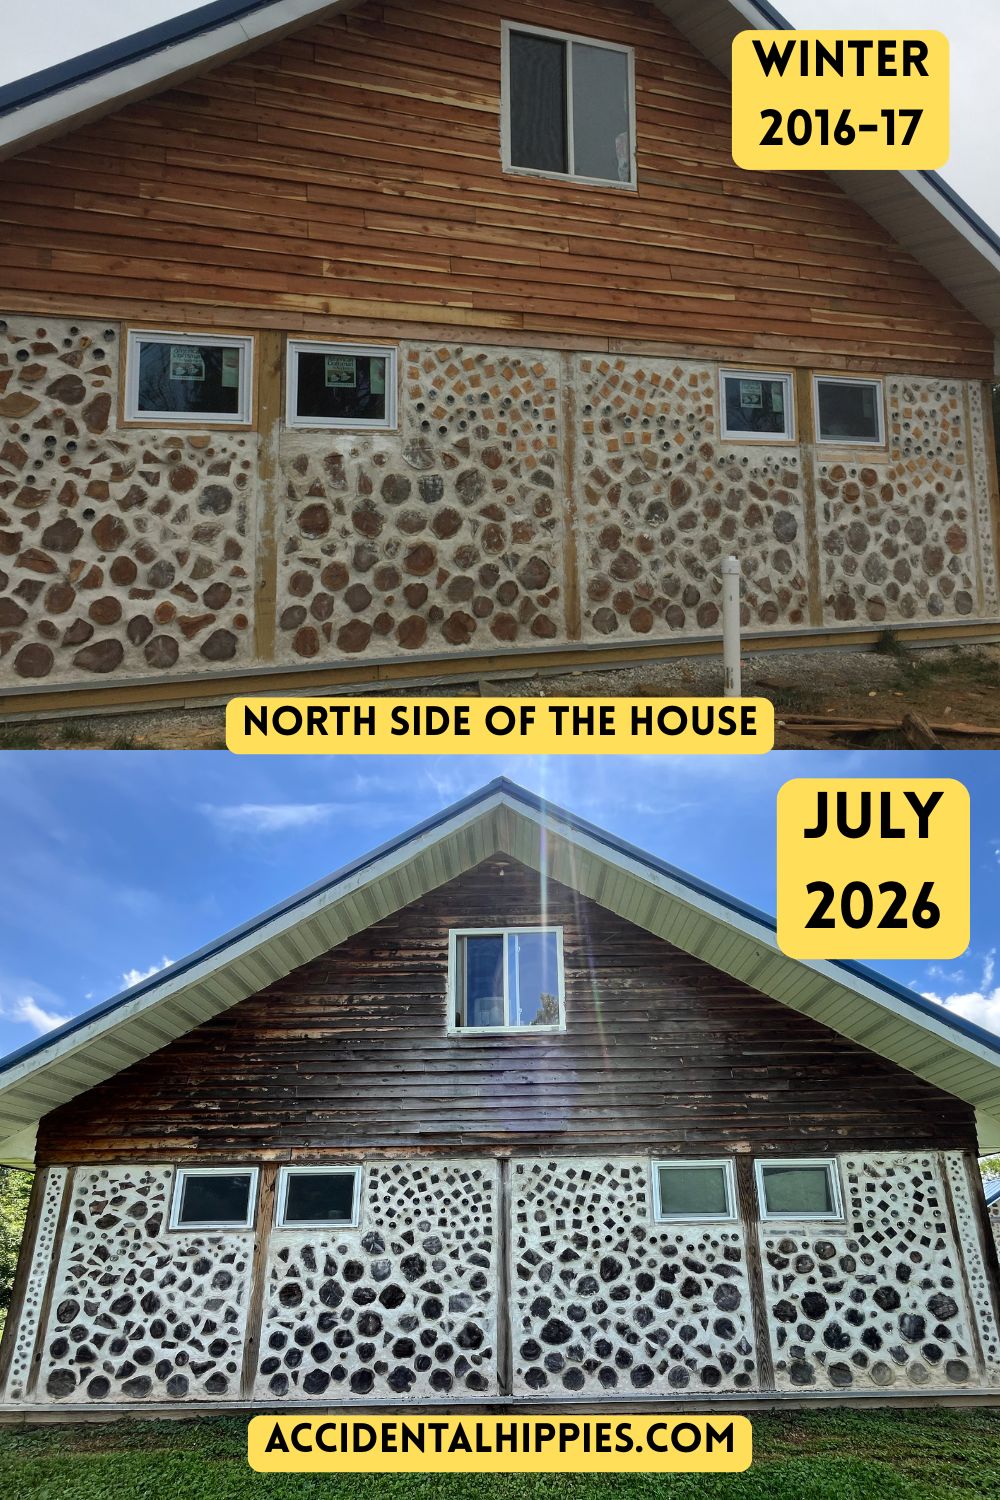
North Wall
This is the side of the house we assumed the winter weather would come from, based on all the literature we read about passive solar. This seems to be one of those things that is about half right, but doesn’t usually pan out in our real-world experiences. Not only does very little weather come in from this side, it’s also buffered by proximity to the tree line, which is about 45 feet away. As a result, this side of the house hasn’t aged a ton. The biggest difference is probably how the cedar siding has weathered on this side versus the south face:
South Wall (Front of the House)
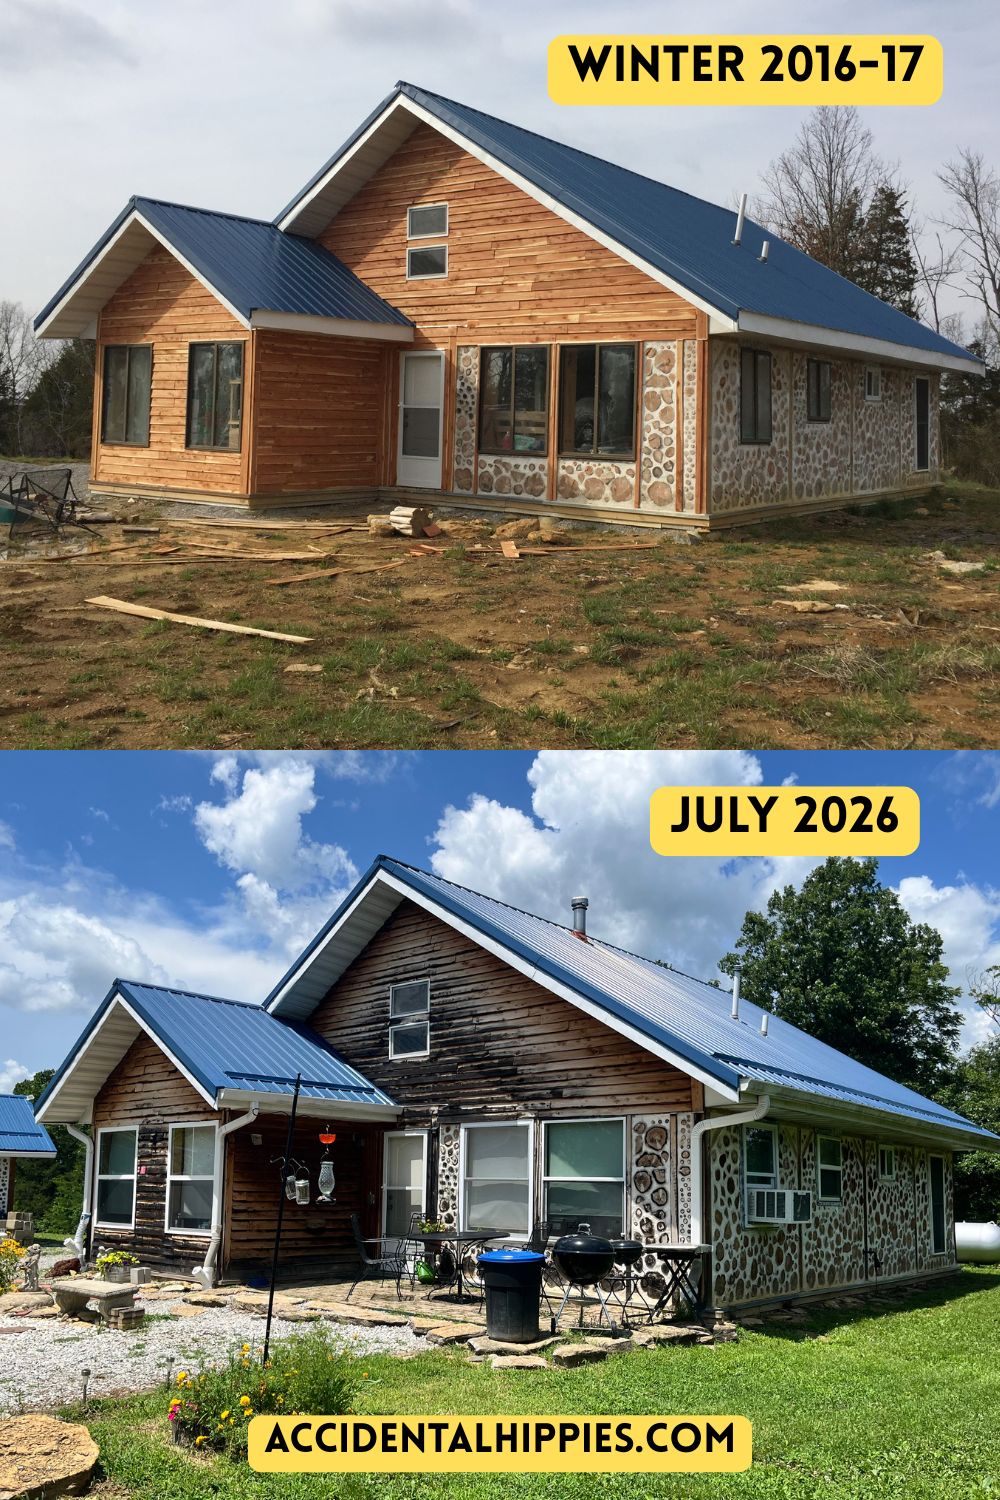
I saved the front for last because it has the least amount of cordwood in it! Most of this face is rough-cut cedar plank siding. I wrote about that process here back when we installed it. The logs on this side get a lot of the bigger rain systems that hit us from the south. They’re pretty exposed, but they also tend to dry out pretty quickly. That’s one of the nice things about how breathable cordwood is. As long as water isn’t allowed to sit on the logs, you’re golden.
The 2026 pictures were all taken on a really sunny day, which makes it look more “washed out” than it really is. The cedar logs and planks HAVE lost much of their red, but not nearly as much as the photo suggests. The red that remains is close to the soffits.
I have a feeling that, had we done some kind of wrap-around porch or something highly protective like that, the cedar would have retained much more of its redness. Our cordwood shed has much more protective overhangs. As a result, the logs in that structure are aging much more evenly with less gray than the house.
What Has Gone Well
Cordwood has been everything people said it would be.
This style of building is the epitome of “trust the process”. You read up on the best practices. You take some classes. Maybe try a practice wall or two. And then you just…do it.
You trust that the experts who say cordwood is a resilient natural building technique are right. Then suddenly, ten years have passed, and you realize that everything they said would be true actually IS.
It is super strong; our house doesn’t flinch during high wind events. It’s really good at regulating temperature. It resists rot and pest infiltration.
It’s a pain in the neck trying to hang pictures or cabinets on it sometimes, but overall, we’ve been quite pleased!
No, the logs haven’t rotted out.
We haven’t had any issues with logs rotting. None. Nada. The one thing that everyone told me would definitely for sure happen.
READ: 9 Questions Cordwood Skeptics LOVE to Ask
Even some of the less-than-ideal log faces have managed to avoid rot because they are protected by the overhang and sit just above grade. Cordwood is great at moving moisture through the xylem and phloem tubes in the wood tissues, so they never have time to harbor things that cause rot.
We’ve also had zero issues with termites, carpenter ants, wood bees, or any other pest we get asked about. We have a termite shield around the whole house, but even if we didn’t, I’m pretty sure we’d still be fine. Cordwood is notoriously tough. The logs are separated from each other in a matrix of thick mortar and the tough end grain is facing out. This automatically makes our walls less desirable to most pests.
I’ve been very impressed at how well the logs have held up, even in spite of the many ways our home design fell short of best practices. We also hadn’t quite refined our building technique at this point. We built our solar shed several years later and it was a much better final product. Still, it’s aging nicely.
The log faces still look pretty nice.
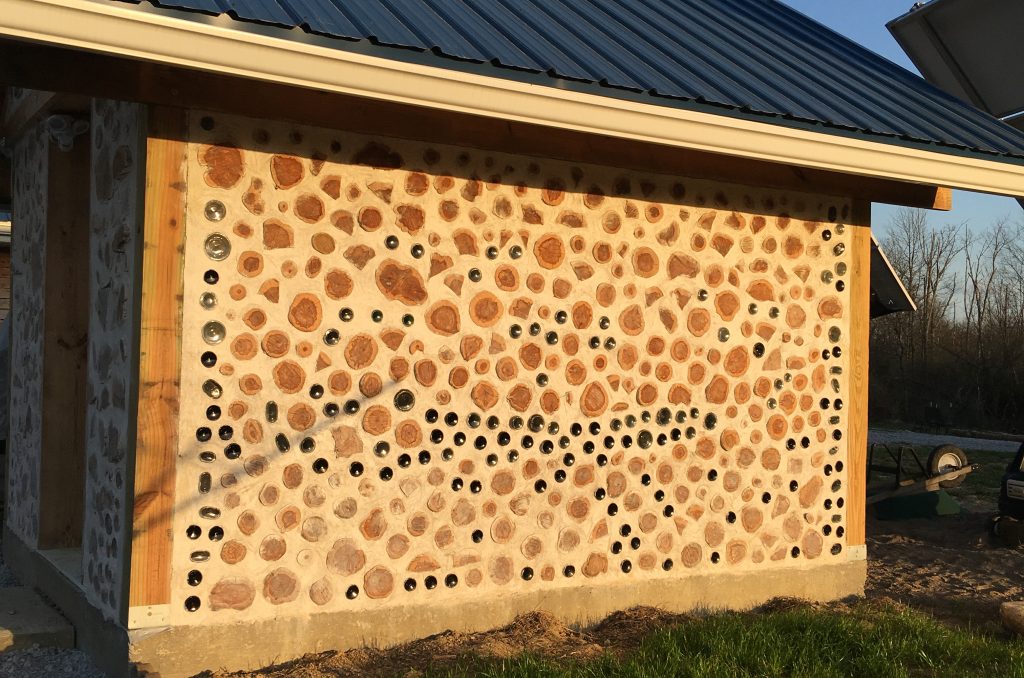
Overall, the logs still look as smooth and solid as the day we built. There’s been quite a bit of graying and blackening on the exterior, which is typical for red cedar. None of the discoloration was unexpected, especially since we didn’t treat them with anything. That was intentional with the logs, though I’m regretting not treating the siding with some kind of UV blocker.
I took a moderate-grain sandpaper and a palm sander several years back and was able to sand off the blackened bits to reveal some nicer reds and browns underneath. The eastern wall, which is probably our most sheltered from the sun and incoming weather, has retained that color pretty well. The western wall, which really takes a beating, gets more discoloration and is definitely the least pretty of any walls we’ve built up here. We should have built a deep porch on this side of the house, and are currently exploring ways to add that on.
The “emergency logs” have turned out okay.
I’ve been pleasantly surprised with how well our “emergency” post logs have blended with the rest of the cedar. Towards the end of our cordwooding, it became painfully clear we were going to run out of cedar logs, and being so close to first frost, we had NO time to go cut and peel more. We added a few windows and threw in as many field stones and bottles as we could muster, but it could only fill so much space.
We ended up buying some untreated pine posts to fill the rest. They happened to be square because that’s what was available to us, and it always bothered me how obviously different they are. They were an uncomfortable reminder of how our planning fell short.
Early on, I’d scheme ways to make them blend a bit better. Maybe I could stain them or sand the corners down to round them out a bit. I ultimately didn’t do anything about it, and it’s turned out to be fine. The exterior portions have weathered to a very similar gray as the rest of the cedar, and the inside faces have darkened just a bit. As a result, I’m not really bothered by it anymore. If anything, they’re part of the story.
Issues with Logs
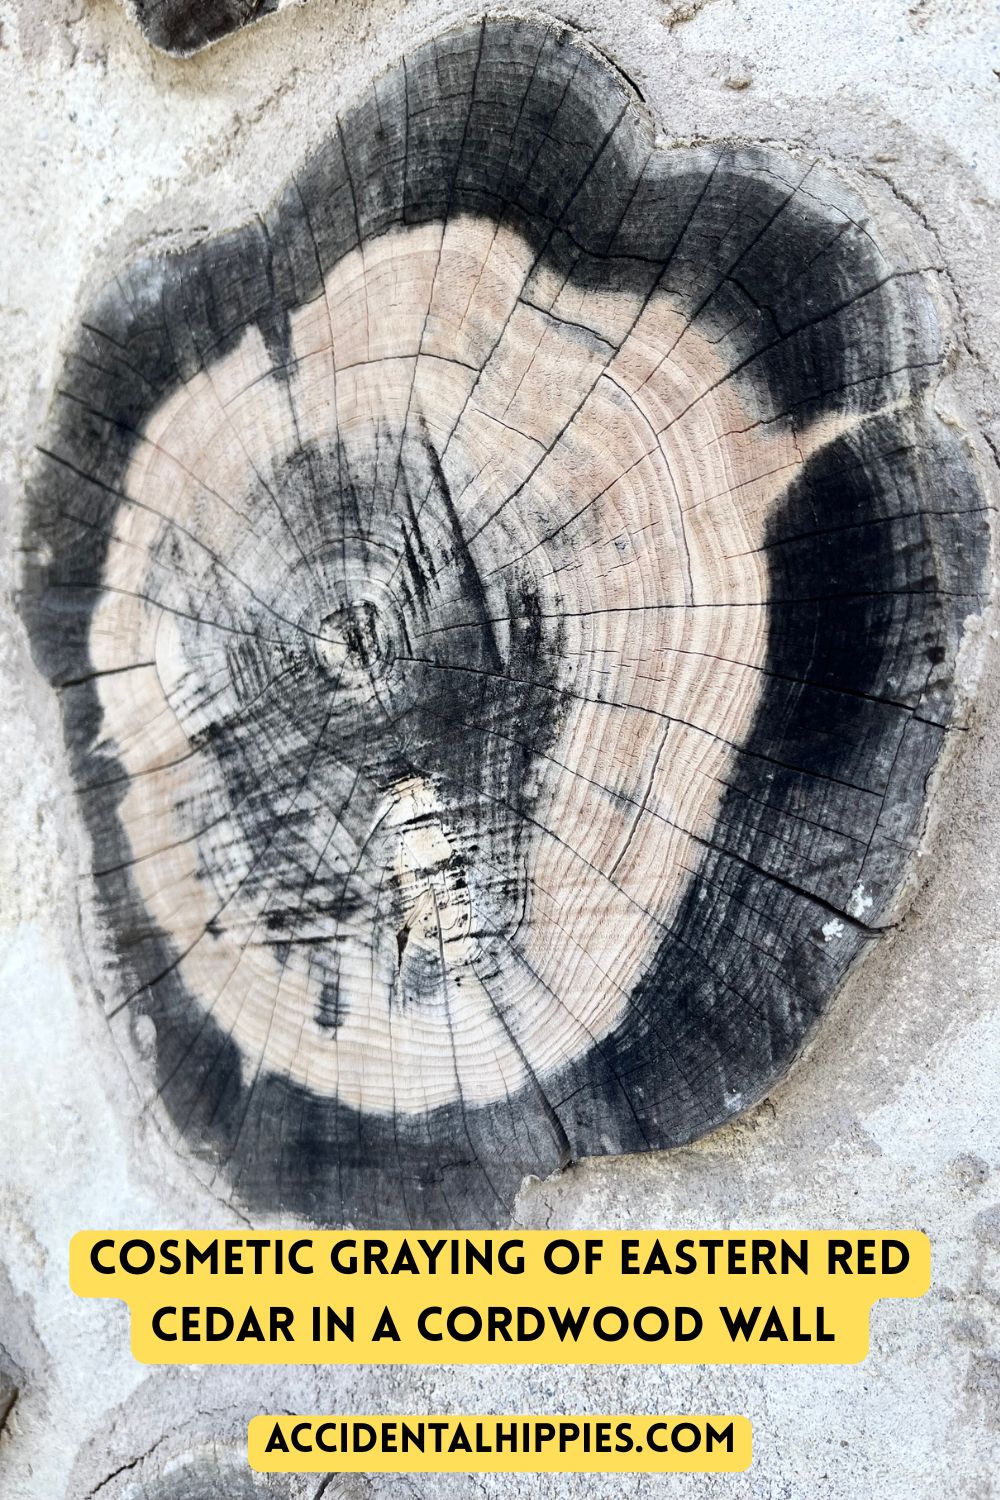
That said, there have been small issues here and there. As I have noted, eastern red cedar tends to turn a weird, faded brown and black, especially the more exposed to the sun and elements the logs are. This graying, especially of the sapwood, is typical. The log below is an example from the west side of the house.
There have also been a handful of logs that developed cracks through their lengths and needed to be stuffed with insulation and sealed off with Log Jam. I really do only mean a handful of them though, maybe 2-5 total. Out of the nearly one thousand logs in our house, I’d say that’s a decent margin of error.
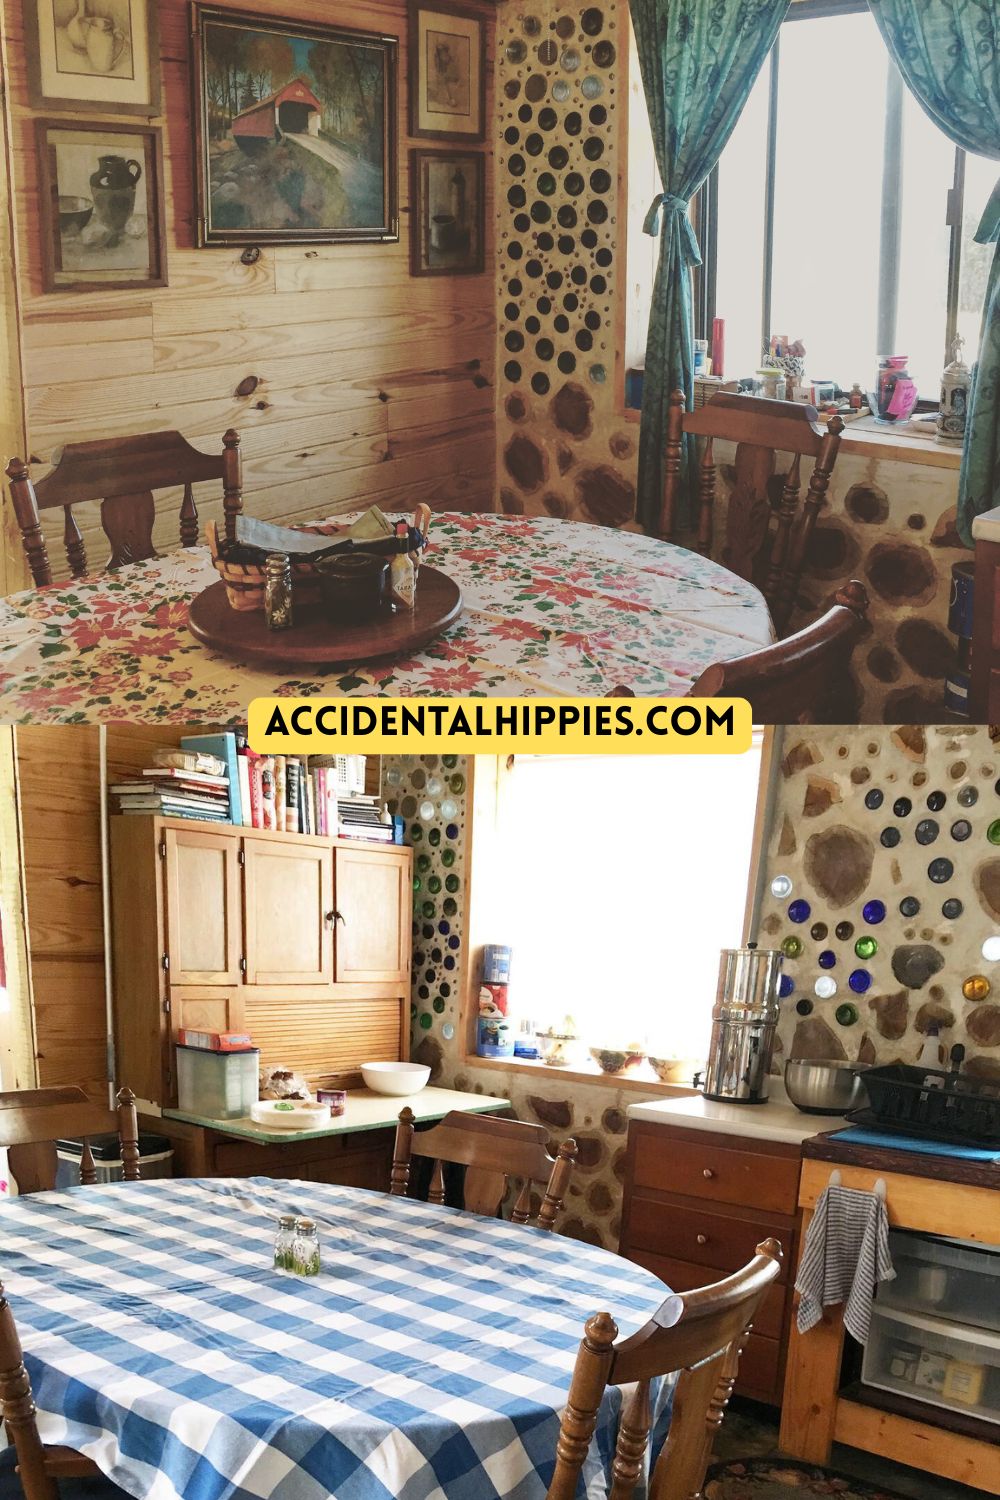
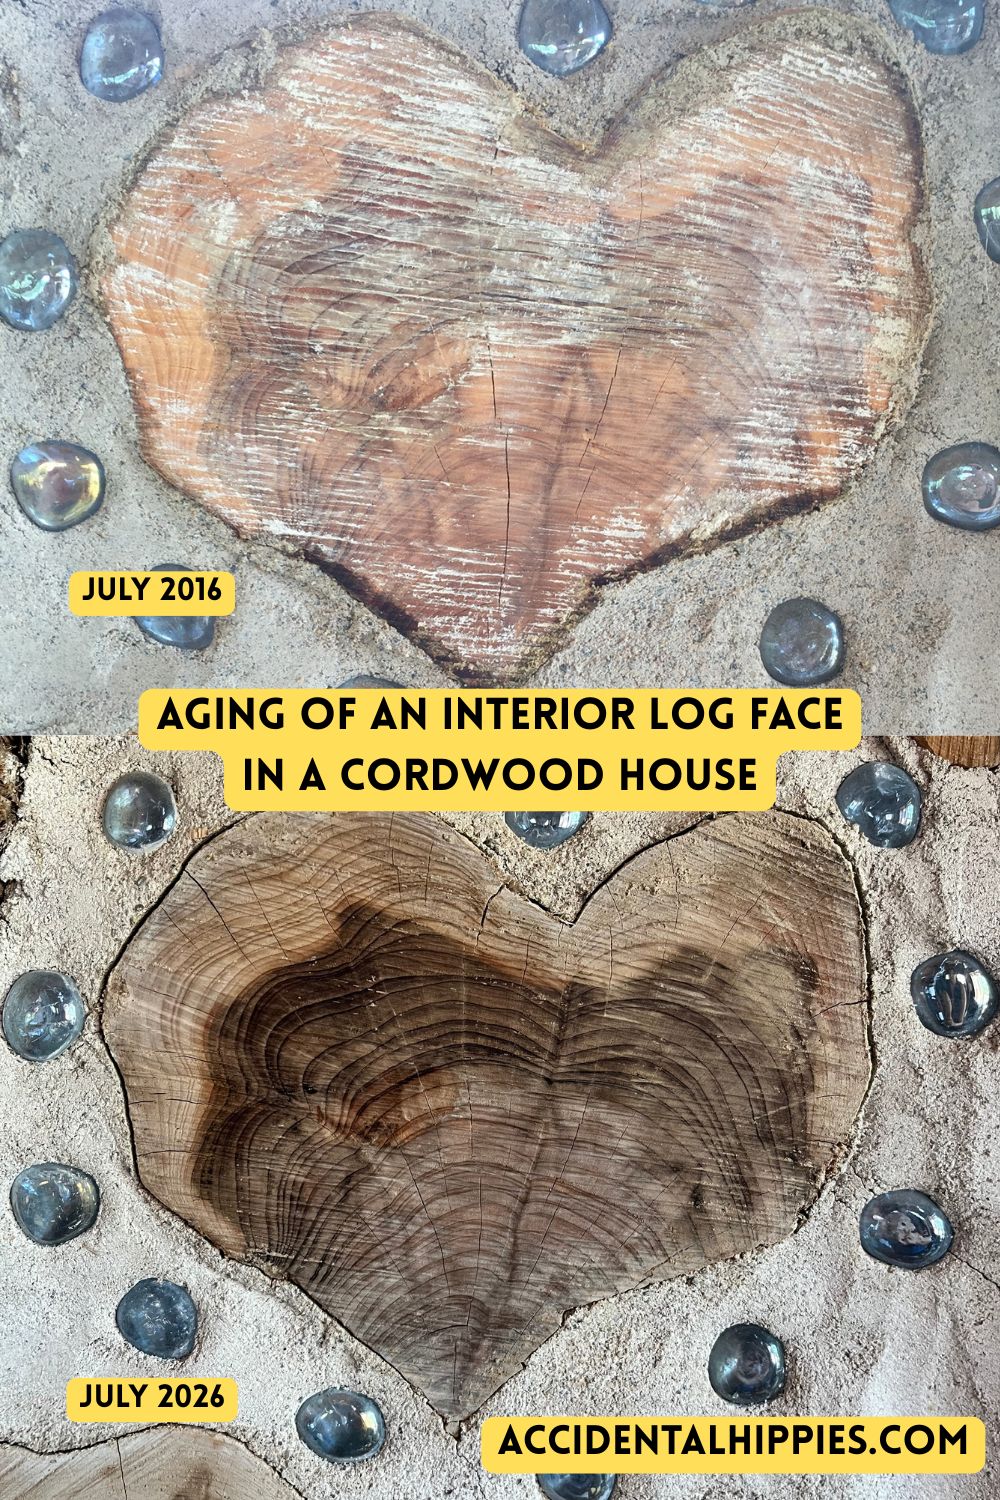
That said, the interior log faces have held up phenomenally. The only UV exposure they get is whatever comes in through the windows, so they’ve only darkened a hair (same as our pine tongue-and-groove). Here’s an example of our heart log (a gift from my husband Mark to me!) the day he placed it (but before he wiped off the mortar) versus today:
Issues With Mortar
Gaps
For the most part, our logs were all well-seasoned when we built, so we haven’t experienced many issues with log shrinkage. Any gaps we developed were less than 1/4″ and were easily filled in with Log Jam, which is a gritty, flexible caulk designed to mimic mortar in log homes. After the first couple of years, I went around the house and sealed up as many small gaps as I could. Here I am below, finding out that White White is simply TOO white for our walls.
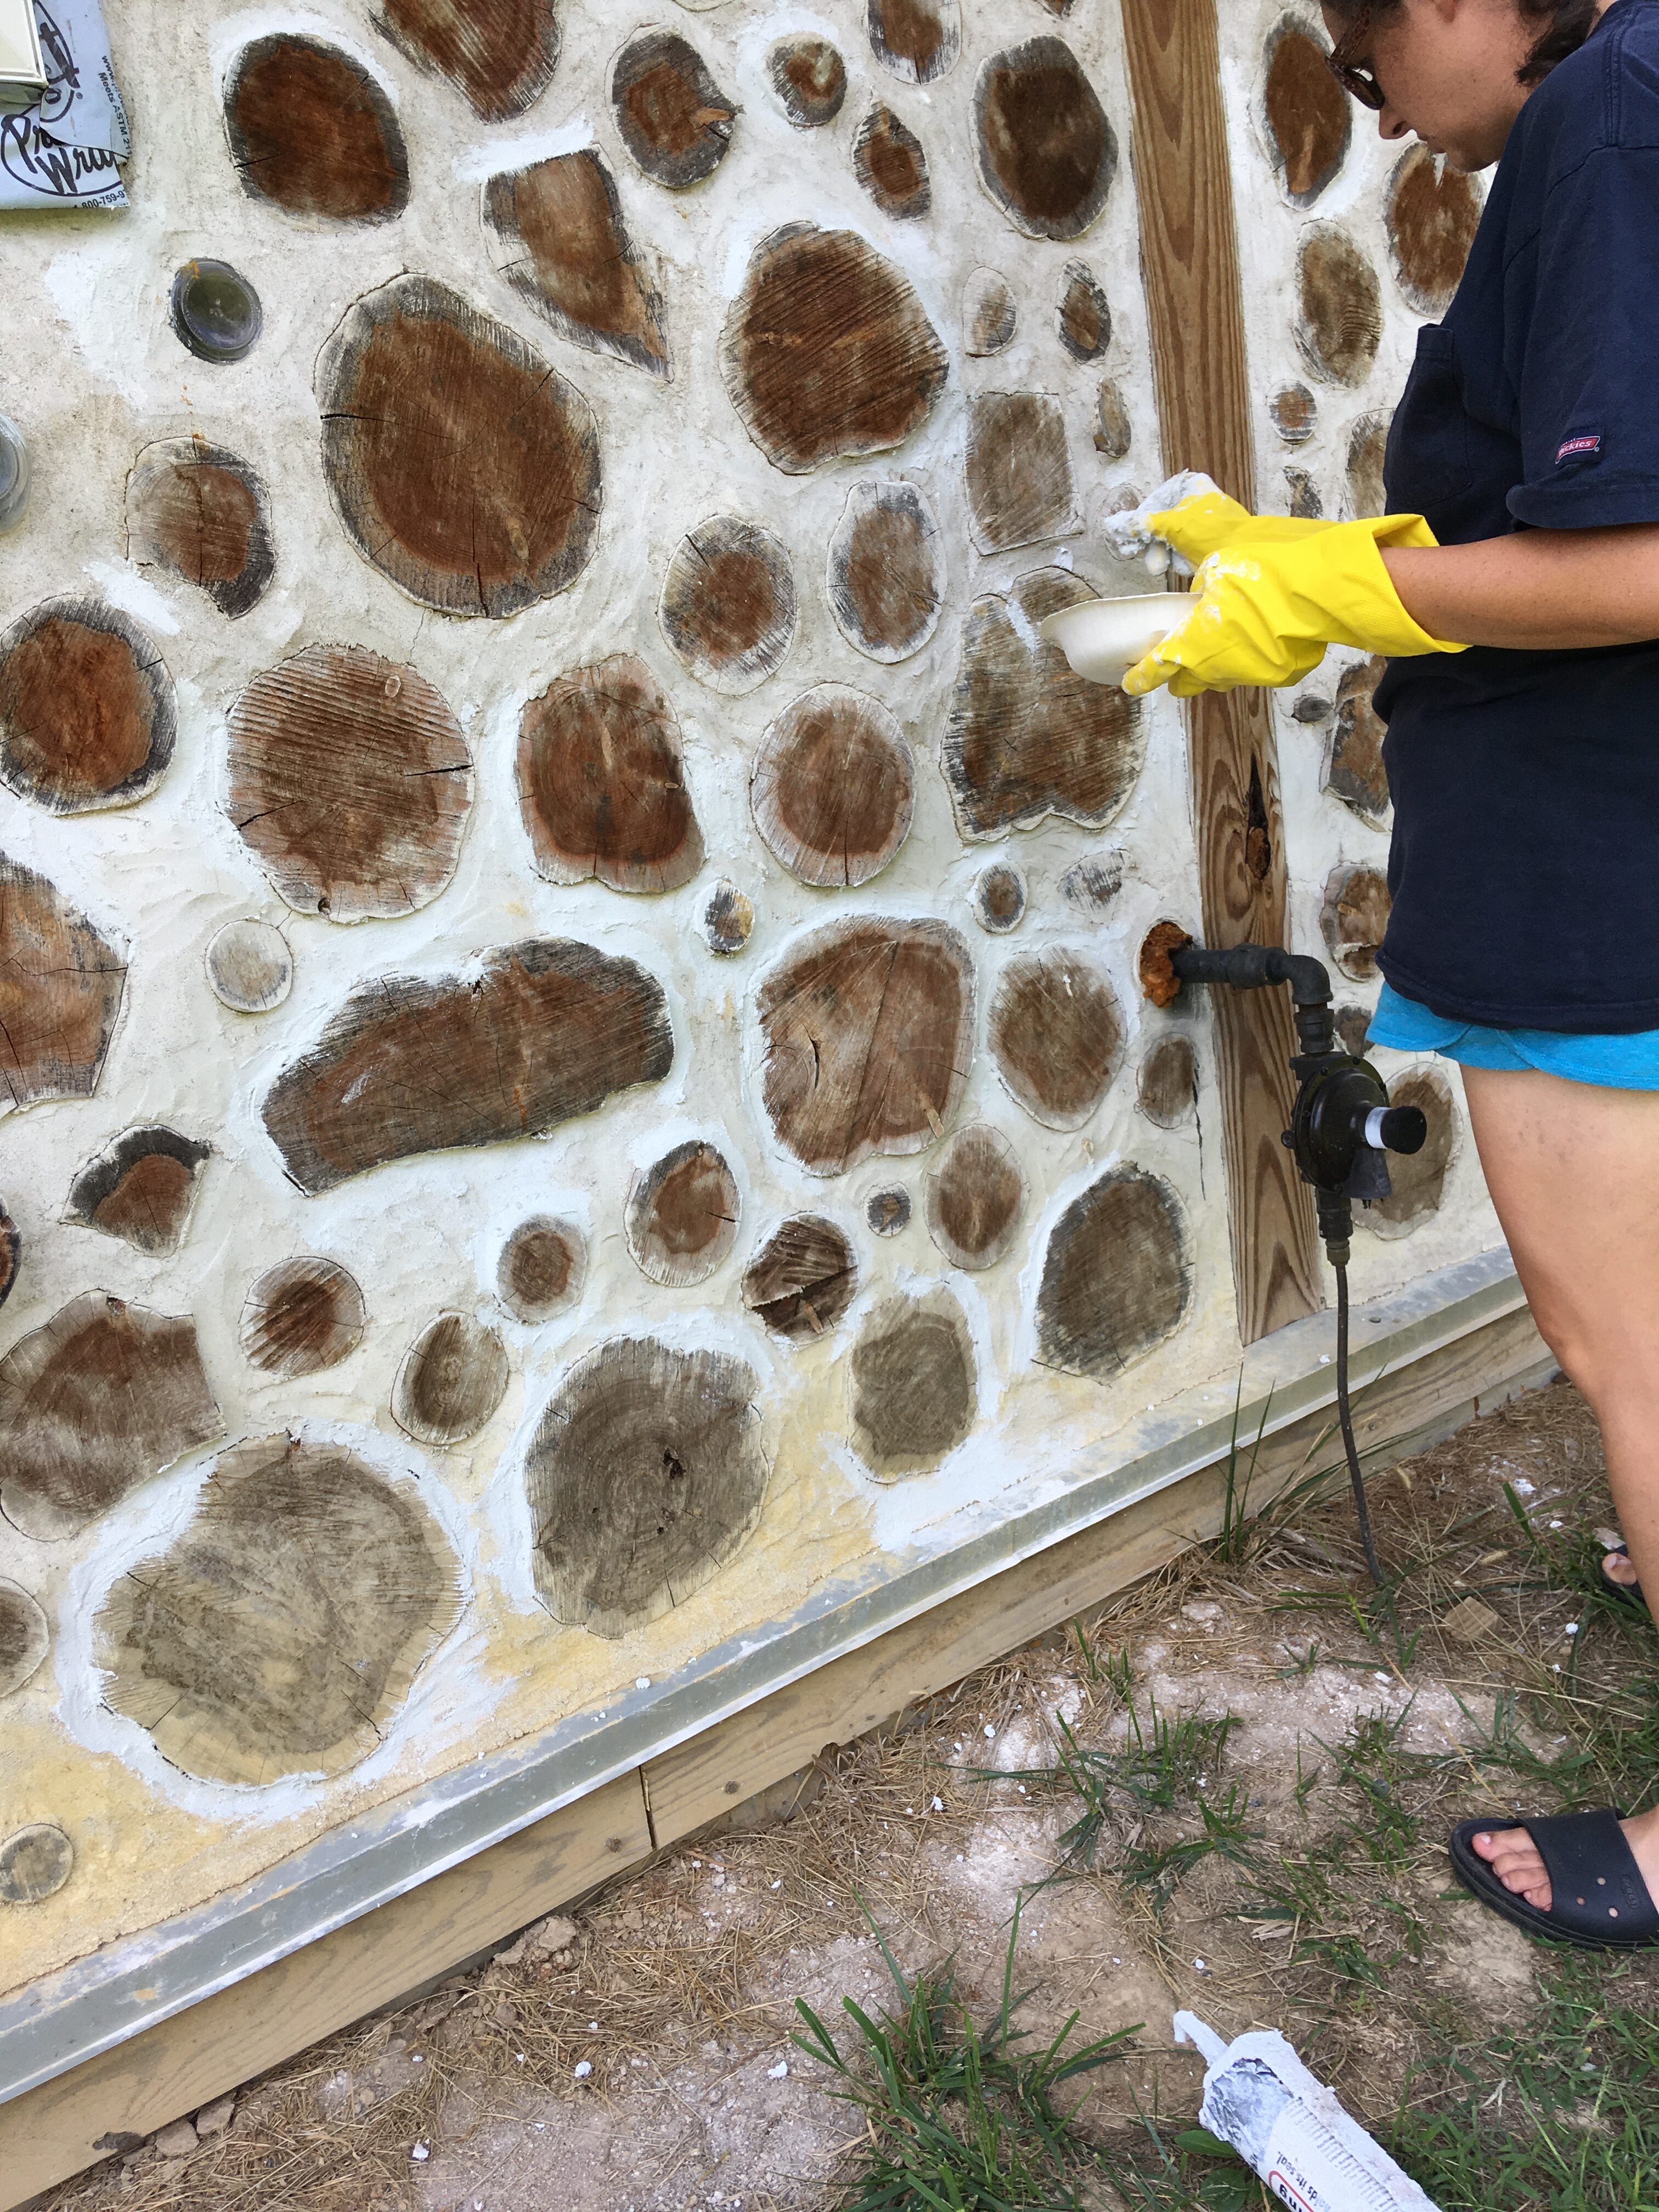
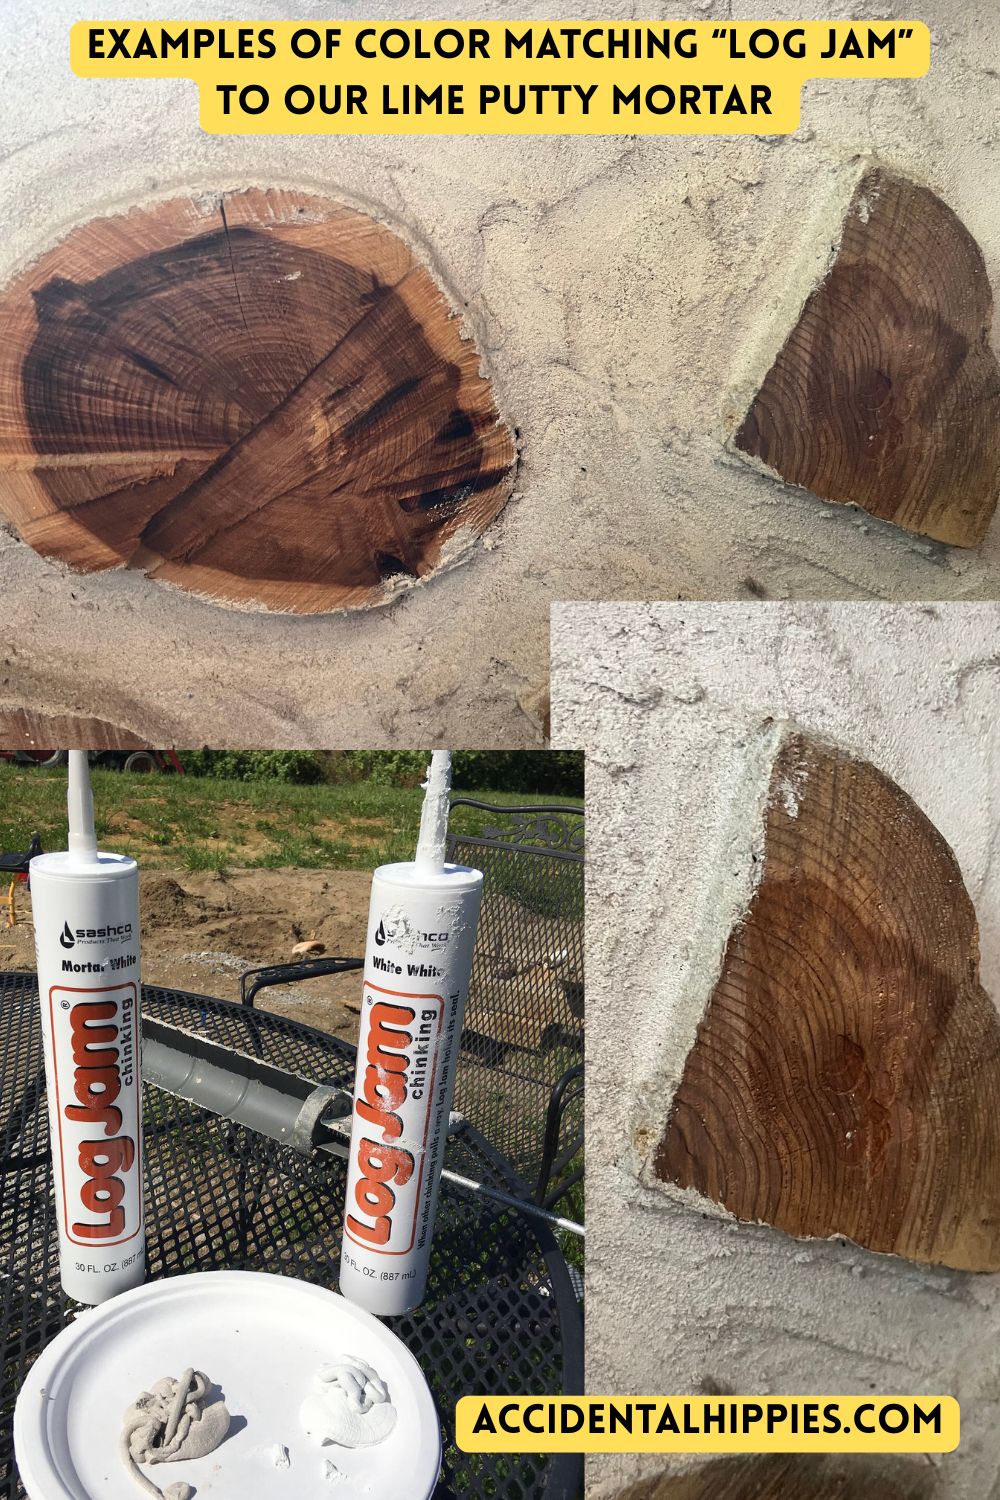
My biggest problem with the Log Jam was that our mortar color exists somewhere between the two lightest colors they offer, and one required me to specialty order it while the other I could get pretty easily on Amazon. You can actually see it in the picture above how white the Log Jam in “White White” is compared to the surrounding mortar. “Mortar White” is the next color in their palette and it’s just a hair darker, so my best experiences came from mixing the two together and blending with gloved fingers. Here’s an example of how close of a match I was able to make on our interior walls:
READ: How to Prevent Rot in your Cordwood Walls
Hairline Cracks with LPM
We chose lime putty mortar (LPM) for its simple recipe, bright white color, and ability to self-heal small cracks. We loved the simplicity of the recipe while building both the house and the solar shed. The brightness of the mortar perks up the interior space.
Early on, there were small areas at the back of the house where it got too cold while the mortar was curing and it got “flaky”. I had been nervous that the cold had ruined it, but those cracked, flaking areas self-healed after a few months. Now, I can’t even tell there was an issue was even though I KNOW where it was.
Beyond that, the only thing I really notice is that our lime putty has a few spots with cracks running from log to log. These are not structural, but they don’t exactly look great. Lime putty mortar is very slow curing and usually pretty forgiving. The big problem for us was that, even in keeping the walls covered with a tarp AND spraying the walls down with water in a misting bottle while we worked, it was simply SO hot in our area during the months we cordwooded that it dried too fast. That fast drying is the biggest contributor to the formation of these cracks.
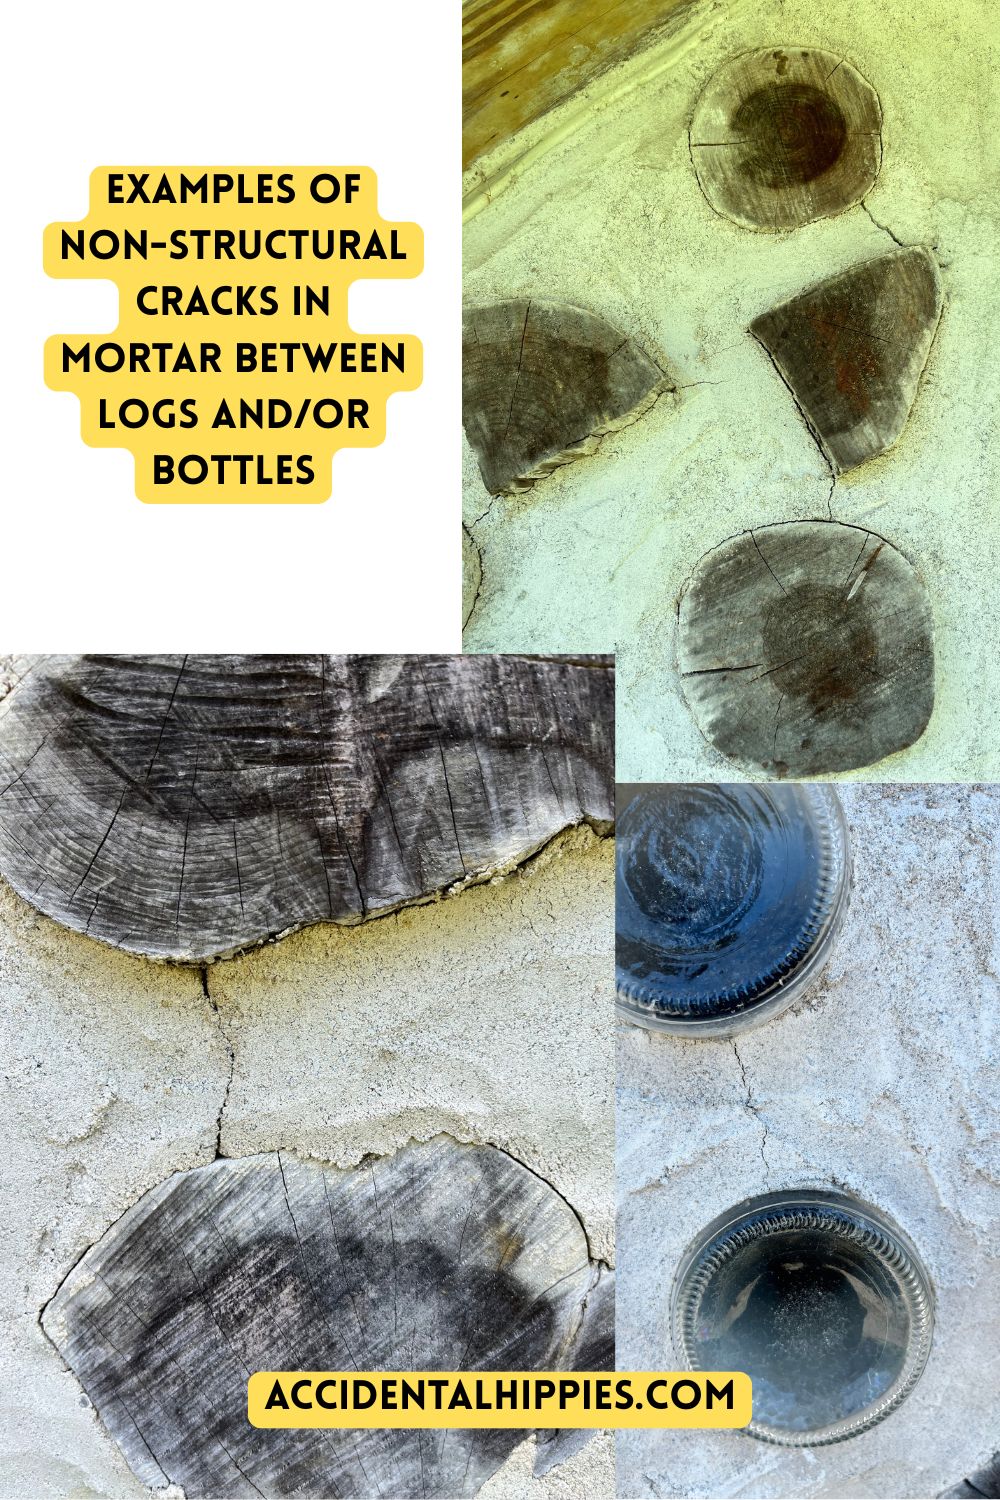
You can go back over the whole thing with Log Jam if desired (and I may yet, as outlined in this great post by Richard Flatau at Cordwood Construction about freshening cordwood walls), but I focused my efforts on the gaps around logs. Matching the color became such a pain in the neck that, unless I was going to smear Log Jam over the ENTIRE wall, it would just look patchy to fill in those hairline cracks. Most of the small cracks have self-healed. Some remain. It’s a bit of a mixed bag.
Ways Our Walls Have Surprised Us
The temperature is stable. Sometimes TOO stable.
I had always heard about the thermal mass of cordwood and the flywheel effect of temperature regulation. This is the tendency of a massive material (like concrete, earth, or water) to absorb, store, and slowly release heat. It stabilizes indoor temperatures by lagging and resisting temperature swings outside. We combined this effect with some passive solar design principles (however imperfectly) and north-south orientation to optimize this effect.
The heat of the day gets slowly released at night, and the cool from the night slowly releases during the day. The house does resist temperature swings, just like they said it would.
The problem comes when you WANT the temperature to swing. Say there’s been a heatwave, and the daytime temperatures have been 95+ degrees Fahrenheit for weeks on end. The walls have absorbed all that heat energy and don’t give it up easily.
When the heat wave finally breaks and the night air gets cool again, the walls hang on to all that heat, so it takes longer to cool the house off. The reverse is also true in the winter when we’ve been in a deep freeze and it finally starts warming up outside. The house wants to hang onto that cool so it takes longer to warm the house back up. It’s relatively minor in the big scheme of things, but it’s definitely not a problem we ever thought about in a normal stick-built house.
They’re (unsurprisingly) hard to clean.
I spent the vast majority of my life living in houses or apartments with “normal” walls. Drywall, tile, paneling, and the like. I wasn’t exactly known for having the cleanest baseboards or scrubbing the walls down once a year or anything, so it isn’t like my standards are super high in this regard.
But when I say that cordwood walls (indoors) can get dusty, they get DUSTY. It makes sense if you think about it. Unless you build your walls with the logs absolutely flush with the mortar, you end up with hundreds or even thousands of teeny-tiny “shelves” sticking out of the wall a quarter of an inch or so. And each of them collects dust.
With painted drywall, you can take a damp sponge and wipe it down. Easy peasy. Cordwood isn’t so simple. Even if wiping it down with a damp sponge was the best course of action, the logs and mortar are rough. Cordwood walls tend to grab onto the sponge material (or rag or whatever item you’re using) and rip it up.
And woe unto you if you have a moment with your small child, as I did, where they projectile vomit all over the wall before you can run them to the bathroom. It was on the mortar, the logs, the windowsill, everything. I did end up using a scrub brush and some soapy water to get the majority of it and then dried what I could with a junk towel. But in that moment, I just found myself thinking about how drywall never would have done me dirty like that.
If you have to clean your interior cordwood walls, junk towels, scrub brushes, and vacuums are your friends.
What would we do differently?
A protective porch overhang
Hands down, a big wrap-around porch. Protecting the cordwood walls ended up being more important to us than any passive solar gains we get. Our overall home design is only really passive solar “adjacent” and isn’t a 100% passive design like some of the cool earthship-style homes you see out there. Still, the 24-inch overhang we have is the absolute MINIMUM you should consider with cordwood. It protects enough, but the logs would be stunning with less UV exposure.
Cedar siding switchup
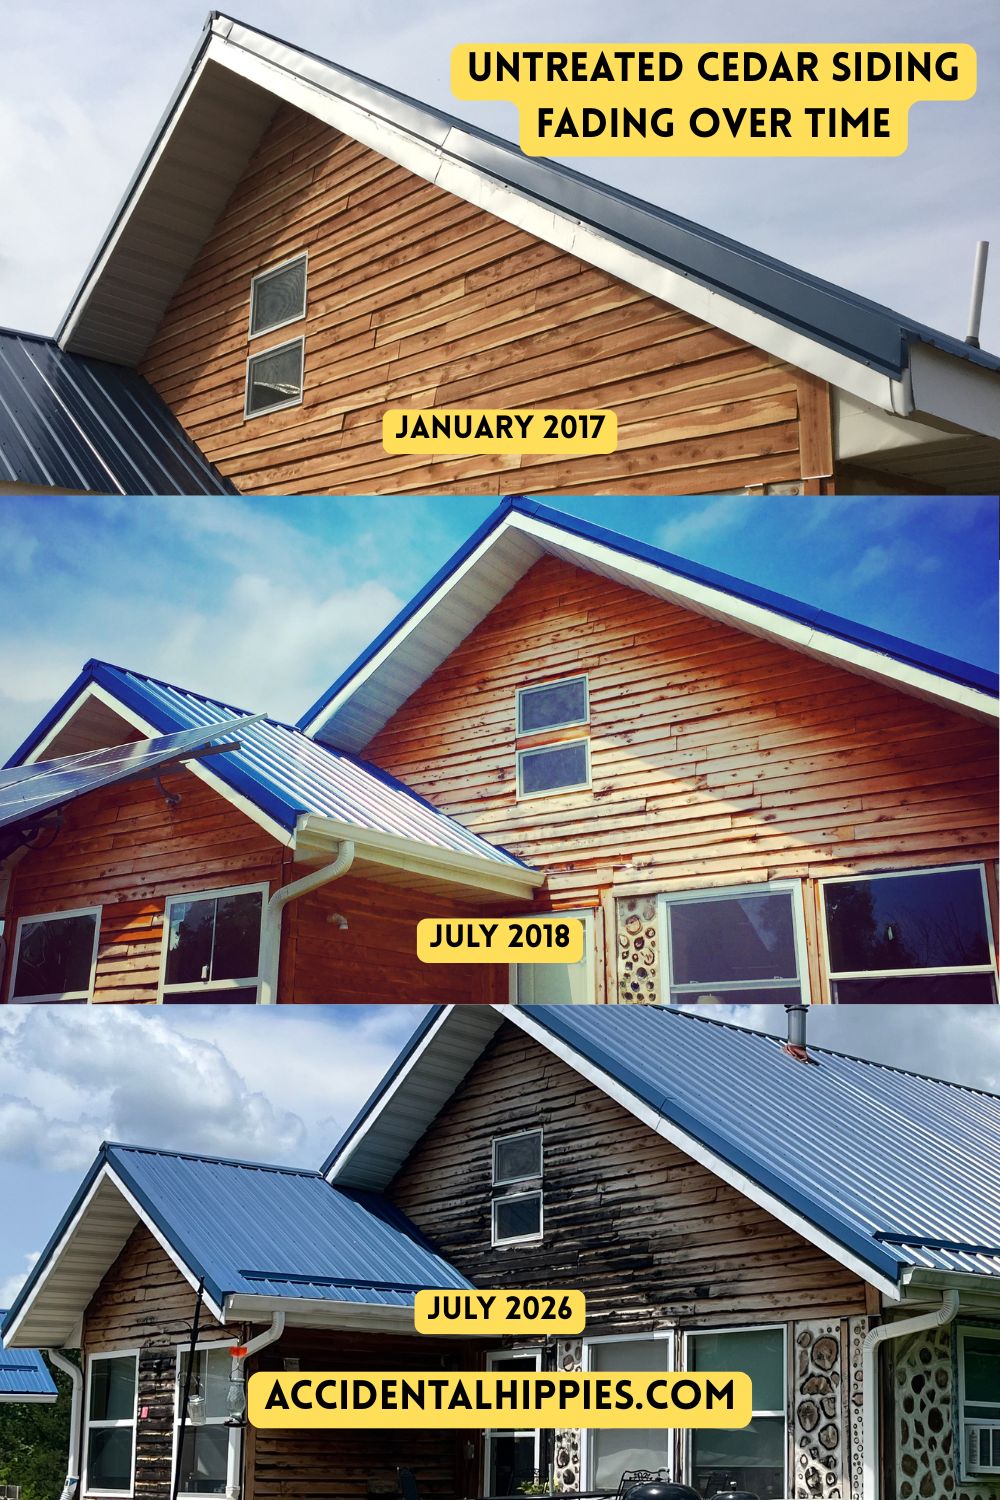
Overall, I do enjoy the cedar siding. I just don’t love how it’s weathering! We had considered doing the siding as a “board and batten” style, and I often find myself wishing we had. We opted not to do shakes because we didn’t want to cut all those pieces from our cedar bundle. Using the long lengths as they were seemed like the most efficient way to use our materials.
The problem is twofold: long lengths tend to warp over time, and they display the weathering process more obviously. I feel like shakes would probably hide it better, but shakes have the same issue as long boards, which is providing lots of little niches for critters like bats (ask me how I know). I suspect that board and batten would be a bit more secure in that regard. If we ever redo the siding, that’ll probably be the route we’ll go.
I’d also make sure to treat the siding with some kind of UV protective stain to keep the color more even, at least for a time. Maybe even a painted siding would be nice. That’s pretty far down the home improvement list though. We have a LOT of other projects to work through first.
Would we build with cordwood again?
Overwhelmingly yes. Of all the aspects of building a home that I feel ANY confidence in, cordwood is the most positive. There are many things I would choose to do differently with the overall design and building process, but cordwood isn’t one of them.
Cordwood is strong, durable, ecofriendly, and incredibly forgiving. It’s an artistic expression of the builders. Each of our walls is infused with memories of the build.
If done right, following a best-practices approach, a cordwood house will stand proud for years to come, and ours is showing that to us already. I hope that isn’t hubris, and that the house isn’t falling apart in another 20 years. Building this house was definitely a “trust the process” situation and, so far, it seems to be working in our favor.
Read More About Our Cordwood Journey
I spent many years documenting and writing about the cordwood process for free here on the blog. If you’re going down a cordwood rabbit hole, these are the posts I’d consider:
- Our Monthly Building Updates (listed by most recent and going backward in time, so if you want to see it from the beginning, go to the last page of posts and work forward!)
- Cordwood Photo Gallery (a collection of photos from groundbreaking through completion, including progress photos and finished interior shots!)
- About our Cordwood Building Project
- Cordwood for Beginners
- Cordwood Building FAQ: All About the Basics
- How to Prep Cedar Trees for Cordwood Building
- How to Prevent Rot In Your Cordwood Walls
- Cordwood Foundations: Options for Building (and how we built ours)
- How Much Can It Cost to Build a Cordwood Home From Scratch?
- Cordwood Homes In The Winter: How Do They Compare to Regular Construction?
- Ultimate Guide to Using Bottles in Cordwood Walls
Join the Email List to Get the Free Cordwood Guide
I put together a free PDF guide to consolidate the information about our cordwood build. You can get that, plus all the other free PDFs in our Members-Only Resource Library, by signing up below. I’m probably the least spammy blogger you’ll ever have in your inbox, but if it’s not your jam, you can unsubscribe any time.
Ready to really dig in? Enroll in our Cordwood Building Course!
We put together an easy, step-by-step online course back during the pandemic to accommodate the in-person workshop we were going to have and had to cancel. Since then, it’s been a resource for all kinds of cordwood builders who want to learn the technique from home but don’t have the ability to make it to an in-person building clinic for whatever reason.
It’s self-paced and totally asynchronous so you can learn on your own time! It comes with printable worksheets to help you plan your specific project, and includes hours of videos, including Zoom calls with our original cohort so you can see a cordwood build in real-time. Check it out!
Learn more about our original cordwood homestead project here. And be sure to join us on Pinterest, Facebook, and Instagram for more homesteading goodies that don’t necessarily make it to the blog. Thanks for reading!