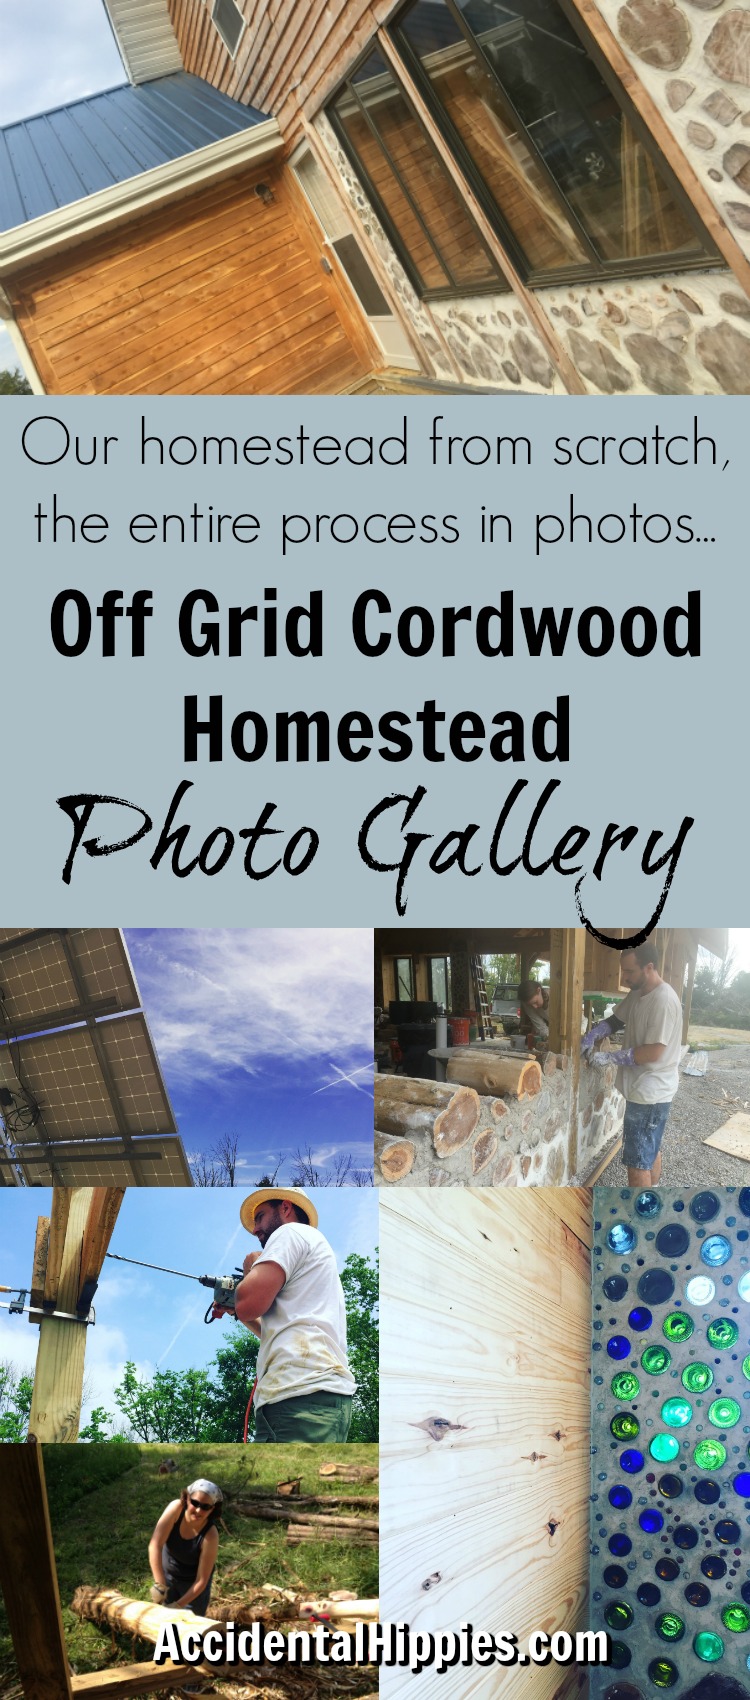
Each gallery on this page represents a different phase of our Cordwood Building Project. To learn more about cordwood, construction, to see progress updates, and more, simply click on any of the links below.
Photo galleries will appear after the links.
MOST RECENT PHOTOS @ACCIDENTALHIPPIES
Cutting Down Trees – Summer 2015
![Moving a cedar tree to prepare it for cordwood masonry construction.](https://i2.wp.com/accidentalhippies.com/wp-content/uploads/2015/04/img_2361-e1556544489144.jpg?ssl=1)
![](https://i0.wp.com/accidentalhippies.com/wp-content/uploads/2015/04/img_2362.jpg?ssl=1)
![Mark clearing brush around a tree with a machete before chopping the tree down.](https://i1.wp.com/accidentalhippies.com/wp-content/uploads/2015/06/img_2551-e1520687069830.jpg?ssl=1)
![](https://i0.wp.com/accidentalhippies.com/wp-content/uploads/2015/06/img_2557-e1520687099370.jpg?ssl=1)
![Cordwood masonry is a time-tested green building technique that is costs next to nothing and is practical for many homesteaders. If you want to build a chicken coop, shed, playhouse, garage, or even a house out of cordwood masonry, then preparing your cedar trees correctly will make the job a lot quicker and easier. In this step-by-step guide, we lay out the exact process we use to cut down and prepare cedar trees from our property to use in our cordwood building.](https://i1.wp.com/accidentalhippies.com/wp-content/uploads/2015/06/img_2545-e1520705813843.jpg?ssl=1)
![](https://i0.wp.com/accidentalhippies.com/wp-content/uploads/2015/06/img_2544.jpg?ssl=1)
![](https://i0.wp.com/accidentalhippies.com/wp-content/uploads/2015/06/img_2543.jpg?ssl=1)
![](https://i0.wp.com/accidentalhippies.com/wp-content/uploads/2015/06/img_2542.jpg?ssl=1)
![](https://i1.wp.com/accidentalhippies.com/wp-content/uploads/2015/06/img_2541.jpg?ssl=1)
![](https://i2.wp.com/accidentalhippies.com/wp-content/uploads/2015/06/img_2539.jpg?ssl=1)
![](https://i1.wp.com/accidentalhippies.com/wp-content/uploads/2015/06/img_2537.jpg?ssl=1)
![](https://i2.wp.com/accidentalhippies.com/wp-content/uploads/2015/06/img_2525.jpg?ssl=1)
![](https://i2.wp.com/accidentalhippies.com/wp-content/uploads/2015/06/img_2510.jpg?ssl=1)
![](https://i1.wp.com/accidentalhippies.com/wp-content/uploads/2015/06/img_2514-e1529548627809.jpg?ssl=1)
![](https://i2.wp.com/accidentalhippies.com/wp-content/uploads/2015/06/img_2508.jpg?ssl=1)
![Woman standing over a cedar log peeling the bark off with a knife](https://i2.wp.com/accidentalhippies.com/wp-content/uploads/2015/06/img_2472-e1527513804869.jpg?ssl=1)
![](https://i1.wp.com/accidentalhippies.com/wp-content/uploads/2015/06/img_2469.jpg?ssl=1)
![](https://i0.wp.com/accidentalhippies.com/wp-content/uploads/2015/06/img_2467.jpg?ssl=1)
Framing – Spring 2016
![Posts in place on our DIY pole frame for a cordwood house](https://i0.wp.com/accidentalhippies.com/wp-content/uploads/2016/06/IMG_3179-e1524054442596.jpg?ssl=1)
![](https://i0.wp.com/accidentalhippies.com/wp-content/uploads/2016/06/IMG_3175.jpg?ssl=1)
![Accidental Hippies: This is how we put up our own pole frame on concrete piers with just two people. We are using it for a cordwood house, but you could do the same with strawbale or metal/wood siding to build a barn, shed, or even house!](https://i0.wp.com/accidentalhippies.com/wp-content/uploads/2016/06/IMG_3207-e1524054564465.jpg?ssl=1)
![](https://i1.wp.com/accidentalhippies.com/wp-content/uploads/2016/06/IMG_3169-e1478110829113.jpg?ssl=1)
![](https://i0.wp.com/accidentalhippies.com/wp-content/uploads/2016/06/IMG_3170.jpg?ssl=1)
![](https://i0.wp.com/accidentalhippies.com/wp-content/uploads/2016/06/IMG_3185-e1478111019152.jpg?ssl=1)
![How we built our own pole frame for a cordwood house](https://i2.wp.com/accidentalhippies.com/wp-content/uploads/2016/06/IMG_3182-e1465176879515.jpg?ssl=1)
![How we built our own pole frame for a cordwood house](https://i0.wp.com/accidentalhippies.com/wp-content/uploads/2016/06/IMG_3190-e1465177727909.jpg?ssl=1)
![Cutting notches in a post to build a pole frame for a cordwood home](https://i1.wp.com/accidentalhippies.com/wp-content/uploads/2016/06/IMG_3187-e1465177268775.jpg?ssl=1)
![Raising the headers of a pole frame with a lift](https://i1.wp.com/accidentalhippies.com/wp-content/uploads/2016/06/IMG_3191-e1465178637133.jpg?ssl=1)
![](https://i2.wp.com/accidentalhippies.com/wp-content/uploads/2016/06/IMG_3194-e1630870751644.jpg?ssl=1)
![](https://i1.wp.com/accidentalhippies.com/wp-content/uploads/2016/06/IMG_3203-e1527619790538.jpg?ssl=1)
![If you are thinking about building your own house, it isn't impossible! But if you're thinking it's going to look like all of the magical things you see on Pinterest, think again. Here, we discuss the realities of being owner-builders and the ONE BIG THING to keep in mind if you want to build your own house.](https://i0.wp.com/accidentalhippies.com/wp-content/uploads/2016/06/IMG_3208.jpg?ssl=1)
![Checking to make sure notches are level in our DIY pole frame for a cordwood house](https://i0.wp.com/accidentalhippies.com/wp-content/uploads/2016/06/IMG_3183-e1465177903179.jpg?ssl=1)
![](https://i2.wp.com/accidentalhippies.com/wp-content/uploads/2016/06/IMG_3272-e1466013562593.jpg?ssl=1)
![](https://i1.wp.com/accidentalhippies.com/wp-content/uploads/2016/06/IMG_3273-e1511902432876.jpg?ssl=1)
![](https://i1.wp.com/accidentalhippies.com/wp-content/uploads/2016/06/IMG_3281-1-e1547429651385.jpg?ssl=1)
![](https://i1.wp.com/accidentalhippies.com/wp-content/uploads/2016/06/IMG_3173-e1630870947332.jpg?ssl=1)
![How to build your own pole frame -- great for barns, sheds, playhouses, green homes, and even tiny houses!](https://i2.wp.com/accidentalhippies.com/wp-content/uploads/2016/06/IMG_3165-e1630870968500.jpg?ssl=1)
![How we built our own pole frame for a small cordwood house -- easy enough that even our not-quite-three-year-old can help!](https://i1.wp.com/accidentalhippies.com/wp-content/uploads/2016/06/IMG_3167-e1524054490414.jpg?ssl=1)
![](https://i1.wp.com/accidentalhippies.com/wp-content/uploads/2016/06/IMG_3166-e1630870989426.jpg?ssl=1)
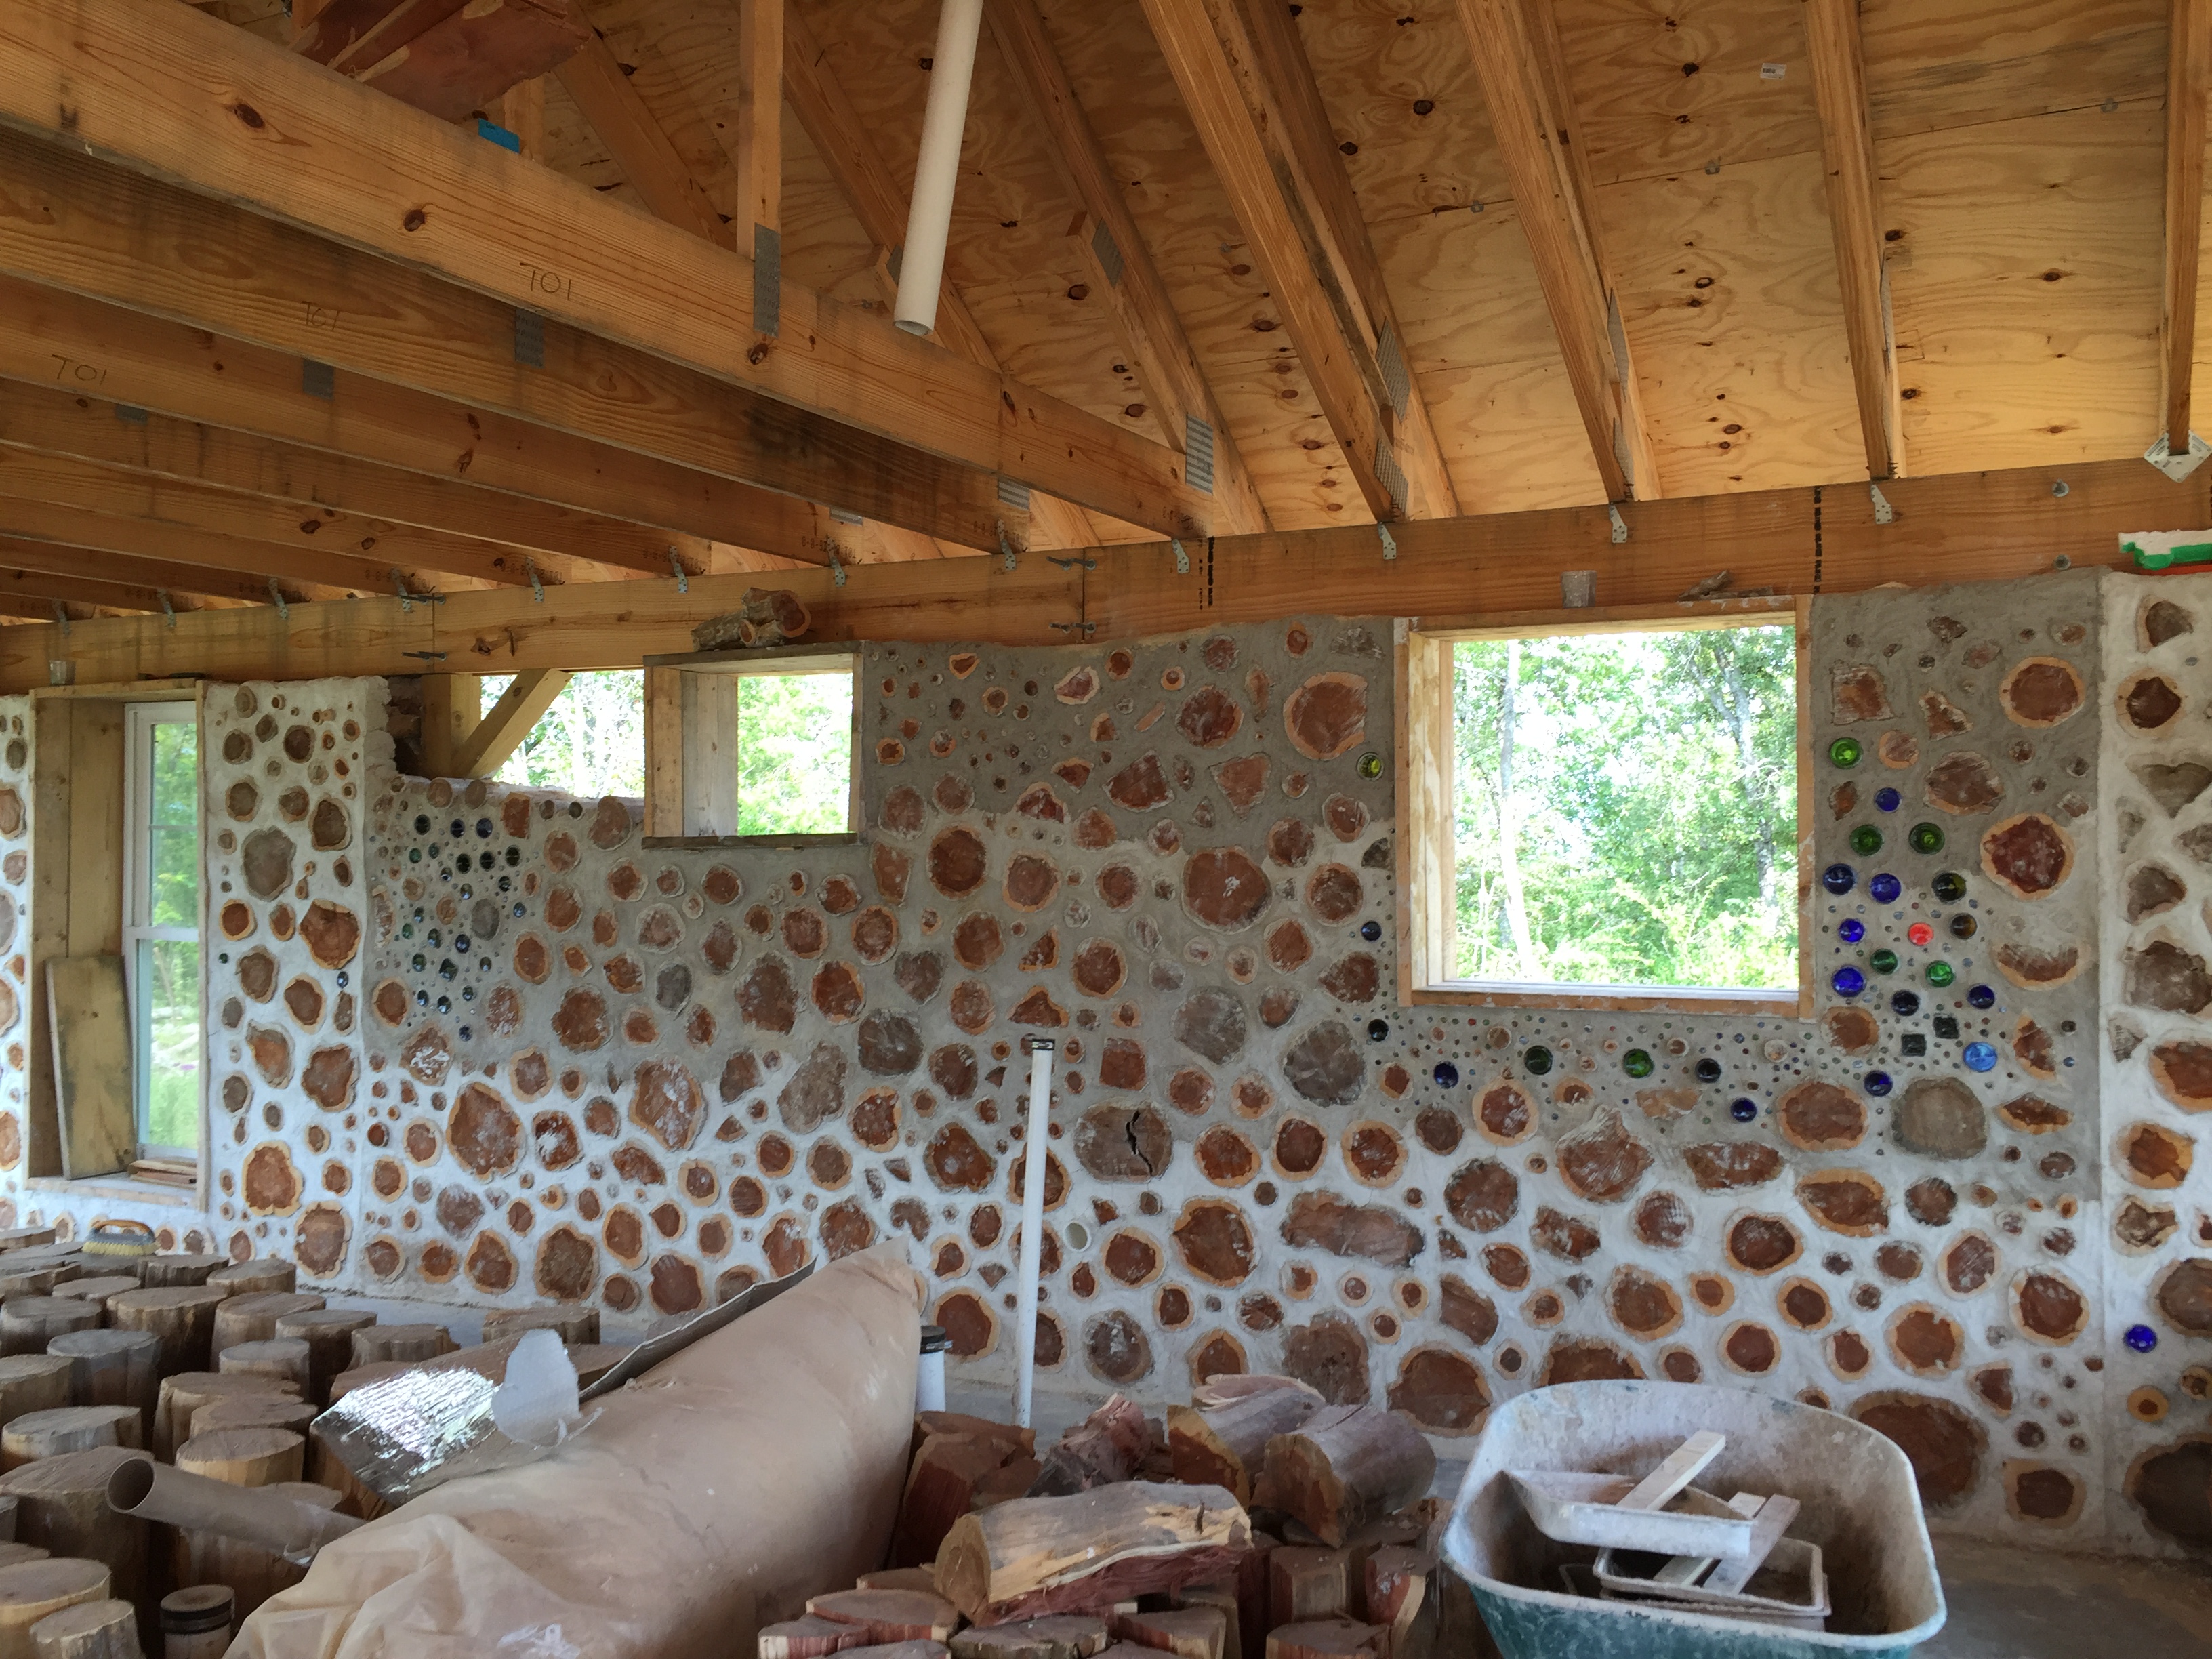
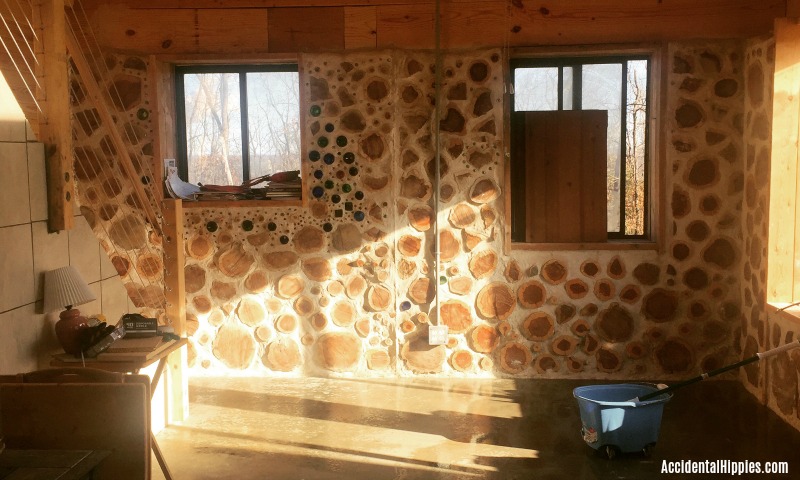
Cordwood Building – Summer/Fall 2016
![This "fake" post will be filled with cordwood masonry to bookend bigger cordwood walls.](https://i1.wp.com/accidentalhippies.com/wp-content/uploads/2016/07/IMG_3487-e1524055096893.jpg?ssl=1)
![Mixing lime putty mortar for cordwood masonry - 2.5 parts sand to 1 part hydrated masonry lime](https://i2.wp.com/accidentalhippies.com/wp-content/uploads/2016/07/IMG_3485-e1541041484882.jpg?ssl=1)
![](https://i0.wp.com/accidentalhippies.com/wp-content/uploads/2016/07/IMG_3491-e1478111513860.jpg?ssl=1)
![Cordwood column - used to bookend a large 16 inch cordwood wall](https://i2.wp.com/accidentalhippies.com/wp-content/uploads/2016/07/IMG_3494-e1524055131906.jpg?ssl=1)
![Cordwood walls built 16 inches thick using cedar logs, lime putty mortar (4 inches on either side) and 8 inches of cedar sawdust/lime insulation in the middle. Click to learn how to DIY! #cordwood #diy](https://i0.wp.com/accidentalhippies.com/wp-content/uploads/2016/07/CordwoodCrossSection.jpg?ssl=1)
![](https://i2.wp.com/accidentalhippies.com/wp-content/uploads/2016/07/IMG_3519.jpg?ssl=1)
![You can add fun designs into your cordwood wall. Here, a heart-shaped log has been adorned with glass pebbles like you would use in centerpieces or other decor!](https://i2.wp.com/accidentalhippies.com/wp-content/uploads/2016/08/IMG_3563-e1470196355316.jpg?ssl=1)
![](https://i1.wp.com/accidentalhippies.com/wp-content/uploads/2016/08/IMG_3546-e1478111537880.jpg?ssl=1)
![A concrete mixer isn't necessary to make the mortar for building with cordwood, but it sure was worth the money!](https://i0.wp.com/accidentalhippies.com/wp-content/uploads/2016/08/IMG_3540-e1529583098680.jpg?ssl=1)
![](https://i0.wp.com/accidentalhippies.com/wp-content/uploads/2016/08/IMG_3506.jpg?ssl=1)
![A cordwood wall in progress on a house](https://i0.wp.com/accidentalhippies.com/wp-content/uploads/2016/08/IMG_3519-e1470195538573.jpg?ssl=1)
![](https://i0.wp.com/accidentalhippies.com/wp-content/uploads/2016/08/IMG_3524-e1477405853871.jpg?ssl=1)
![](https://i1.wp.com/accidentalhippies.com/wp-content/uploads/2016/08/IMG_4252.JPG-e1527620181607.jpeg?ssl=1)
![](https://i1.wp.com/accidentalhippies.com/wp-content/uploads/2016/08/IMG_3487.jpg?ssl=1)
![Mixing lime putty mortar by hand](https://i2.wp.com/accidentalhippies.com/wp-content/uploads/2016/08/IMG_3485-e1529583053669.jpg?ssl=1)
![](https://i1.wp.com/accidentalhippies.com/wp-content/uploads/2016/09/TonyWall1.jpg?ssl=1)
![](https://i0.wp.com/accidentalhippies.com/wp-content/uploads/2016/09/MasterWall1.jpg?ssl=1)
![](https://i2.wp.com/accidentalhippies.com/wp-content/uploads/2016/09/MarkBottle2.jpg?ssl=1)
![Mark pours a mix of sawdust and masonry lime into the middle of a cordwood wall. The sawdust acts as insulation and the lime keeps it rot and pest resistant.](https://i2.wp.com/accidentalhippies.com/wp-content/uploads/2016/09/IMG_4037-e1473642812378.jpg?ssl=1)
![](https://i1.wp.com/accidentalhippies.com/wp-content/uploads/2016/09/IMG_4020.jpg?ssl=1)
![Bottles and marbles in a cordwood wall - at Accidental Hippies](https://i0.wp.com/accidentalhippies.com/wp-content/uploads/2016/09/IMG_4023-e1473563551121.jpg?ssl=1)
![A wine bottle in a cordwood wall - so pretty!](https://i0.wp.com/accidentalhippies.com/wp-content/uploads/2016/09/IMG_4007.jpg?ssl=1)
![](https://i0.wp.com/accidentalhippies.com/wp-content/uploads/2016/09/IMG_4010.jpg?ssl=1)
![Interior cordwood wall in progress - at Accidental Hippies](https://i0.wp.com/accidentalhippies.com/wp-content/uploads/2016/09/IMG_4017.jpg?ssl=1)
![Colored glass bottles in a cordwood wall let in beautiful light!](https://i1.wp.com/accidentalhippies.com/wp-content/uploads/2016/09/IMG_4006.jpg?ssl=1)
![](https://i2.wp.com/accidentalhippies.com/wp-content/uploads/2016/09/IMG_4005.jpg?ssl=1)
![Cordwood wall in progress - at Accidental Hippies](https://i1.wp.com/accidentalhippies.com/wp-content/uploads/2016/09/IMG_3752.jpg?ssl=1)
![Front of a cordwood house in progress - from Accidental Hippies](https://i0.wp.com/accidentalhippies.com/wp-content/uploads/2016/09/IMG_3629-e1473557619282.jpg?ssl=1)
![You can use bottles in a cordwood wall to make constellations. Here is the constellation Orion. The mortar at the top still needs to be smoothed out.](https://i0.wp.com/accidentalhippies.com/wp-content/uploads/2016/10/IMG_4232.jpg?ssl=1)
![You can use bottle bricks to make designs in a cordwood wall. Here you see the bottom half of the constellation Orion in progress in a wall.](https://i0.wp.com/accidentalhippies.com/wp-content/uploads/2016/10/IMG_4224-e1477090740373.jpg?ssl=1)
![A little blue truck made out of bottles inside of a cordwood wall](https://i0.wp.com/accidentalhippies.com/wp-content/uploads/2016/10/IMG_4130-e1477090397226.jpg?ssl=1)
![](https://i2.wp.com/accidentalhippies.com/wp-content/uploads/2016/10/IMG_4103.jpg?ssl=1)
![A bottle brick made out of two beer bottles joined with metal flashing and duct tape](https://i0.wp.com/accidentalhippies.com/wp-content/uploads/2016/10/IMG_4100.jpg?ssl=1)
![Using bottles in a cordwood wall is a beautiful way to reuse common materials while letting in light and color! #cordwood #bottlewall](https://i1.wp.com/accidentalhippies.com/wp-content/uploads/2016/10/IMG_4031-e1475629053107.jpg?ssl=1)
Drone Photos – September 2016
![](https://i0.wp.com/accidentalhippies.com/wp-content/uploads/2016/09/West-Wall-Prog-1.jpg?ssl=1)
![](https://i0.wp.com/accidentalhippies.com/wp-content/uploads/2016/09/High-Front-1.jpg?ssl=1)
![I'm quitting my job to build our homestead. Find out more about why!](https://i0.wp.com/accidentalhippies.com/wp-content/uploads/2016/09/High-Aerial-wDriveandAA-1.jpg?ssl=1)
![](https://i2.wp.com/accidentalhippies.com/wp-content/uploads/2016/09/High-Aerial-South.jpg?ssl=1)
![](https://i1.wp.com/accidentalhippies.com/wp-content/uploads/2016/09/High-Aerial-1.jpg?ssl=1)
![](https://i2.wp.com/accidentalhippies.com/wp-content/uploads/2016/09/Front-3.jpg?ssl=1)
![](https://i1.wp.com/accidentalhippies.com/wp-content/uploads/2016/09/Front-2.jpg?ssl=1)
![We're building a cordwood home off the grid on our 16 acres. Check it out!](https://i1.wp.com/accidentalhippies.com/wp-content/uploads/2016/09/East-Wall-4.jpg?ssl=1)
![](https://i1.wp.com/accidentalhippies.com/wp-content/uploads/2016/09/East-Wall-3.jpg?ssl=1)
![](https://i1.wp.com/accidentalhippies.com/wp-content/uploads/2016/09/East-Wall-2.jpg?ssl=1)
![Cordwood house built by owner builders - see how you can do it too!](https://i2.wp.com/accidentalhippies.com/wp-content/uploads/2016/09/East-Wall-1.jpg?ssl=1)
![](https://i1.wp.com/accidentalhippies.com/wp-content/uploads/2016/09/Aerial-South-3.jpg?ssl=1)
![Our off grid property cannot be seen from the road, an aspect of it we love! Find out what other aspects of our property we considered when we purchased it for our homestead.](https://i1.wp.com/accidentalhippies.com/wp-content/uploads/2016/09/Aerial-South-2.jpg?ssl=1)
![](https://i0.wp.com/accidentalhippies.com/wp-content/uploads/2016/09/Aerial-South-1.jpg?ssl=1)
Exterior Framing and Trim – Fall/Winter 2016
![Even our 3 year old son can help build our house!](https://i1.wp.com/accidentalhippies.com/wp-content/uploads/2016/12/IMG_4563-e1482351732386.jpg?ssl=1)
![Soffit installation in progress on a cordwood house](https://i2.wp.com/accidentalhippies.com/wp-content/uploads/2016/12/IMG_4569.jpg?ssl=1)
![Soffit installation in progress on a cordwood house](https://i2.wp.com/accidentalhippies.com/wp-content/uploads/2016/12/IMG_4570.jpg?ssl=1)
![](https://i2.wp.com/accidentalhippies.com/wp-content/uploads/2016/12/IMG_4427.jpg?ssl=1)
![Building a house is hard work, but it's also pretty fun!](https://i0.wp.com/accidentalhippies.com/wp-content/uploads/2016/12/IMG_4465-e1482371048119.jpg?ssl=1)
![Stud framed wall with sheathing as seen from the inside](https://i0.wp.com/accidentalhippies.com/wp-content/uploads/2016/12/IMG_4426.jpg?ssl=1)
![](https://i1.wp.com/accidentalhippies.com/wp-content/uploads/2016/12/IMG_4424.jpg?ssl=1)
![2x6 stud framed wall with window openings set between 6x6 posts in a pole frame house](https://i1.wp.com/accidentalhippies.com/wp-content/uploads/2016/12/IMG_4423.jpg?ssl=1)
![2x6 Stud framed wall set between 6x6 posts in a pole frame house](https://i1.wp.com/accidentalhippies.com/wp-content/uploads/2016/12/IMG_4422.jpg?ssl=1)
![](https://i1.wp.com/accidentalhippies.com/wp-content/uploads/2016/12/IMG_4421.jpg?ssl=1)
![](https://i0.wp.com/accidentalhippies.com/wp-content/uploads/2017/03/IMG_5199.jpg?ssl=1)
![](https://i1.wp.com/accidentalhippies.com/wp-content/uploads/2017/02/IMG_5338-e1488333377755.jpg?ssl=1)
![](https://i1.wp.com/accidentalhippies.com/wp-content/uploads/2017/02/IMG_5323-e1488333346677.jpg?ssl=1)
![](https://i2.wp.com/accidentalhippies.com/wp-content/uploads/2017/02/IMG_5209.jpg?ssl=1)
![](https://i2.wp.com/accidentalhippies.com/wp-content/uploads/2017/02/IMG_5174-e1488333132906.jpg?ssl=1)
![](https://i0.wp.com/accidentalhippies.com/wp-content/uploads/2017/02/IMG_5067.jpg?ssl=1)
![](https://i1.wp.com/accidentalhippies.com/wp-content/uploads/2017/02/IMG_4997-e1488332890314.jpg?ssl=1)
![](https://i1.wp.com/accidentalhippies.com/wp-content/uploads/2017/03/IMG_5446-e1589029376239.jpg?ssl=1)
![](https://i1.wp.com/accidentalhippies.com/wp-content/uploads/2017/03/IMG_5441-e1490797341438.jpg?ssl=1)
![](https://i1.wp.com/accidentalhippies.com/wp-content/uploads/2017/03/IMG_5440-e1490797314710.jpg?ssl=1)
![How to do your own cedar lap siding on the cheap!](https://i0.wp.com/accidentalhippies.com/wp-content/uploads/2017/03/IMG_5434-e1490797299106.jpg?ssl=1)
![](https://i1.wp.com/accidentalhippies.com/wp-content/uploads/2017/03/IMG_5409-e1490879892877.jpg?ssl=1)
![](https://i0.wp.com/accidentalhippies.com/wp-content/uploads/2016/11/IMG_5364-e1489254490540.jpg?ssl=1)
![](https://i1.wp.com/accidentalhippies.com/wp-content/uploads/2016/11/IMG_5357.jpg?ssl=1)
![](https://i0.wp.com/accidentalhippies.com/wp-content/uploads/2016/11/IMG_5359-e1489254511893.jpg?ssl=1)
![Learn how we DIYed our own cedar lap siding on the cheap!](https://i0.wp.com/accidentalhippies.com/wp-content/uploads/2016/11/IMG_5354-e1492119735226.jpg?ssl=1)
![](https://i2.wp.com/accidentalhippies.com/wp-content/uploads/2016/11/IMG_5327-e1489253590570.jpg?ssl=1)
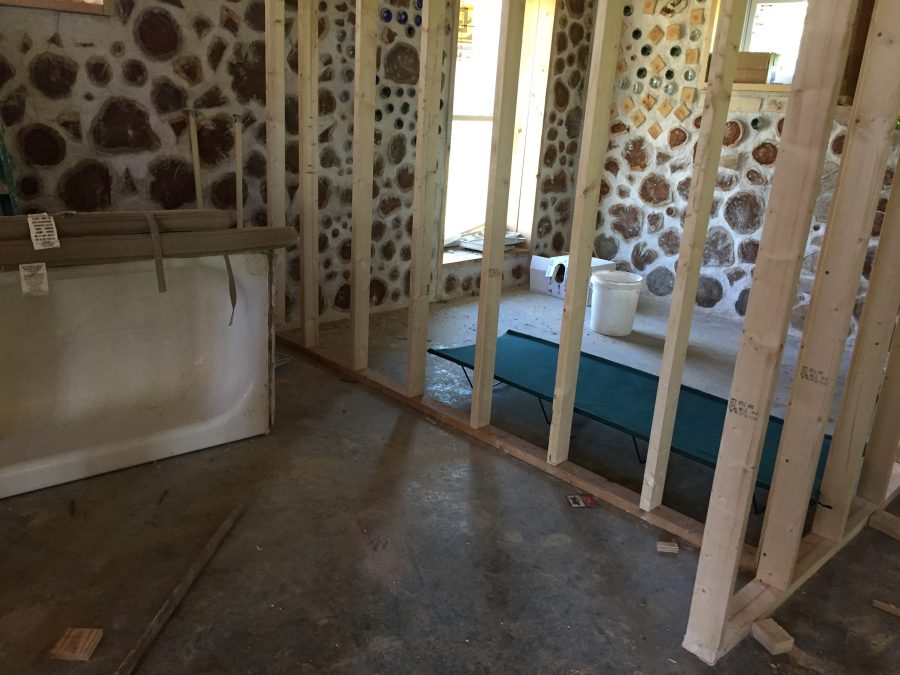
Interior Framing – Spring 2017
![](https://i1.wp.com/accidentalhippies.com/wp-content/uploads/2017/06/IMG_5939-e1496629759181.jpg?ssl=1)
![](https://i1.wp.com/accidentalhippies.com/wp-content/uploads/2017/06/IMG_5938-e1496629738117.jpg?ssl=1)
![](https://i0.wp.com/accidentalhippies.com/wp-content/uploads/2017/06/IMG_5937-e1496629725782.jpg?ssl=1)
![](https://i1.wp.com/accidentalhippies.com/wp-content/uploads/2017/06/IMG_5880-e1496630013982.jpg?ssl=1)
![](https://i0.wp.com/accidentalhippies.com/wp-content/uploads/2017/06/IMG_5709.jpg?ssl=1)
![](https://i2.wp.com/accidentalhippies.com/wp-content/uploads/2017/06/IMG_5707-e1496606345978.jpg?ssl=1)
![](https://i1.wp.com/accidentalhippies.com/wp-content/uploads/2017/06/IMG_5701-e1496606358679.jpg?ssl=1)
![](https://i2.wp.com/accidentalhippies.com/wp-content/uploads/2017/06/IMG_5694-e1589161674368.jpg?ssl=1)
![We're in months 10-11 of building our own cordwood home from scratch. Check out our progress!](https://i2.wp.com/accidentalhippies.com/wp-content/uploads/2017/06/IMG_5673-e1496606387482.jpg?ssl=1)
![](https://i2.wp.com/accidentalhippies.com/wp-content/uploads/2017/06/IMG_5590-e1496606410678.jpg?ssl=1)
![](https://i1.wp.com/accidentalhippies.com/wp-content/uploads/2017/06/IMG_5585.jpg?ssl=1)
![](https://i1.wp.com/accidentalhippies.com/wp-content/uploads/2017/06/IMG_5583-e1589161611397.jpg?ssl=1)
![](https://i2.wp.com/accidentalhippies.com/wp-content/uploads/2017/06/IMG_5581-e1496606496813.jpg?ssl=1)
![](https://i2.wp.com/accidentalhippies.com/wp-content/uploads/2017/06/IMG_5580-e1496606507895.jpg?ssl=1)
![The truck all loaded up with our interior framing members. See how it turned out!](https://i0.wp.com/accidentalhippies.com/wp-content/uploads/2017/06/IMG_5574-e1496606519521.jpg?ssl=1)
![DIY cross bracing for floor joists](https://i2.wp.com/accidentalhippies.com/wp-content/uploads/2017/06/IMG_5541-e1496606533162.jpg?ssl=1)
![](https://i0.wp.com/accidentalhippies.com/wp-content/uploads/2017/07/IMG_6387-e1499608394778.jpg?ssl=1)
![](https://i0.wp.com/accidentalhippies.com/wp-content/uploads/2017/07/IMG_6125.jpg?ssl=1)
![](https://i1.wp.com/accidentalhippies.com/wp-content/uploads/2017/07/IMG_6096-e1499606760121.jpg?ssl=1)
![](https://i2.wp.com/accidentalhippies.com/wp-content/uploads/2017/07/IMG_6111.jpg?ssl=1)
Septic and Cistern Installation – Summer 2017
![](https://i1.wp.com/accidentalhippies.com/wp-content/uploads/2017/07/IMG_6280-e1499718267574.jpg?ssl=1)
![](https://i0.wp.com/accidentalhippies.com/wp-content/uploads/2017/07/IMG_6274-e1499024207372.jpg?ssl=1)
![](https://i2.wp.com/accidentalhippies.com/wp-content/uploads/2017/07/IMG_6268-e1499024174246.jpg?ssl=1)
![](https://i2.wp.com/accidentalhippies.com/wp-content/uploads/2017/07/IMG_6271-e1499024193634.jpg?ssl=1)
![](https://i1.wp.com/accidentalhippies.com/wp-content/uploads/2017/07/IMG_6275-e1499024231700.jpg?ssl=1)
![](https://i2.wp.com/accidentalhippies.com/wp-content/uploads/2017/07/IMG_6291-e1499024243381.jpg?ssl=1)
![](https://i1.wp.com/accidentalhippies.com/wp-content/uploads/2017/07/IMG_6292-e1499024257602.jpg?ssl=1)
![Dealing with wastewater isn't a pretty subject, but it's one of the most important things to consider when building an off-grid or green home. Find out your options (plus the one thing that might surprise you)](https://i0.wp.com/accidentalhippies.com/wp-content/uploads/2017/07/AHSepticFeat.jpg?ssl=1)
![Dealing with wastewater isn't a pretty subject, but it's one of the most important things to consider when building an off-grid or green home. Find out your options (plus the one thing that might surprise you)](https://i2.wp.com/accidentalhippies.com/wp-content/uploads/2017/07/AHSepticFeat2.jpg?ssl=1)
![](https://i1.wp.com/accidentalhippies.com/wp-content/uploads/2017/07/IMG_6304-e1499609470144.jpg?ssl=1)
![](https://i0.wp.com/accidentalhippies.com/wp-content/uploads/2017/07/IMG_6306-e1499615220866.jpg?ssl=1)
![](https://i1.wp.com/accidentalhippies.com/wp-content/uploads/2017/07/IMG_6313-e1499615267503.jpg?ssl=1)
![](https://i0.wp.com/accidentalhippies.com/wp-content/uploads/2017/07/IMG_6315.jpg?ssl=1)
![](https://i0.wp.com/accidentalhippies.com/wp-content/uploads/2017/07/IMG_6336-e1499615417108.jpg?ssl=1)
![This is what it looked like to install our precast concrete cistern. We use it for catching rainwater for our off-grid home. Learn more here.](https://i2.wp.com/accidentalhippies.com/wp-content/uploads/2017/07/IMG_6338-e1499615485361.jpg?ssl=1)
![](https://i1.wp.com/accidentalhippies.com/wp-content/uploads/2017/07/IMG_6339.jpg?ssl=1)
![](https://i1.wp.com/accidentalhippies.com/wp-content/uploads/2017/07/IMG_6346.jpg?ssl=1)
![](https://i0.wp.com/accidentalhippies.com/wp-content/uploads/2017/07/IMG_6366-e1499615568276.jpg?ssl=1)
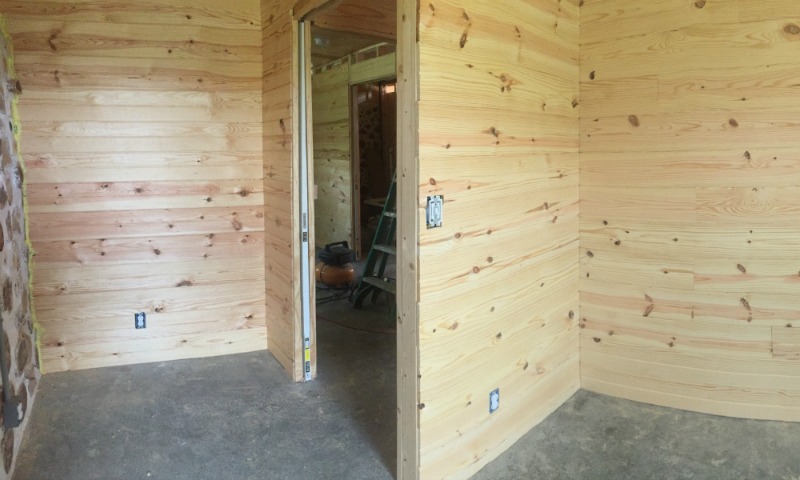
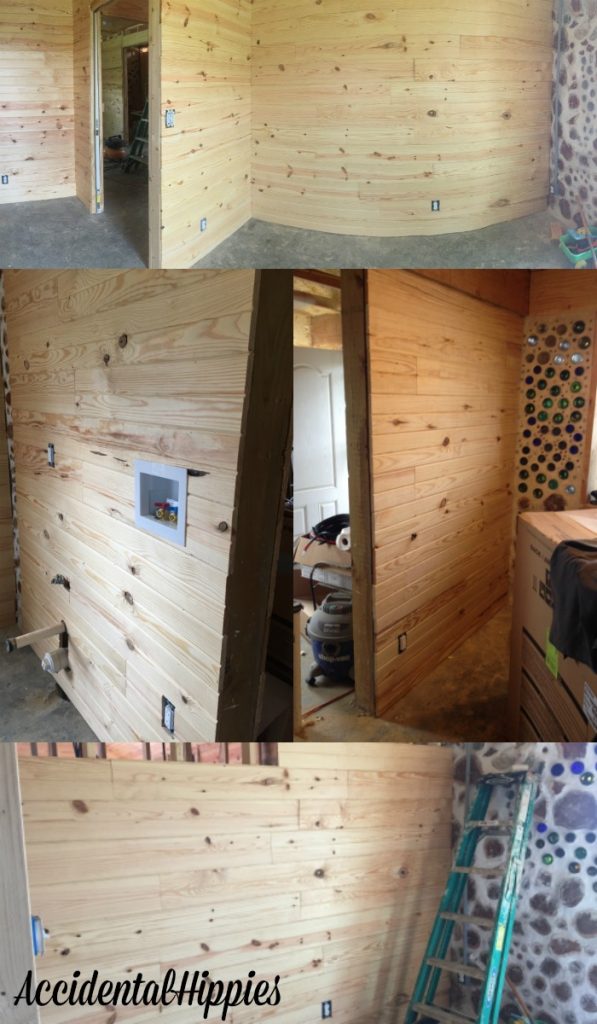
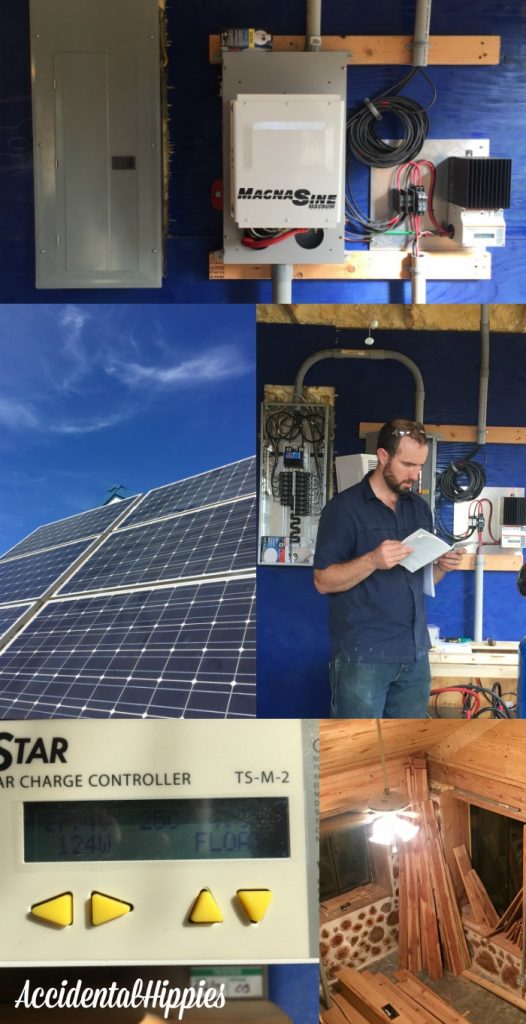
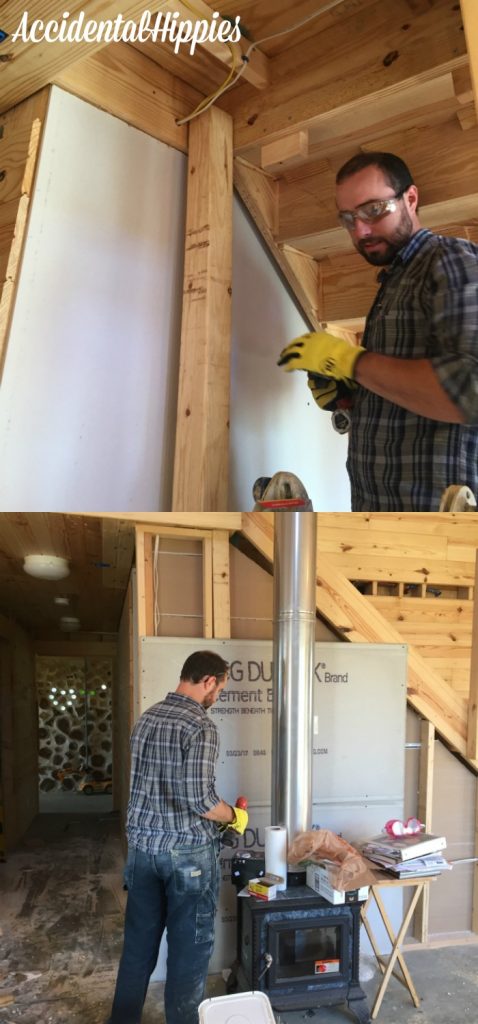
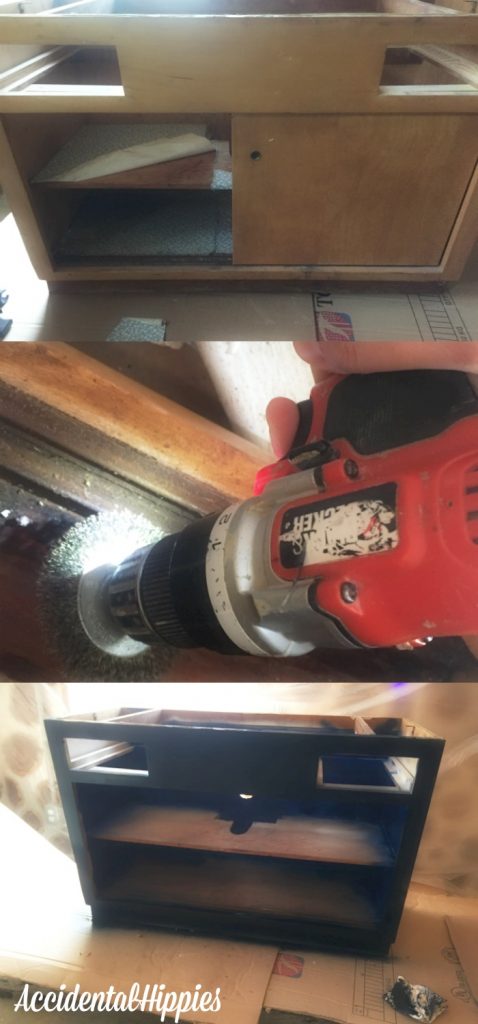
Interior Insulation, Pine Walls, and Misc. Finish Work – Summer/Fall 2017
![](https://accidentalhippies.com/wp-content/uploads/2017/10/AHSeptOctFeat.jpg)
![](https://accidentalhippies.com/wp-content/uploads/2017/10/IMG_7421-1024x1024.jpg)
![We found a clawfoot tub for cheap on Craigslist and refinished it ourselves. We saved tons of money over buying new! Learn about this and other projects in our home building progress report.](https://accidentalhippies.com/wp-content/uploads/2017/10/AHTubRefinish-512x1024.jpg)
![Tongue and groove pine planks are a fast and beautiful way to finish interior walls. Check out our progress with it in this building progress report.](https://accidentalhippies.com/wp-content/uploads/2017/10/AHTongueandGroovePine-597x1024.jpg)
![We purchased an off-grid solar kit and installed it ourselves. Check it out in this building progress report.](https://accidentalhippies.com/wp-content/uploads/2017/10/AHSolarInstall-526x1024.jpg)
![Putting up drywall and concrete backer board are just some of the tasks we completed while building a house ourselves. Find out more in this building progress report.](https://accidentalhippies.com/wp-content/uploads/2017/10/AHDrywallSheetrock-478x1024.jpg)
![We found a free vanity on Facebook Marketplace and refinished it on the cheap. Find out about this and other projects in our homebuilding progress report here.](https://accidentalhippies.com/wp-content/uploads/2017/10/AHFreeVanityProgress-478x1024.jpg)
![Tiling a wall is an easy DIY project. We completed this and other projects as part of our home build this month. Check out our progress reports for more!](https://accidentalhippies.com/wp-content/uploads/2017/11/AHTileWall-478x1024.jpg)
![We took this old clawfoot tub and redid it ourselves for less than...](https://accidentalhippies.com/wp-content/uploads/2018/01/AHTubFeat.jpg)
![We took this old clawfoot tub and redid it ourselves for less than...](https://accidentalhippies.com/wp-content/uploads/2017/11/IMG_7101-1024x768.jpg)
![We took this old clawfoot tub and redid it ourselves for less than...](https://accidentalhippies.com/wp-content/uploads/2017/11/IMG_7105-e1516212779450-768x1024.jpg)
![We took this old clawfoot tub and redid it ourselves for less than...](https://accidentalhippies.com/wp-content/uploads/2017/11/IMG_7089-1024x768.jpg)
![We built our own cordwood home from scratch! In this progress update, see what we did to finalize things before we officially moved in. Project overviews, details, and more.](https://accidentalhippies.com/wp-content/uploads/2018/01/AHNovDecFeat.jpg)
![We built an easy and inexpensive workbench for our kitchen instead of using base cabinets.](https://accidentalhippies.com/wp-content/uploads/2018/01/AHKitchenWorkbenchPreview-452x1024.jpg)
![](https://accidentalhippies.com/wp-content/uploads/2018/01/IMG_7581-1024x1024.jpg)
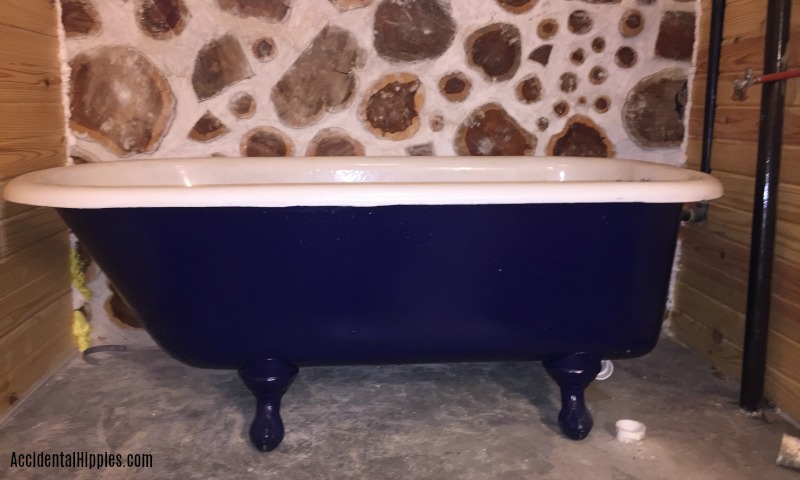
Interior Finished Pictures
![Our cordwood house uses some passive solar principles in its design. How well does it help us keep warm and save power off the grid during the winter?](https://i1.wp.com/accidentalhippies.com/wp-content/uploads/2018/02/IMG_8315-e1519099051968.jpg?ssl=1)
![](https://i2.wp.com/accidentalhippies.com/wp-content/uploads/2018/05/AHKitchenTall.jpg?ssl=1)
![](https://i2.wp.com/accidentalhippies.com/wp-content/uploads/2018/05/AHOpenShelvesFeat.jpg?ssl=1)
![](https://i2.wp.com/accidentalhippies.com/wp-content/uploads/2018/06/IMG_8480-e1536437120198.jpg?ssl=1)
![](https://i2.wp.com/accidentalhippies.com/wp-content/uploads/2018/06/IMG_8451.jpg?ssl=1)
![The living room in our cordwood house. Find out more about how we built it here. #cordwood #homesteading #offgrid](https://i1.wp.com/accidentalhippies.com/wp-content/uploads/2018/09/IMG_9547-e1536436873384.jpg?ssl=1)
![Inside the living room of our cordwood home. Its still a work in progress! Find out the answers to the most common questions we hear in this post #alternativebuilding #naturalbuilding #cordwoodmasonry](https://i2.wp.com/accidentalhippies.com/wp-content/uploads/2018/09/IMG_9524-e1536455277476.jpg?ssl=1)
![The kitchen in our cordwood house. Find out how we built it with our own hands here. #cordwood #homesteading #offgrid](https://i0.wp.com/accidentalhippies.com/wp-content/uploads/2018/09/IMG_9548-e1536436847274.jpg?ssl=1)
![](https://i0.wp.com/accidentalhippies.com/wp-content/uploads/2018/11/AHKitchenBeforeAfter.jpg?ssl=1)
![Chicology roller shades in the west windows of our kitchen lessen the harsh evening sun. #cordwoodhouse #cordwoodkitchen #rollershades #chicology](https://i2.wp.com/accidentalhippies.com/wp-content/uploads/2018/12/Cordwood-Kitchen-e1545355226705.jpg?ssl=1)
![Real life shot of the master bedroom in our cordwood house. Here's how we live off the grid.](https://i2.wp.com/accidentalhippies.com/wp-content/uploads/2019/03/IMG_9991-e1554086614171.jpg?ssl=1)
![](https://i1.wp.com/accidentalhippies.com/wp-content/uploads/2018/09/C3761721-D47F-4102-9BA2-B53657742BBB-e1589550089631.jpg?ssl=1)
![](https://i2.wp.com/accidentalhippies.com/wp-content/uploads/2018/09/EC19636A-29B2-43D0-82BB-68E2B7A17442-e1589550068840.jpg?ssl=1)
![](https://i0.wp.com/accidentalhippies.com/wp-content/uploads/2018/09/9BC50EA7-2B18-4CAD-9103-95BA9BB1E62B-e1589550156222.jpg?ssl=1)
![](https://i1.wp.com/accidentalhippies.com/wp-content/uploads/2018/09/IMG_0924-e1589549751350.jpg?ssl=1)
![](https://i2.wp.com/accidentalhippies.com/wp-content/uploads/2018/09/IMG_0923-e1589549648659.jpg?ssl=1)
![](https://i1.wp.com/accidentalhippies.com/wp-content/uploads/2021/08/IMG_2384-scaled-e1629663595718.jpg?ssl=1)
Ready to learn more? Join our email list!
I connect with our blog readers a few times a month with new posts, information, updates, and more!
You can also join us for more fun on Pinterest, Facebook, and Instagram! Thanks for reading!