Disclosure: I sometimes earn products or commissions from affiliate links or partnerships on my blog. I only recommend products and services I trust to serve you. Learn more.
Cordwood Masonry is great for DIY builders but requires knowledge and practice to do successfully. Here we’ll provide you the valuable resources we used to get our building off the ground and show you some tricks we learned along the way.
What is Cordwood Masonry?
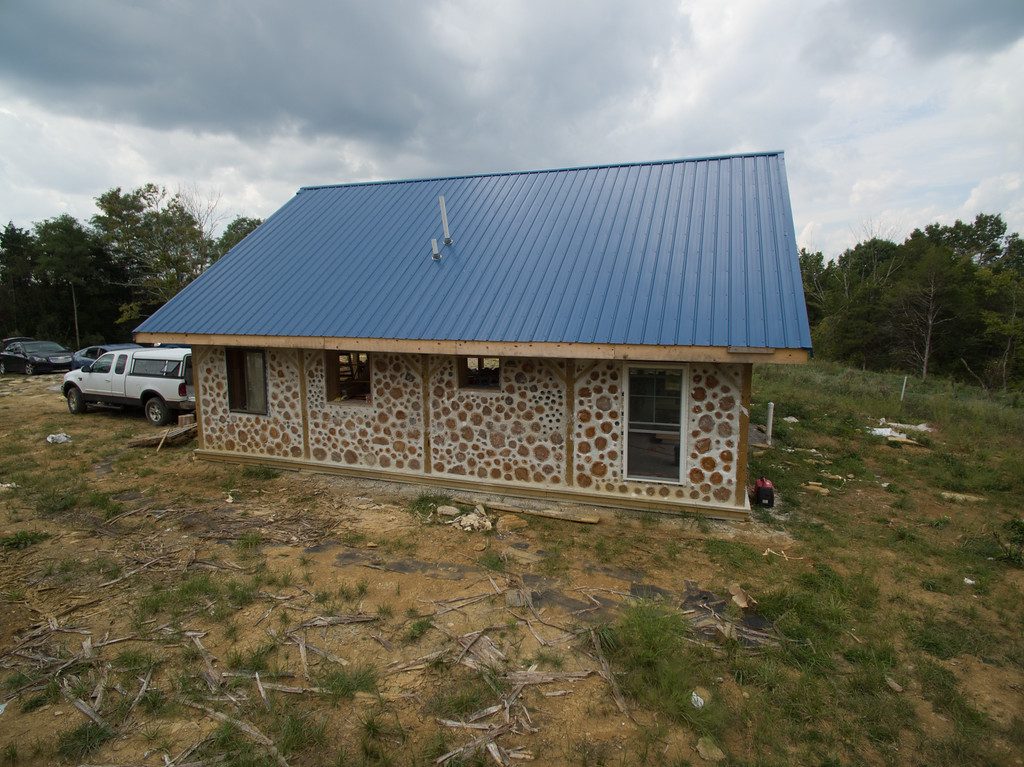
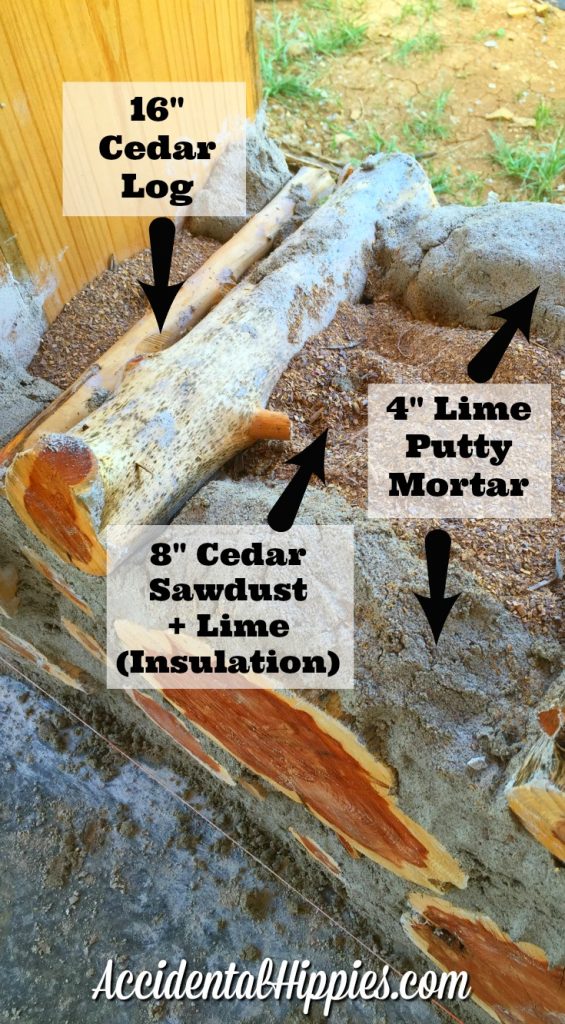
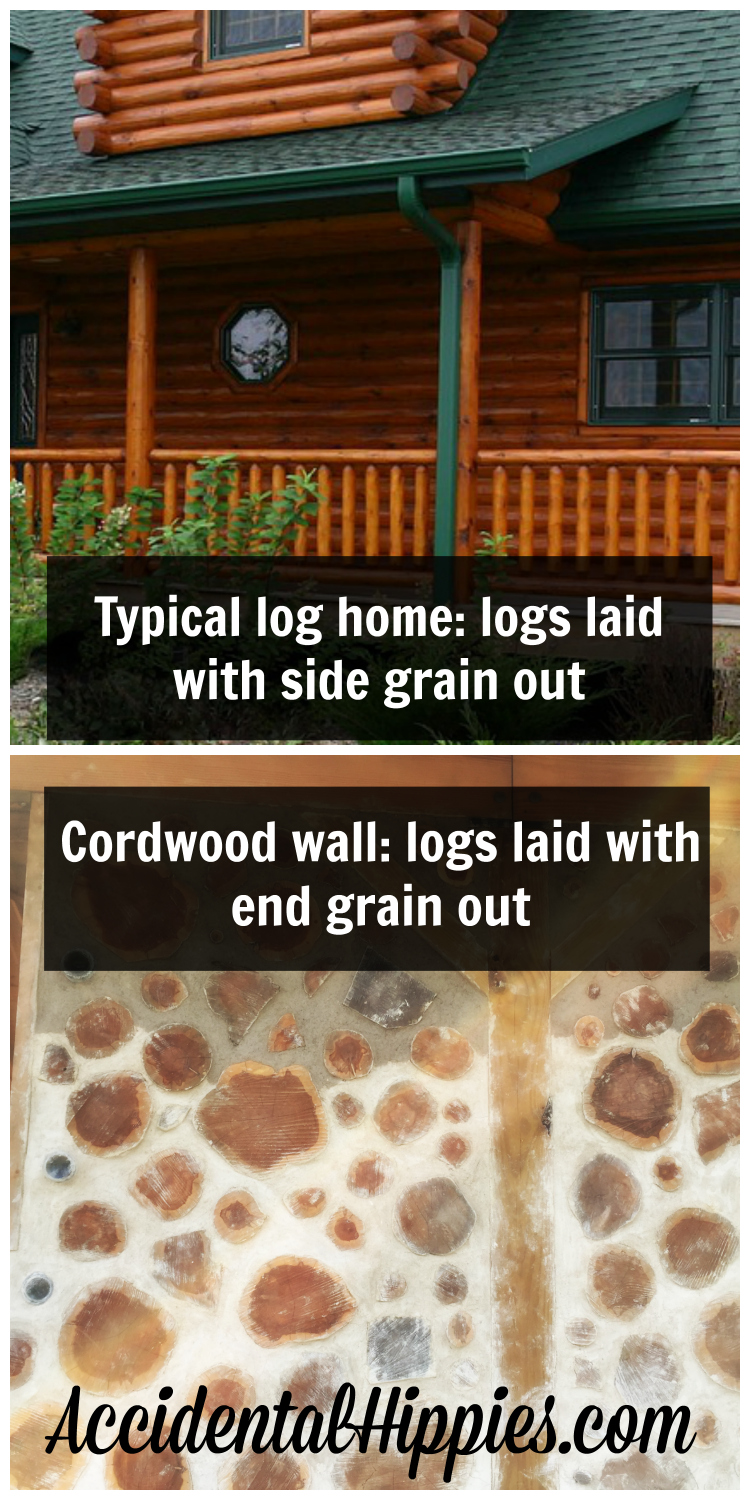
Cordwood Masonry is where logs are cut to the same desired length and laid with the grain facing out instead of running lengthwise like traditional log homes. Logs lay in a bed of mortar with insulation in the middle.
How is this different from standard log construction?
In standard log construction, the side grain runs to the outside. In cordwood construction, the end grain is exposed instead. For example:
What are the basic building blocks of a cordwood wall?
LOGS: Trees are cut down, peeled, and cut to uniform lengths to match your desired wall thickness (ours are 16″). Ideal logs come from softwood trees, though hardwood can be used if it is the only thing available.
INSULATION: Typical insulation for cordwood masonry is sawdust mixed with dry masonry lime. The lime prevents decay/pests and using a softwood sawdust (typically cedar, though any softwood will do) provides an effective and green insulation.
MORTAR: There are several mortar mix recipes out there. It can be made with Portland cement, but we chose to make ours out of LIME PUTTY instead to keep it simple.
Our mortar recipe is simply 2.5 parts sand : 1 part hydrated type-S masonry lime.
Why We Chose Lime Putty Mortar
Lime putty has three advantages for us:
- The mix recipe is simple.
- It can “self heal” small cracks while Portland mix cannot.
- It takes much longer to set, which allows us more time to smooth (aka “point”) the mortar and fix any mistakes in the wall. This is good for those days when our schedule doesn’t allow us time to point right away. Even on hot, dry days we can come back the next morning and still be able to point and smooth the mortar without problems.
- The mortar is a brighter, whiter color than a Portland mix, which is more grayish.
You can learn all about mortar here!
Logs in mortar? Won’t it rot?
No! By its very nature cordwood masonry is rot resistant. See this very detailed post about how to prevent rot from happening in a cordwood wall.
[Very] Basic Steps to Building a Wall
- Run two lines of mortar along the edges of your wall.
- Fill in the middle with your insulation.
- Place logs on top of the lines of mortar.
- Run more mortar along the tops of the new logs and fill the middle with more insulation.
- Rinse and repeat until you reach the top.
- As the mortar dries, smooth the lumps out with a smooth knife.
Basic Tools
Your needs may vary, but you’ll get the most mileage out of having:
- A good wheelbarrow
- Shovels and/or scoops (for mixing and measuring ingredients for mortar and insulation)
- Lots of buckets (for mixing, storing, and distributing lime, sawdust, etc.)
- Non-toothed knives that have been bent at the end for pointing/smoothing the mortar (like a butter knife or spreader – we got ours at an antique mall)
- Wood scraper (for cleaning the ends of the logs – we have two of the ones pictured below)

- Soap, sponges/scrubbies, and access to water for washing hands and tools
Nice to Have
These are more “luxury” than requirements, but we have found that for us to save time (especially in the run up to school starting) these have been a Godsend:
A concrete mixer – most cordwood experts will tell you that you don’t need one, and it’s true, you don’t! We mixed the first panel’s worth of mortar by hand with a garden hoe in our wheelbarrow…and it took forever. So long, that it took three days just to complete the panel. Maybe it was our inexperience, maybe it was our impatience…whatever it was, it worked best for us to plunk down some cash on a mixer similar to this one. It’s an electric mixer, so we run it with our generator. We can be working with one batch of mortar while mixing another one so we can keep the wall going continuously.
 Metal Pans – This is the biggest thing along with the mixer that has sped us up immensely when setting mortar. The idea is to load up your pan with mortar so that you can quickly and easily grab handfuls to lay on the logs without having to constantly go back and forth to the wheelbarrow.
We’re using paint trays since they are what we had access to, but cake pans were what Mark was originally after.Especially when we were at the top of the wall, we’d have to grab some mortar, climb the ladder, set the mortar, climb back down, go back to the wheelbarrow, grab another handful, etc. etc.
Having mortar with me in a pan means I can grab and go. Even if the wheelbarrow is only a couple of feet away…do yourself a favor and use a pan. Even a sturdy bowl could work!
Tips and Tricks for First-Time Cordwood Builders
Tip 1: Go to a workshop!
Last year, Mark got a chance to go to Rob and Jaki Roy’s cordwood masonry workshop to learn the finer points of cordwood building from true experts. If you have an opportunity to go or can save up, it’s worth the investment. If he and I were just going off of what we had read, we’d probably still be out on the property fighting over how to start the first course of logs! Nothing beats getting real life advice from seasoned experts while working on an actual project.
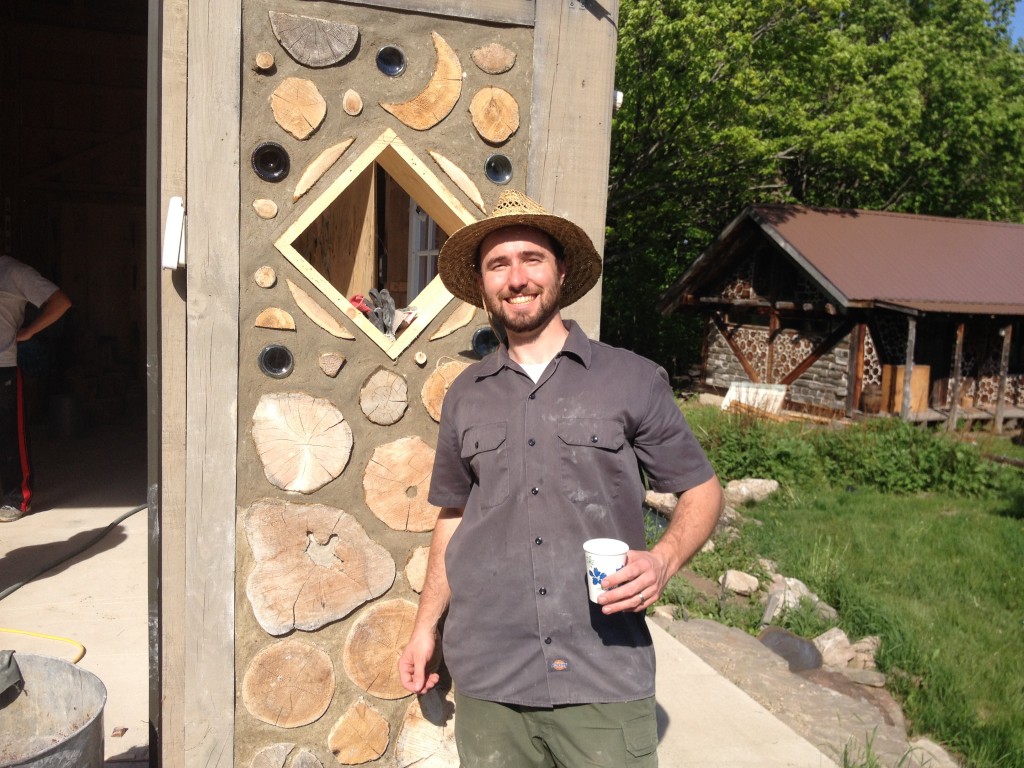
I’m still pretty sad that I couldn’t go, but the school where I teach had graduation that weekend, so Mark took lots of notes and pictures for me. He got a chance to really get his hands dirty and learn the finer points of building with cordwood, but what about me? Until now, I’ve only ever gotten to read about it in books!
Tip 2: Read Books – These are the absolute best to start with (and keep on the building site):
“Essential Cordwood Building”, “Cordwood Building – 2nd ed.” and “Cordwood and the Code” – Rob Roy
“Cordwood Construction Best Practices” – Richard Flatau
“Building Green” It is worth the price of the books alone just to ogle all of the gorgeous photos inside!
Tip 3: Practice!
One of the best ways to practice the art of cordwood building is to build a test wall or small project like a chicken coop, playhouse, or storage shed. You might even join someone on their cordwood build if you know someone. But what if you are unable to do this?
Our solution: Build test “columns” that will be used as the butt ends for larger walls.
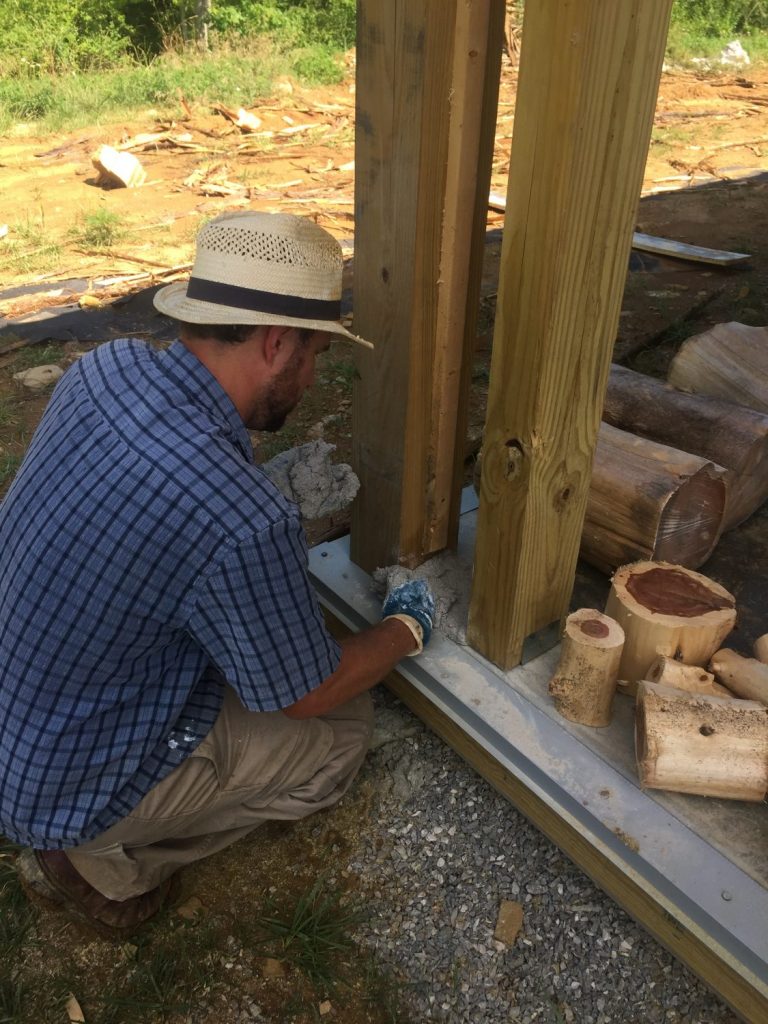
Our main house walls are 16 inches thick. However, the posts in our house frame are only 6 inches wide, which means we have a 10 inch difference where the cordwood walls meet the posts. Mark mounted posts made of some extra 4×6 lumber we had lying around, and left a 6 inch gap in between the main post and the “fake” 4×6 post.
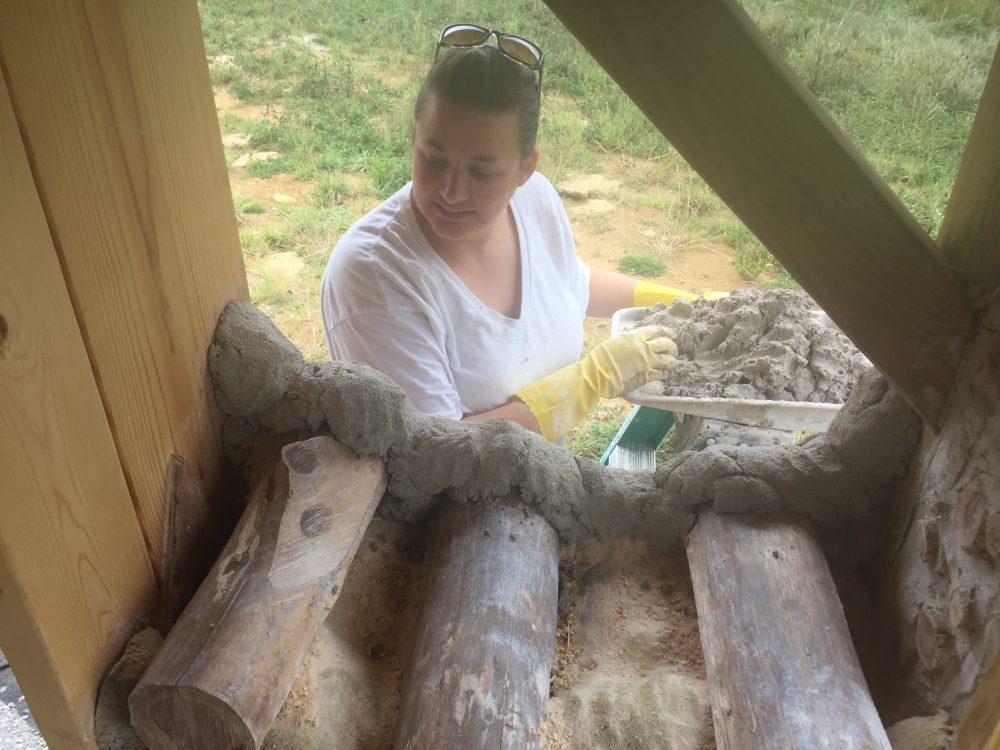
This created a 6×16 inch column that we then filled with our test cordwood. Below, you see the our actual structural 6×6 post on the left and the fake 4×6 post on the right. Mark is starting the first course of mortar at the bottom.
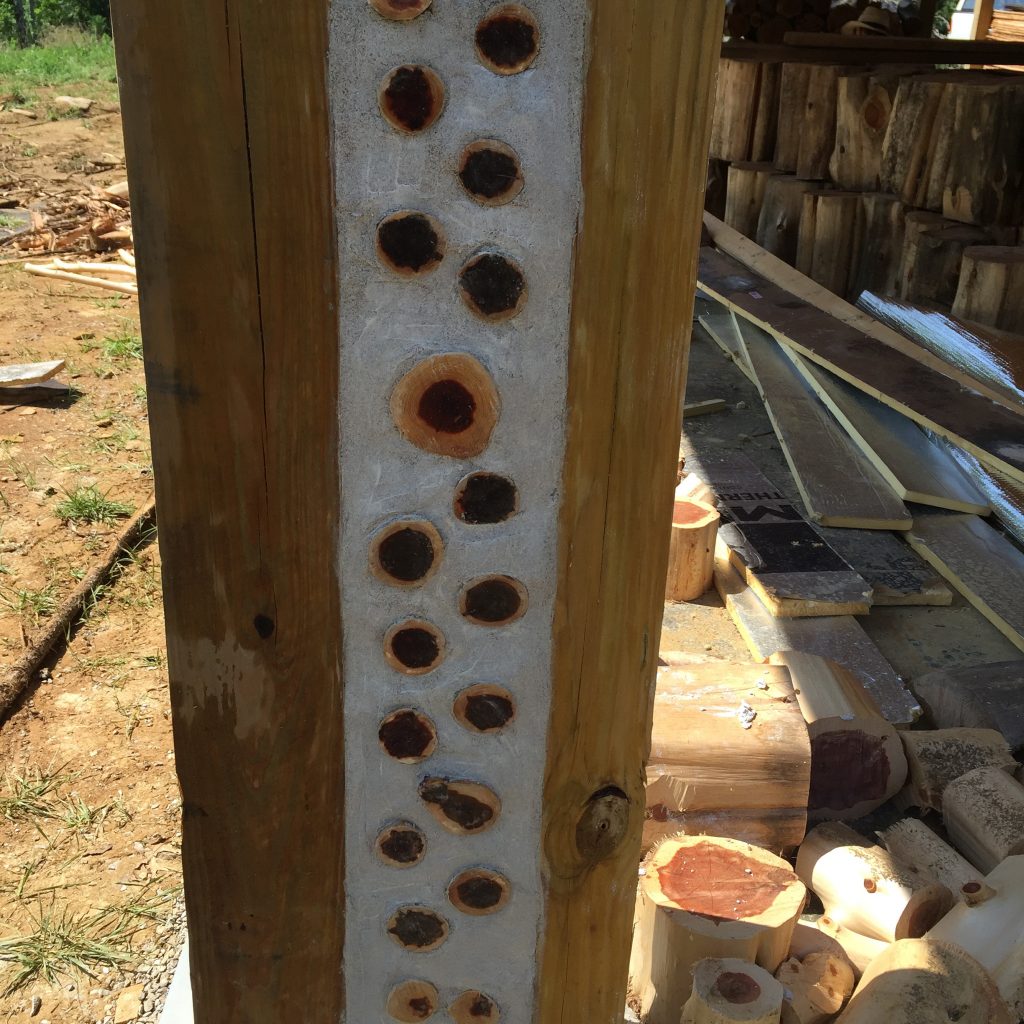
We then filled with small 6-inch logs up the height of the column, making sure to offset logs as we went. It is important to offset the logs to avoid having straight lines of mortar because straight lines of mortar weaken the structure.
Tip 4: Make it a team effort!
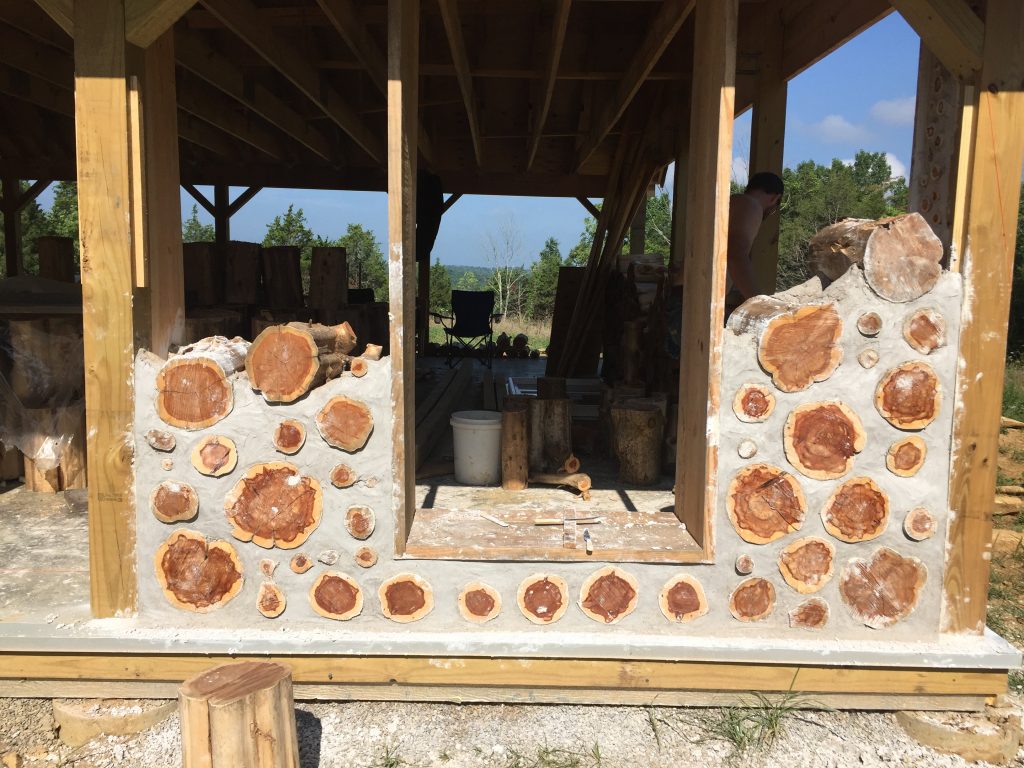
Cordwood building is not a quick process, unlike traditional stud framing. Normally, you’d just slap some 2×6’s together and add insulation and sheathing of some kind, but that’s not the case here. I wish we had an army working on these walls just so it would go faster, but that isn’t always practical.
With at least two people though, there’s always someone to be mixing/pointing mortar or pouring insulation while the other sets logs in the wall or something.
Ready to dive into more cordwood goodness?
Our Complete Cordwood Project Overview and Specs
Read all of our building progress reports here
Cordwood Building FAQ: All About the Basics
How to Prep Cedar Trees for Cordwood Building
How to Prevent Rot In Your Cordwood Walls
Cordwood Foundations: Options for Building (and how we built ours)
How Much Can It Cost to Build a Cordwood Home From Scratch?
Cordwood Homes In The Winter: How Do They Compare to Regular Construction?
Ultimate Guide to Using Bottles in Cordwood Walls
Our Cordwood Building Photo Gallery
Subscribe below to get a free PDF detailing everything that went into building our cordwood house from scratch, plus get access to our free Members-Only Resource Library:
And of course, be sure to join the party on Facebook, Twitter, Instagram, and Pinterest! We’d love to have you join us.
Thanks for reading!
This is so interesting – I’d never seen this before, but it’s so distinctive and interesting to look at!
I agree! My husband was originally the one drawn to doing cordwood. I wasn’t always onboard with the aesthetics, but over the years it’s definitely grown on me. Now I’m absolutely in love with some of the tiny details we’ve built into our home!
I’ve sen corwood some months ago. Now I want to build a wall in my garden based on corwood.
They told me that the mortar will destroy the wood very quick?
Maybe you need special mortar for working with wood?
I actually have an entire post dedicated to preventing rot here: https://accidentalhippies.com/2017/01/08/cordwood-rot/
If you have it on, in, or close to the ground then yes, you are likely to experience rot. The idea with cordwood is to keep it dry by keeping it under roof and elevating it away from the ground to prevent it from getting splashed by water sitting on the ground. I personally think doing a cordwood garden wall would be more trouble than it is worth, but it has been done before. The best advice I can give would be to do a “foundation” for the wall in concrete block or stone to get it off the ground, and then top the wall with something that has a bit of an overhang to prevent water from just dripping down it.
cordwood homes look like the perfect structures to run around naked in!
lol cordwood homes are perfect for whatever floats your boat. 😀
Love your blog!! We are looking to build a cordwood house! We are trying to gather info on the mortar mix. Can you give more detailed information on what you guys used for the mortar? Thanks!
Yes! We used a lime putty mortar. The basic recipe consists of 5 parts fine masonry sand to 2 parts lime putty. To create the lime putty we bought bags of Type-S Masonry Lime in 50-lb bags from Menards. It comes in a powdered form so to make a putty you add water until it makes a sort of cream cheese consistency. We mixed ours in our concrete mixer and then portioned it out into 10-gallon buckets with lids to keep them from drying out. To mix, we measured the putty out with a feed scoop and dumped it into the concrete mixer along with the masonry sand. I really need to do a post just about the mortar!
I know this might defeat the purpose of a cordwood wall but would it be possible to render the wall to finish? I am looking at this idea more to save on the removal of so much excess trees that in my location would more than likely end up in landfill.
I’m not entirely sure what you mean by “render the wall to finish”. Can you explain a bit of what you mean?
MIght be a term used here in Australia and not in America. Rendering is basically adding a concrete or plaster based surface over the top of normally a brick wall.
Quick reference:
https://www.bunnings.com.au/diy-advice/home-improvement/walls/how-to-render
Ahhh gotcha. It isn’t a terribly common technique in my neck of the woods but it makes sense. Several people have had success plastering over cordwood walls, though you’re right…it does kind of defeat the purpose of the cordwood aesthetically. Fortunately, its other properties, like thermal mass, aren’t negated as a result.
We have the post and beam bones of a shed all ready to go and plan to lay in the cordwood masonry in September as our cedar logs have been drying all summer long. We are in Northern Wisconsin, and I’m wondering about cure time for the lime putty mortar. I’ve seen references that suggest 10 days to cure and others that suggest it may need 4 weeks. What are your thoughts?
Curing to the touch is about 2 days, but curing all the way through is about 4 weeks depending on the weather. It cures much slower in the cooler weather. About how many square feet of wall do you have to cordwood? That’s the biggest thing. I imagine you’ll get to cooler weather sooner than we do in KY, which is my biggest concern. It takes way longer to lay cordwood than anyone actually thinks it will, and even for us it started to get too cold towards the end of our cordwooding in late October. We had some minor damage from frosts and light freezes but the lime putty mortar actually self healed all of those, which is pretty cool. I wouldn’t want to chance it again though. If it’s just a small shed you might be able to finish it in a few weeks to a month or so IF you have a lot of time to devote to it. We had to do the cordwood around our school schedules since we were both teaching at the time. I have more info about it on our project page here:
It’s a small shed with lots of windows and a door and beams breaking up the bigger sections of wall. By my math we have approximately 165 square feet of wall that needs the cordwood masonry (4 inches thick and uninsulated so we don’t have to mortar both the inside and outside). I’m leaning toward using Rob Roy’s mix of sand, lime, soaked sawdust and Portland cement just because it cures faster, since the first freeze of the year can come early up here in way North Wisconsin. But I like that the lime putty mortar will self-heal minor cracks.
That’s such a small square footage amount that you might be fine either way. As long as you can have a good week or two of warm, dry weather your mortar should set fine either way. Unless it starts dipping below freezing before the beginning of October you should be good. Even with learning the ropes of cordwood building you should be able to get that much wall up in a month or less. Of course, everyone varies on that, but that’s what I’d estimate.
Can I use hardwoods for my cordwood house? It’s all I can find up here in Northern NewYork. No one has pine because it is not good for wood stoves. I’ve looked all over but it’s all Maple, Cherry and Ash mixed together. What do you suggest so that I can make the shrinkage and expansion less?
Yes, though it isn’t generally recommended. If you have to, the general advice is to not dry it quite as low as you would a softwood (which we dry to about 12-16%), and to build a very generous overhang beyond the minimum 24-inch recommendation. I’d go for a wrap-around porch on all sides if I had to use hardwoods. And personally, if all I had were hardwoods I would reconsider using cordwood as a method. You might see if you can find any log home builders or furniture makers who may have discards for cheap or free. I’ve heard of people getting wood already peeled and cut from such places that weren’t suitable for their purposes but that are perfect for cordwood. It’s worth a shot! Good luck!
I love the idea of using cedar, and see that it seems to have the best rating for not shrinking/expanding as much, a good R factor for insulation purposes, and being rot resistant. Plus it’s so pretty. As much as I love the smell of cedar though, I’m wondering if you find it overwhelming in the house house?
Also, it looks like (in some of the pictures) that there’s large sections of putty between the wood pieces. What would happen if one were to space the wood a little closer together? Is there a minimum or maximum amount of space recommended between pieces of wood?
Thanks for this post, it’s most helpful!!
Thanks for the comment!
First, on the cedar smell: we actually don’t notice it at all. You can only smell it if you put your face literally up against a log, more so after a good rain than when it’s dry. If anything, we smell our white pine tongue-and-groove paneling in the house and not the cedar. Not what I expected at all!
Second, the amount of putty is sort of and aesthetic choice but also practical. You don’t want your logs to be TOO close together because you don’t want any opportunities for logs to touch. Logs touching will invite rot. With cordwood, you can have larger mortar joints and it isn’t really a big deal. Most people like a good 1-2″ mortar joint between logs. Most of ours fall in this range and we find that to be the most aesthetically pleasing, but larger joints juxtaposed to larger logs also works well. It’s all about proportion really.
Hope that helps!