Disclosure: I sometimes earn products or commissions from affiliate links or partnerships on my blog. I only recommend products and services I trust to serve you. Learn more.
From 2017 through the first half of 2020 we had a modest 1.14-kilowatt off-grid solar system. We had six 190-watt panels, a single Morningstar charge controller, and a 4000-watt MagnaSine inverter feeding 500 aH worth of lead-acid AGM batteries.
Through great providence and the generosity of some friends of the blog, we were able to add NINE new solar panels and two new Schneider charge controllers to the mix.
To accommodate all of this, we decided to build a separate solar shed to keep all of the components out of the house.
And of course, we chose to build with cordwood again!
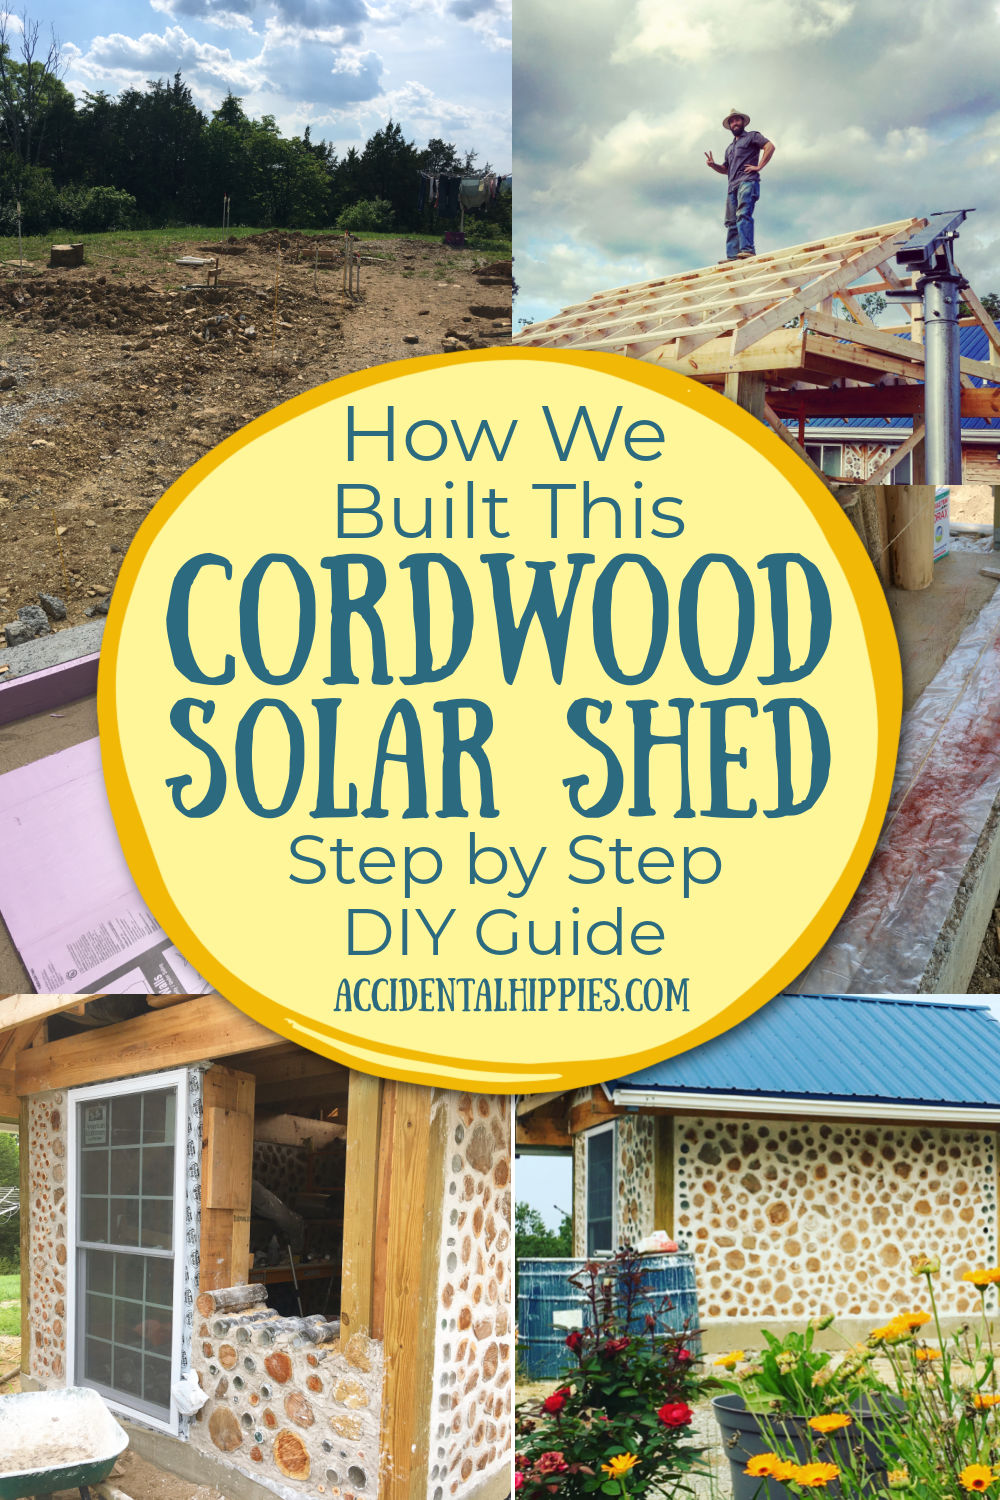
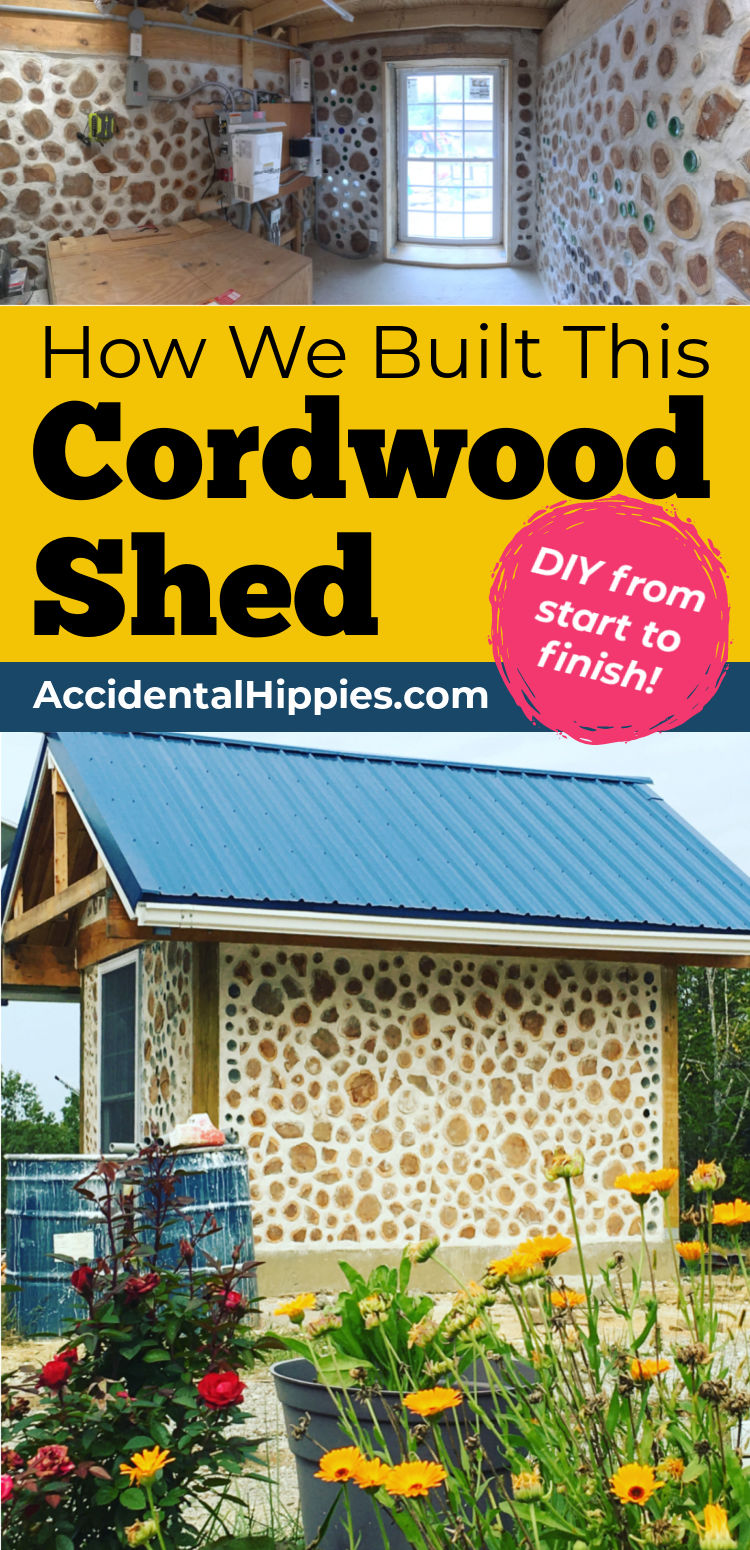
This is how we built our cordwood solar shed from start to finish.
How We Built Our Cordwood Shed
Step 1: Planning
Whether you’re building something small like a shed or something big like an entire house, the success of your project depends on how well you plan it.
First, we thought about what we really wanted to build and asked ourselves:
- What size building will we need to comfortably house our battery bank, charge controllers, inverter, and other components?
- How much extra room should we allot for future component changes, like a bigger or differently shaped battery bank?
- In what ways can we “future proof” our design?
- In what ways can we improve on the design of our home to make this cordwood structure better?
- Can we build using dimensions that allow us to use standard sizes of common building materials with minimal cutting or special ordering?
Once we had a clear vision of what we wanted to build, we asked:
- Do we need permits? If so, what type?
- Do we need to inform our insurance company of our addition? Is this structure covered?
- How do we plan to pay for this? What is our budget?
- Where will we source our materials? What will we need and how much?
We found out that we didn’t need a building permit since it was under 200 square feet, but did need an electrical permit and inspection. Requirements vary by location, so be sure to check with your state/county/municipality to be extra sure of what you need.
We went through the entire process as laid out in The Owner-Builder Home Planner, minus the “homey” things like septic. This shed is purely for housing our electrical system and isn’t connected to anything else that runs our home.
Posts related to project planning:
Beginner’s Guide to Permits and Code for Owner-Builders
Insuring and Financing Your Home Build
9 Ways to Get Building Materials Cheap or Free
Step 2: Designing the Structure
Certain details from building our house easily carried over to our shed design. This includes things like code-required footer depths for our location, the thickness of cordwood wall we wanted to use, the specific lumber we would need and how to source it, or where to get specific materials like sawdust, Type-S masonry lime, or washed masonry sand.
My husband Mark spent a lot of time drawing out different ideas, making calculations, and figuring the strongest, most efficient ways to build. He also spent a lot of time researching specific codes we might need to heed in terms of how to set the ground wire in the foundation, depths of wire trenches, wire and conduit sizes, and more.
Step 3: Cordwood Prep
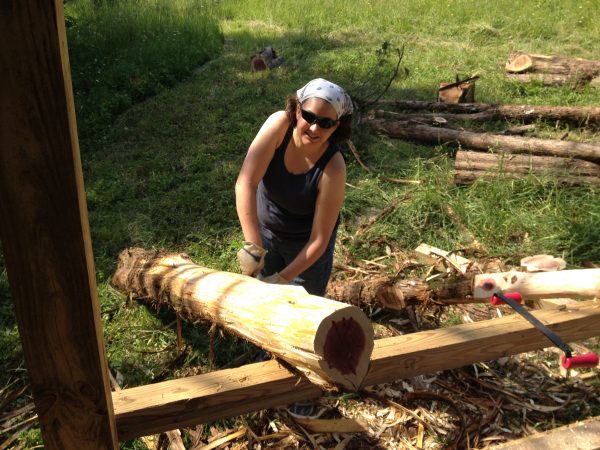
Since we already knew we wanted to build with cordwood, we began harvesting our Eastern red cedar trees and prepping them almost a year before we began building.
This process involves cutting down a tree, cutting off the limbs, peeling off the bark, cutting the logs into 16-inch lengths, and stacking them in the drying shed until they reach approximately 12% moisture content.
We only peel during certain parts of the year, when trees are easiest to work with. In our area, the bark is easiest to peel from about April/May to September.
Related: How to Prepare Logs for Cordwood Building
I show this process in detail in the videos inside our Building With Cordwood Masonry online course.
Step 4: Site Choice and Prep
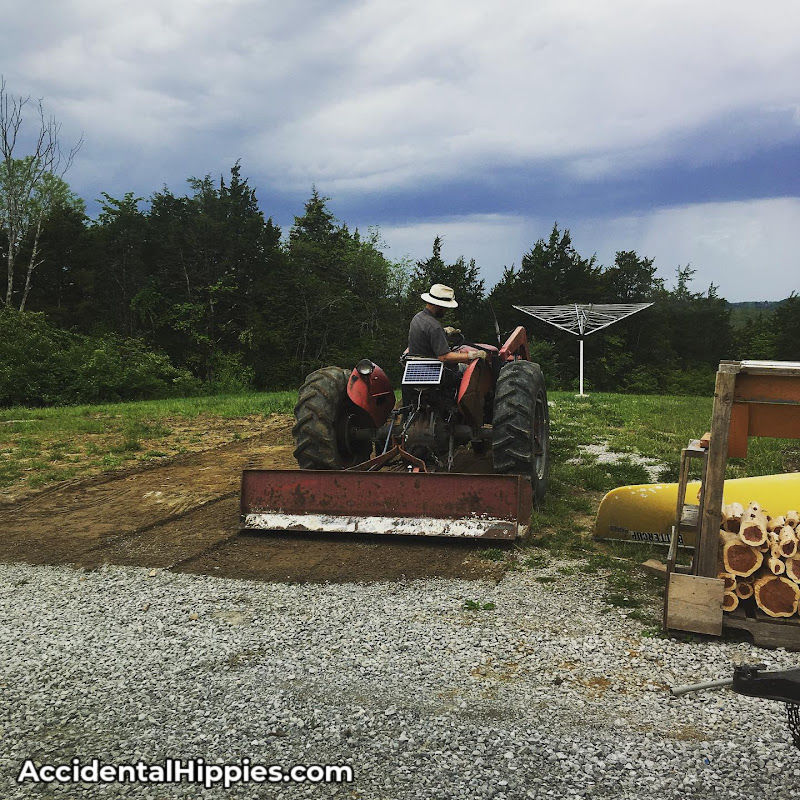
Choosing our building site was based on proximity to the house and the distance from the septic field. We wanted to have it on the western side of our clearing so the adjacent solar panels could capture our abundant afternoon and evening sun. This area is also relatively flat and easy to access. The proximity to the house is spacious enough to let us move our vehicles or tractor through, but close enough that our conduit trench wasn’t prohibitively long to dig.
This area is where our original sand pile from our first cordwood build was, so the area was already pretty well clear of grass and other plants. Scraping it flat with the grader blade was a fairly simple task.
Step 5: Foundation Work
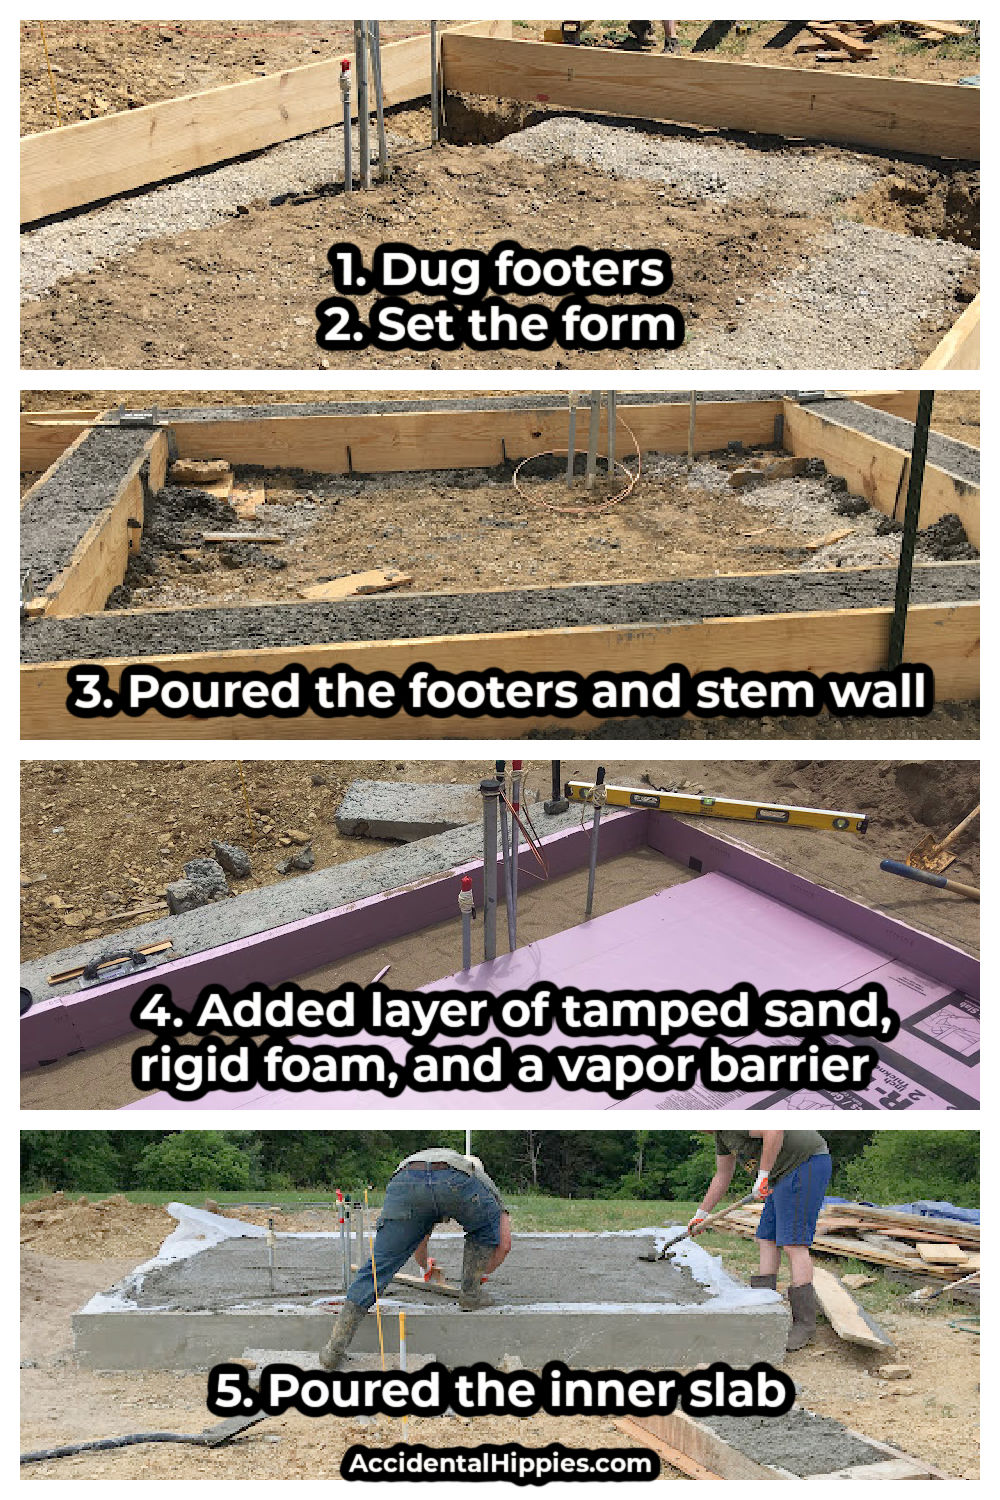
This process could be a post all to itself, so I’ll abbreviate what we did:
- Dug holes 36-inches deep for concrete footers, per our area’s code-required frost depth (check your local codes)
- Set forms for a stem wall and ran rebar through the initial structure.
- Poured concrete for the footers and stem wall.
- Set tamped sand, rigid foam board, and a vapor barrier.
- Poured a concrete slab within the stem wall structure.
You can see more information about foundations for cordwood buildings in this post.
Step 6: Framing
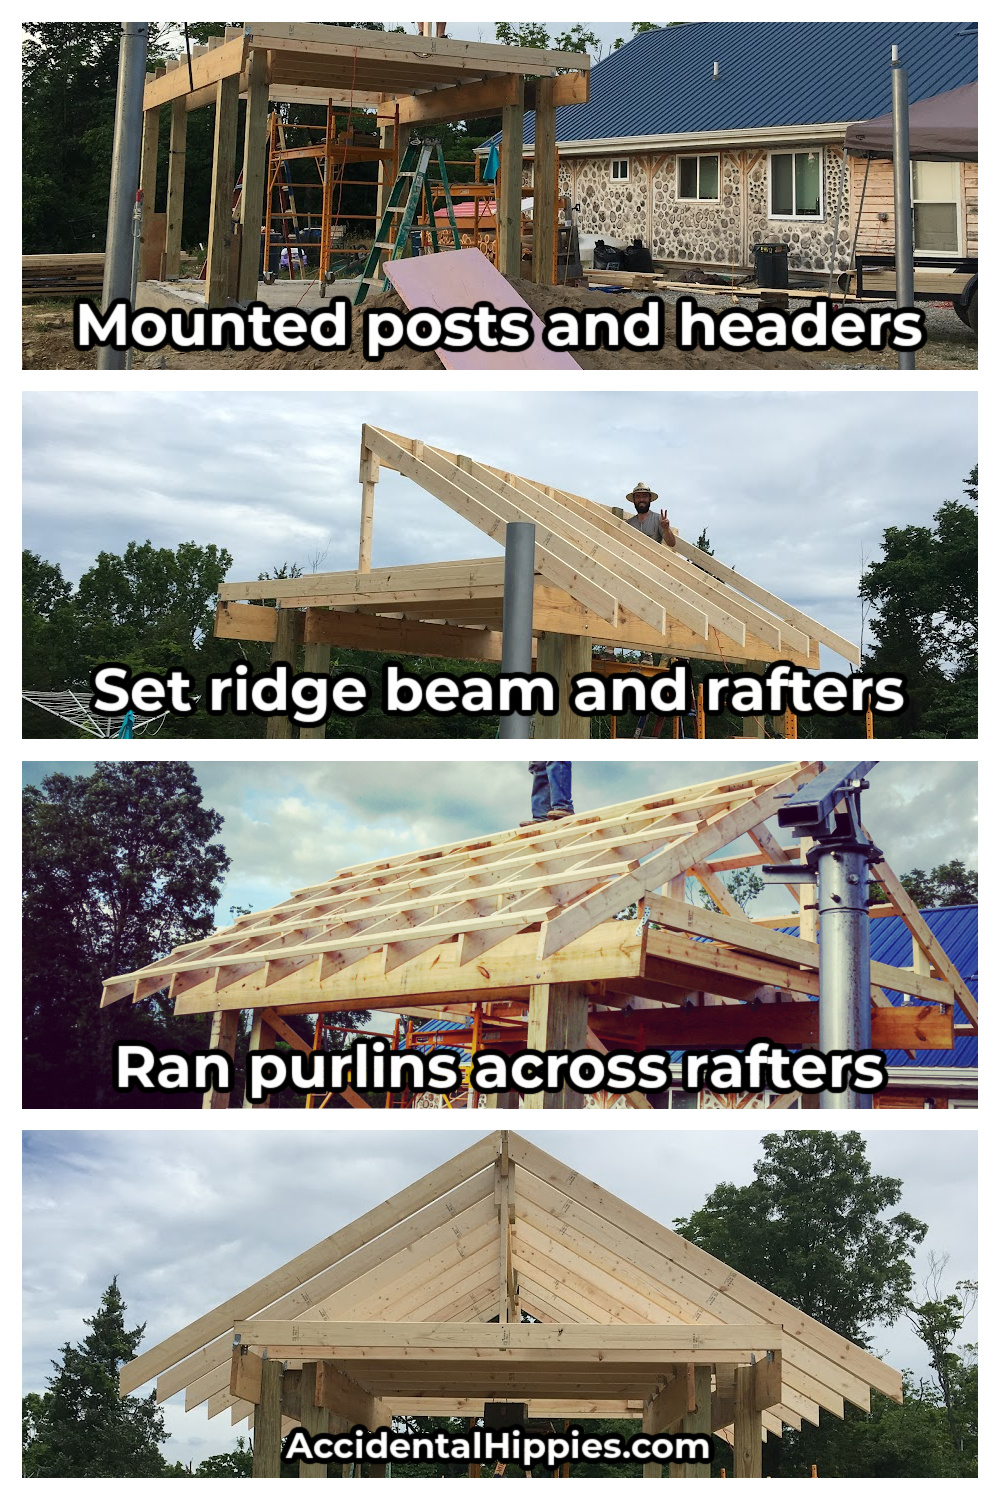
We used treated 6×6 posts, per code requirements, to frame our building. The same is true of our cordwood house. In both cases, the posts are set on top of the concrete using Simpson Strong-Tie fasteners. No wood is in contact with the ground, which is important for preventing rot.
Note: You can use home-milled posts for this, but check your area’s code requirements to see if your lumber must have a grade stamp. You can find more information about having your lumber grade stamped here.
Next, we installed the header boards, which are standard untreated 2×12’s, one on each side of the posts flanking the east and west walls. We used smaller 2×6’s on the boards/joists that span the two headers.
Next, we set the ridge beam and cut rafters. The rafters provide a 2-foot overhang on all sides to protect the cordwood from the elements. They are also set to give the roof an 8:12 pitch identical to the house. Not only will they match, but we also have additional storage space in the loft above.
Step 7: Insulation and Roofing
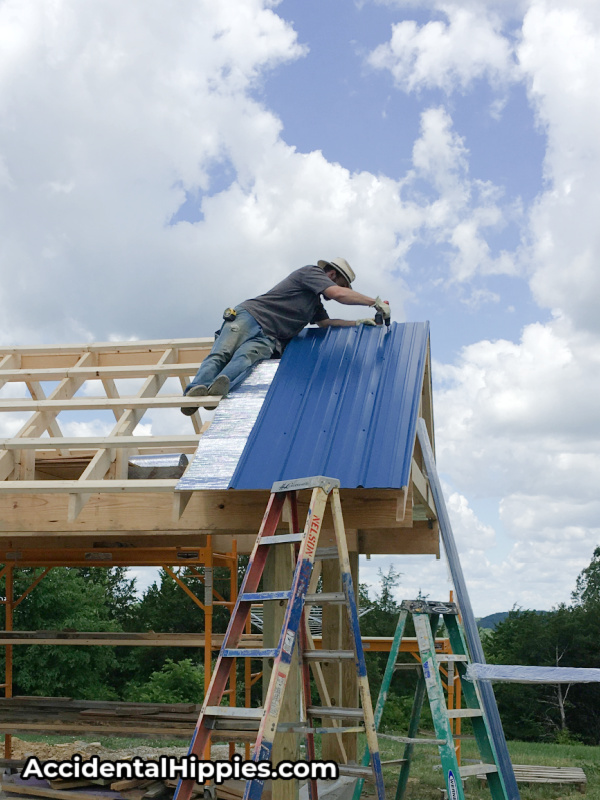
Next, we fastened a layer of “double bubble” insulation over the outside of the rafters/purlins and finished the roof off with the same blue metal that we used on our house. We cut the trim pieces and added gutters, which will eventually feed into our cistern, increasing our off-grid water capabilities.
Related: The Basics of Rainwater Harvesting
Step 8: Windows and doors
We installed the windows and doors BEFORE doing the cordwood for two reasons:
- It got them out of the way!
- It prevents the window/door frames from shifting as you build the cordwood. We experienced some shifting when we built our house because we didn’t have the windows situated. Even with bracing in the windows, we still got some shifting.
Step 9: CORDWOOD!
This is the most glamorous, fun, and also time-consuming part of the build. There are other posts on the blog about HOW specifically to build this way, so I encourage you to check those out to learn more about the method itself. For this post, I’m including several photos of the process, as well as how we improved on our original techniques and experimented with new ideas.
Tool and Resource Recommendations for Cordwood Masonry
You can also go much more in-depth with the method in our online Building With Cordwood Masonry course.
HERE WE GO:
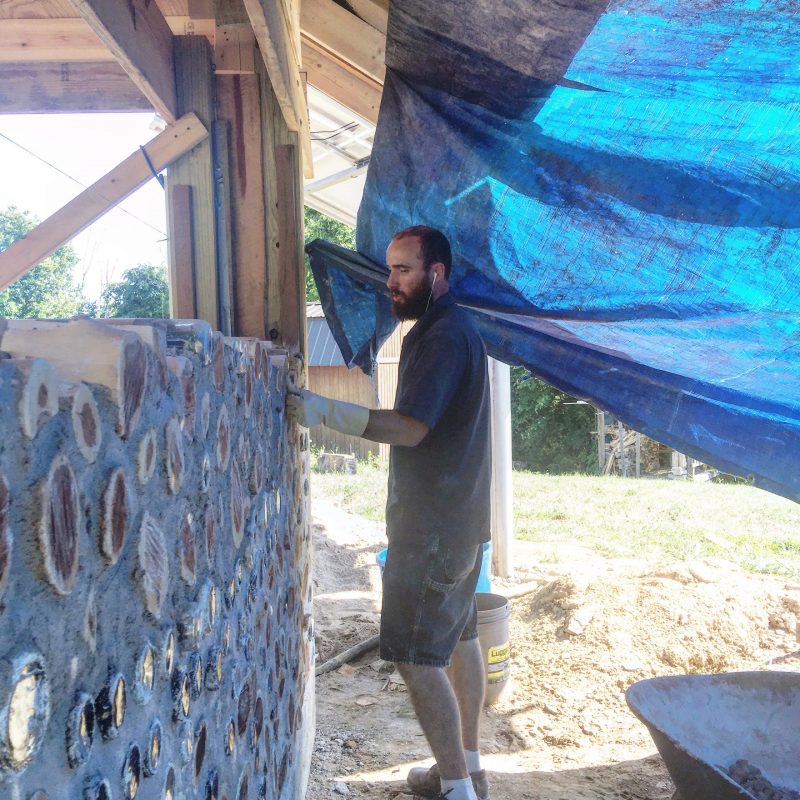
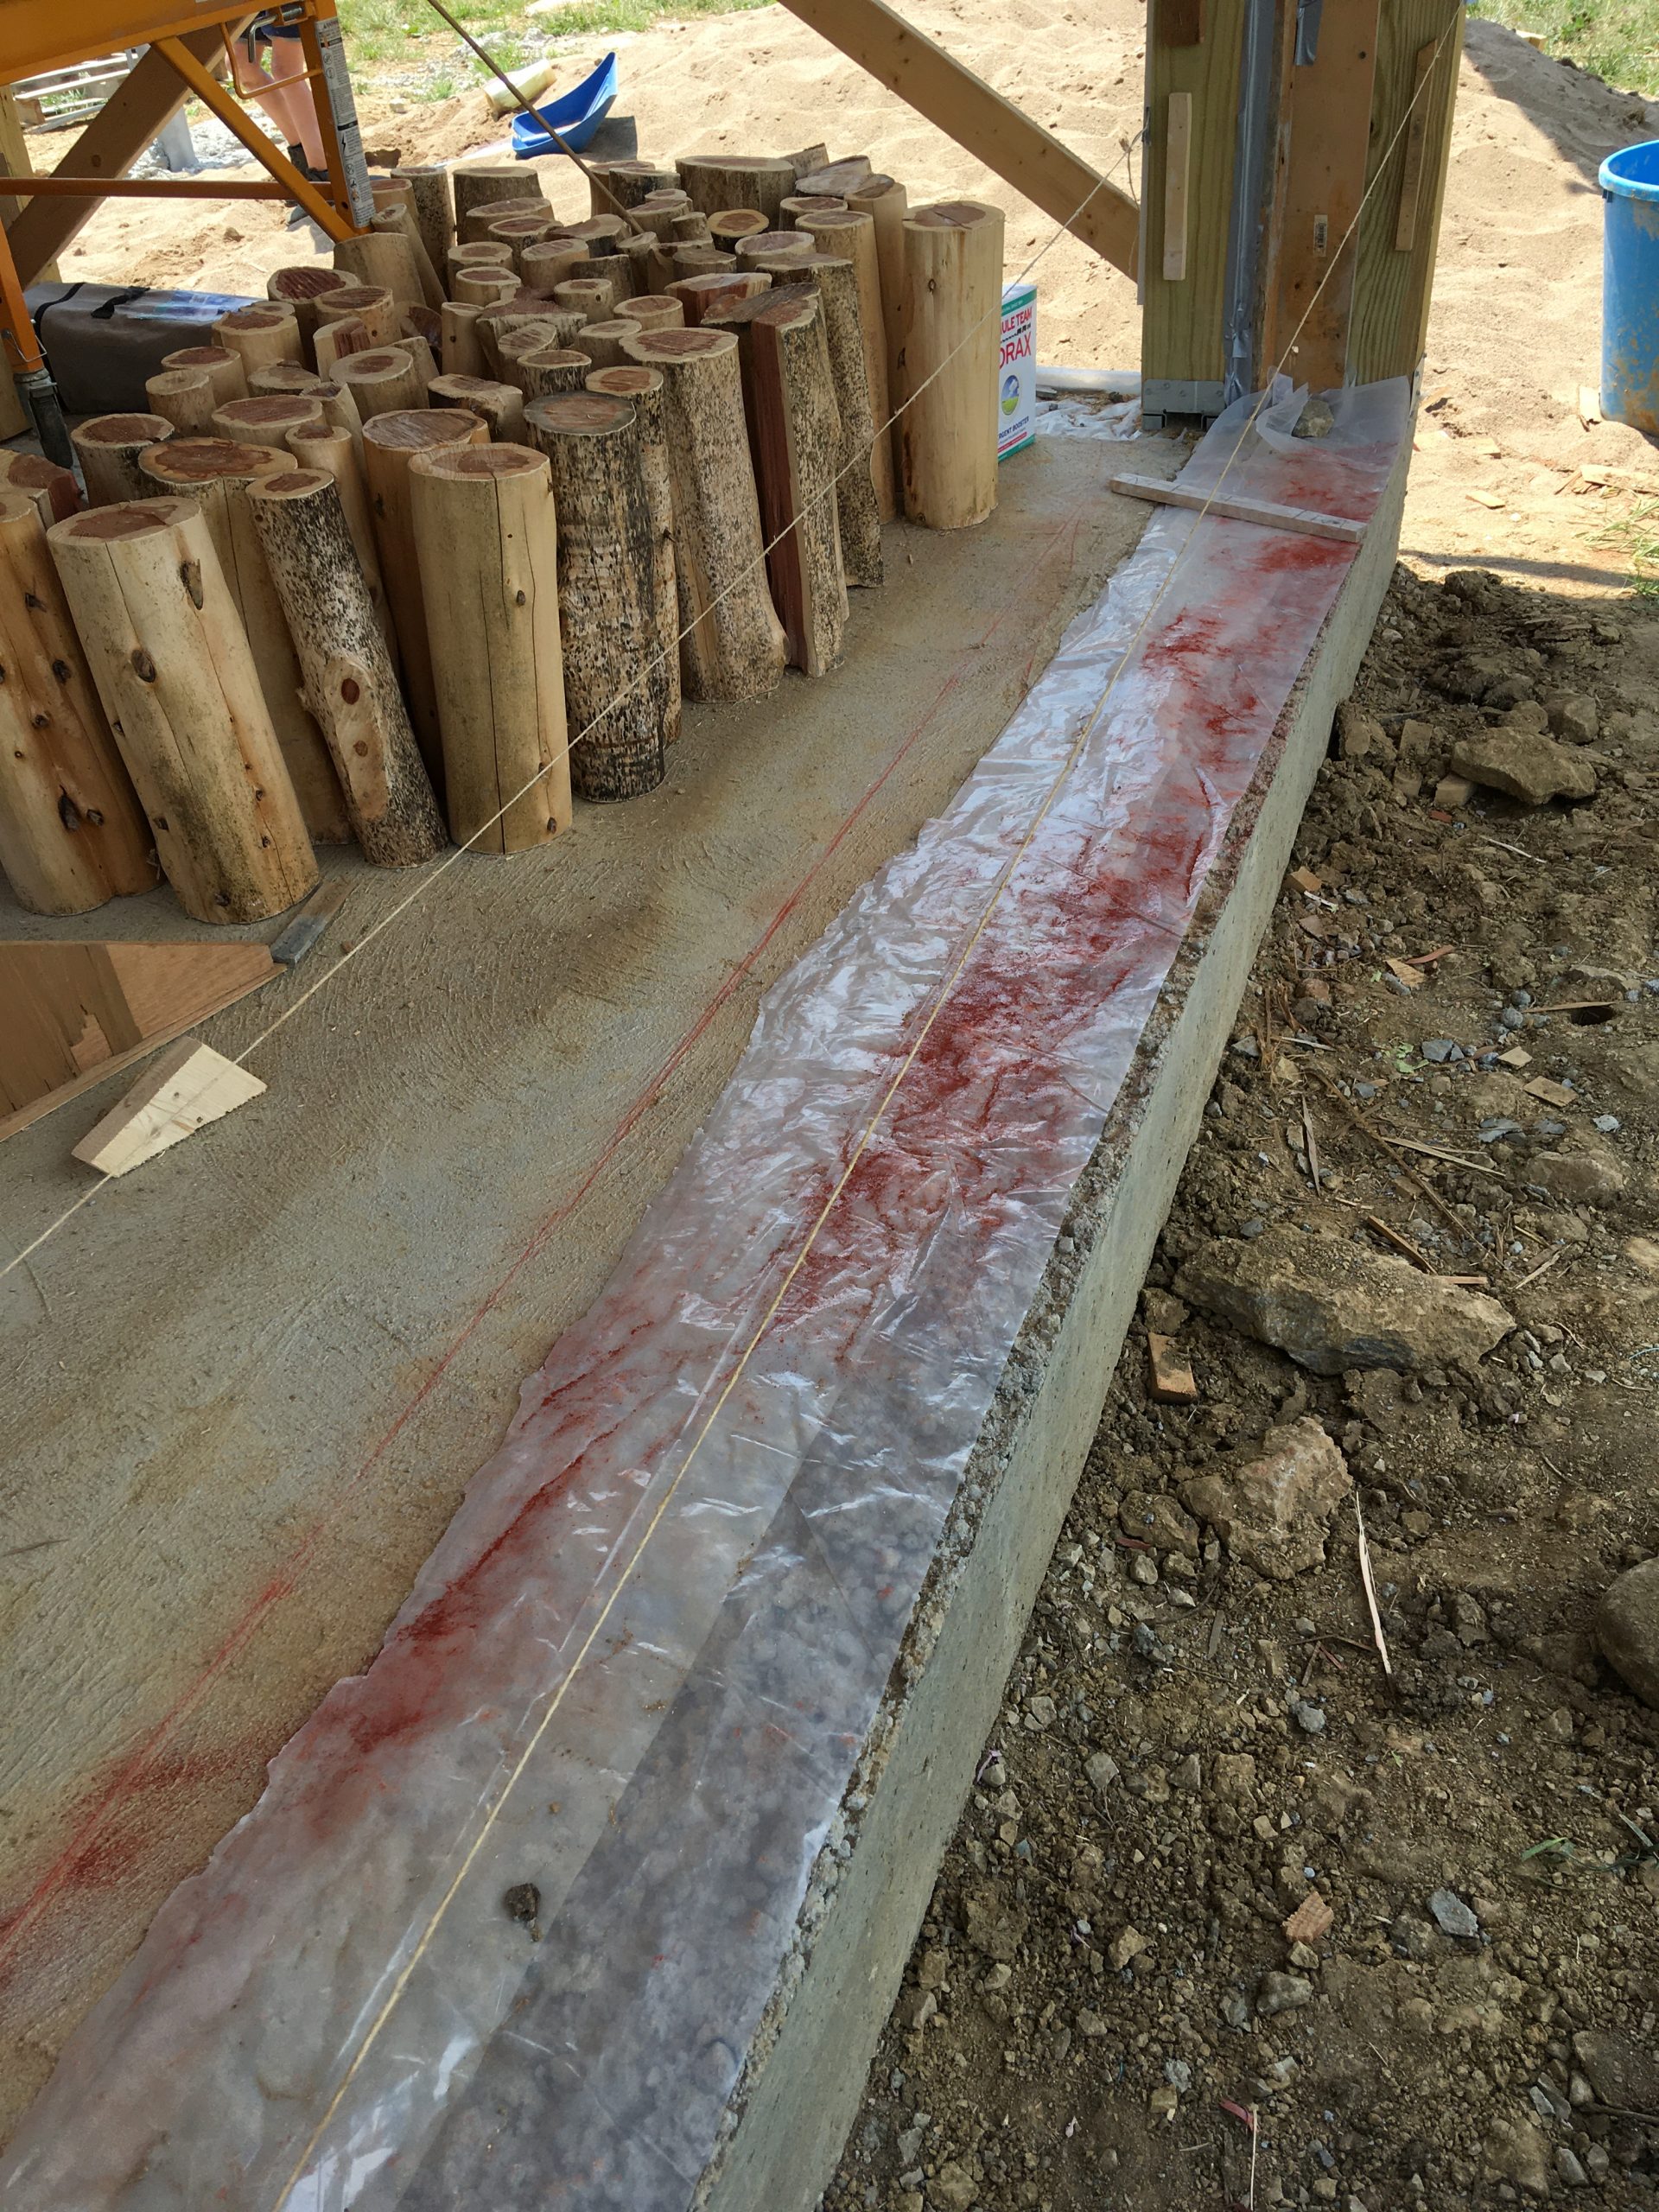
We really improved on our cordwood technique compared to the job we did in our home. We did a much better job of keeping the logs clean as we built. The walls also stayed much more plumb thanks to the use of level strings spanning the wall as well as occasionally using a small level on the logs as we built. You can see an example of level strings and chalk lines in the picture below. Also note the keyways, or strips of wood, along the post. These strips of wood hold the mortar in place and prevent shifting over time:
We also had fun experimenting with adding perlite as a pozzolan to the mortar mix. In short, we got a bag of perlite and tested out adding handfuls of it to our lime putty mortar to help it cure a bit stronger and with fewer cracks. It resulted in a more uniform, slightly “spongier looking” texture that self-healed a little bit better than our standard mortar mix. That said, I’m not sure it was worth the extra money to use it. Your mileage may vary though, so if you try it be sure to send me a message and tell me all about it!
Related: Mortar Mixes for Cordwood Masonry
This is the lime putty we use as a primary ingredient in our lime putty mortar. To make this, we mixed Type-S hydrated lime (a powder) with water and let it age in barrels for several months before using. It has a consistency like cream cheese.

The other component of our lime putty mortar is masonry sand. We use feed scoops to measure our ingredients into our electric mortar mixer. Even our then 7-year-old was able to help with this job! I wrote a bit when he was younger about building with kids and keeping them safe in this post. Depending on the job, he might have his own safety glasses and gloves, or he might not be allowed near the building site. It really depends. You can learn more about that here.
During this build he helped us peel the bark off the cedar trees, scooped sand into the mortar mixer (fingers away from the gears, of course), sprayed the cordwood walls down with water as we built, laid logs and bottles in the wall, practiced tuckpointing the mortar, and helped clean up the building site. He even helped set the rafters! It was a fun way to include him and help him develop his sense of work ethic at the same time.

Here you see the south wall in the middle of construction. Note the window box is made from dimensional lumber and the window is already installed prior to cordwooding.
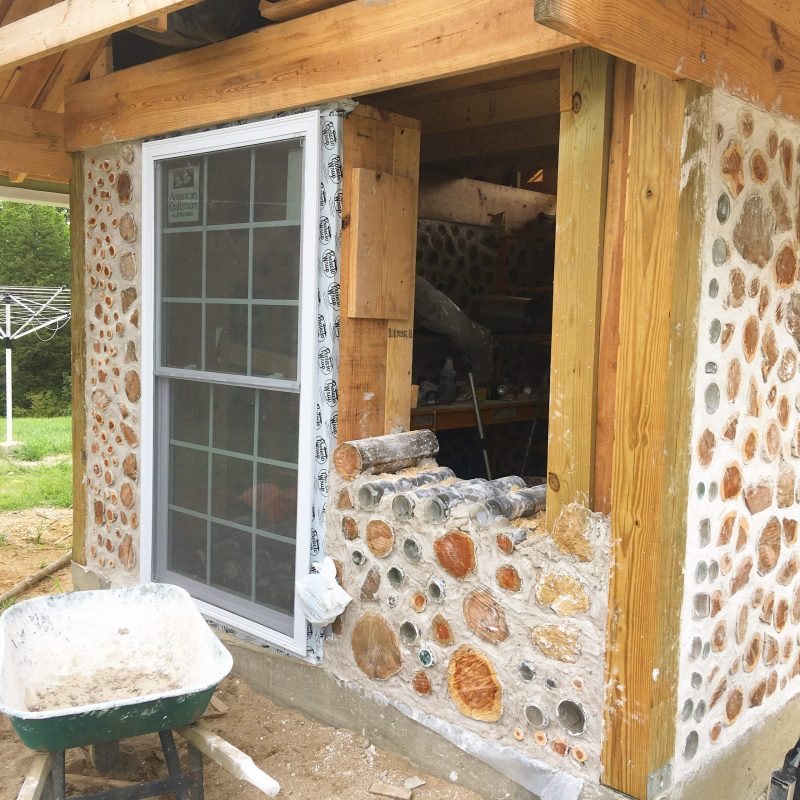
The west wall under construction. Note the bottle bricks are premade and ready to use on the scaffolding in the background.

This is what the first course of cordwood on the west wall looked like in action. Note we have some logs staged and ready to grab at an arm’s reach when we need it. This cuts down on time spent walking over to the stacks of logs and looking for ones that might work every time we need one. When this stack runs out, we’ll bring over some more.

Step 10: Finish the solar, inspection, and DONE!
Once we had the structure finished and the walls had cured for a few weeks, we moved the battery bank and other components out of our mudroom and into the shed. We finished running the wires, adding the new components, moved the old solar panels, and put up the new ones.
Once everything was in place and functional, we called our friendly electrical inspector, who came out to look everything over.
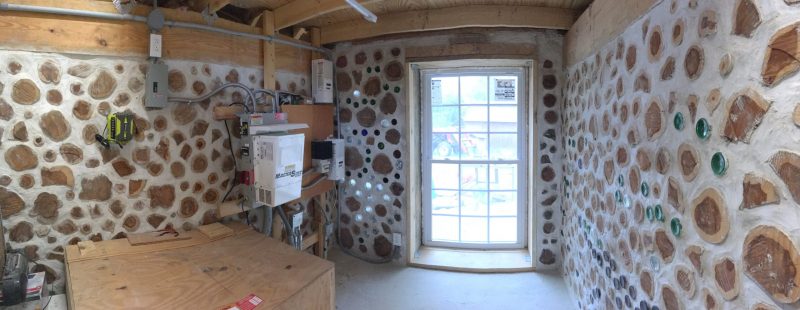
This is a panoramic shot of the interior. On the left is the battery box, which houses four UB8D batteries (wired to create 500 amp hours at 24 volts). To the right of that is our Magna Sine 4000 watt inverter. To the right of that sit three separate charge controllers: our original Morningstar that controls our original 6 panels, and two Schnieder charge controllers that talk to our newest 9 solar panels.
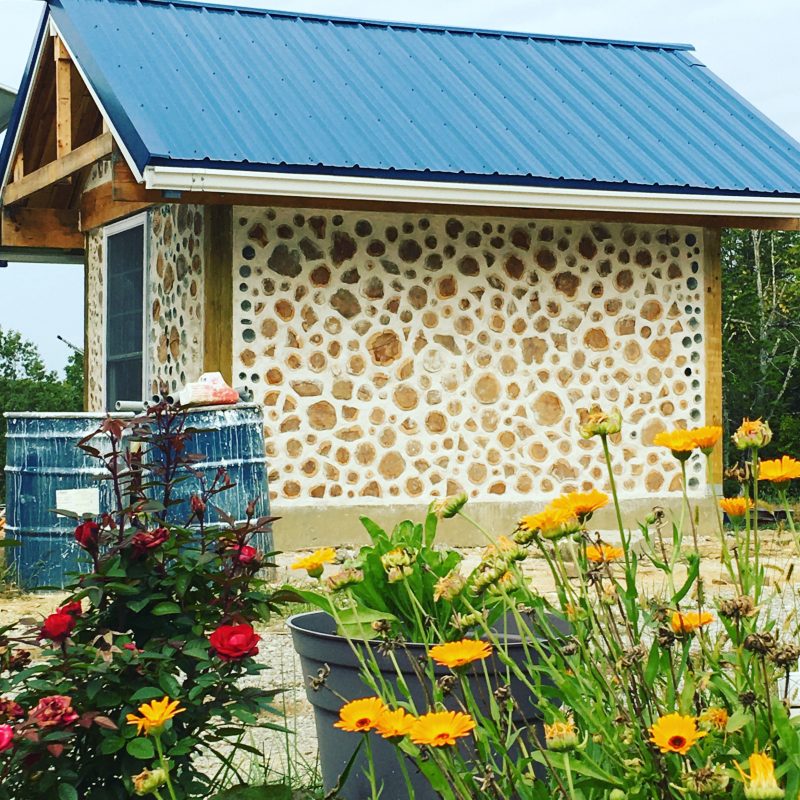
Here is the shed shortly after finishing it:
Here is the west wall, featuring a variety of bottles and cedar logs:
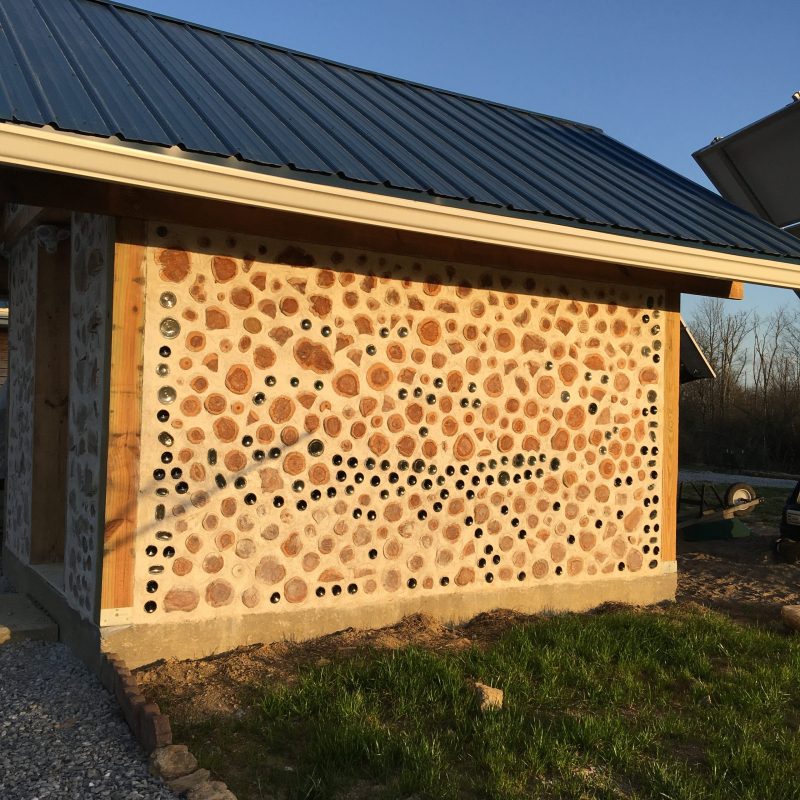
As I said before, the cordwood shed itself didn’t need an inspection — just the electrical. However, we have continued a relationship with our building inspector from the house build and consulted him about our shed project. He had some interesting insights on best practices that ultimately saved us time and money. We were so grateful that he volunteered his time to share his knowledge with us.
Maintaining a good relationship with your code officials is important to the success of any build! You can learn more about working with building code and officials in this post.
So there you have it! Our solar shed project in a nutshell.
There are a LOT of little details that went into this project. This post would get prohibitively long if I put them all here.
Fortunately, I contained all of them, along with diagrams, photos, and lesson guides in our Building With Cordwood Masonry online course over on Payhip This comprehensive online course features, text, picture, and video lessons to guide you through the entire cordwood building process from planning to finishing. It also includes customizable worksheets to help you plan your unique project. Students also receive access to a bonus 30-minute consultation with us!
Find out more about the Building With Cordwood Masonry online course here.
You can also receive the free eBook showing how we built our cordwood home, along with several other free PDF guides, by subscribing to our emails below.
Learn more about our original cordwood homestead project here. And be sure to join us on Pinterest, Facebook, and Instagram for more homesteading goodies that don’t necessarily make it to the blog. Thanks for reading!
