Disclosure: I sometimes earn products or commissions from affiliate links or partnerships on my blog. I only recommend products and services I trust to serve you. Learn more.
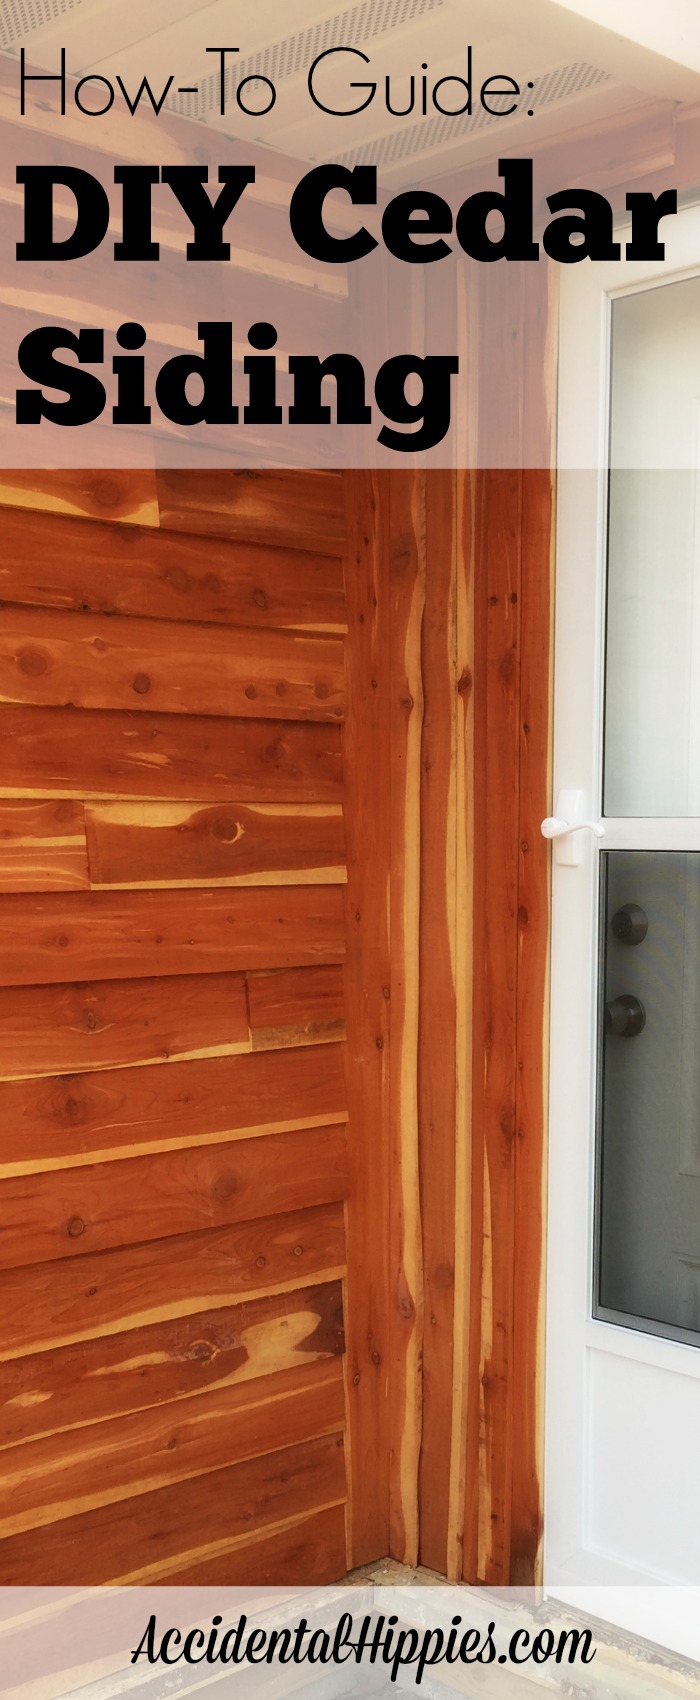
Cedar siding can be a beautiful way to side a home, but it usually comes at a premium. Follow along as we show you our DIY cedar siding
Cedar siding is a wonderful option for the DIYer on a budget if you know where and how to look for materials. It makes great siding for sheds, playhouses, chicken coops, and homes. Cedar is naturally rot and pest resistant, not to mention beautiful. We’ll show you exactly how you can score beautiful cedar boards inexpensively, how to install it yourself, and give you all the tools you need for a successful project.
Quick Navigation
- About our walls
- Why have siding on a cordwood house?
- How to source cedar siding for cheap
- How to prep cedar boards for lap siding
- How to install cedar lap siding
- Considerations
About our walls
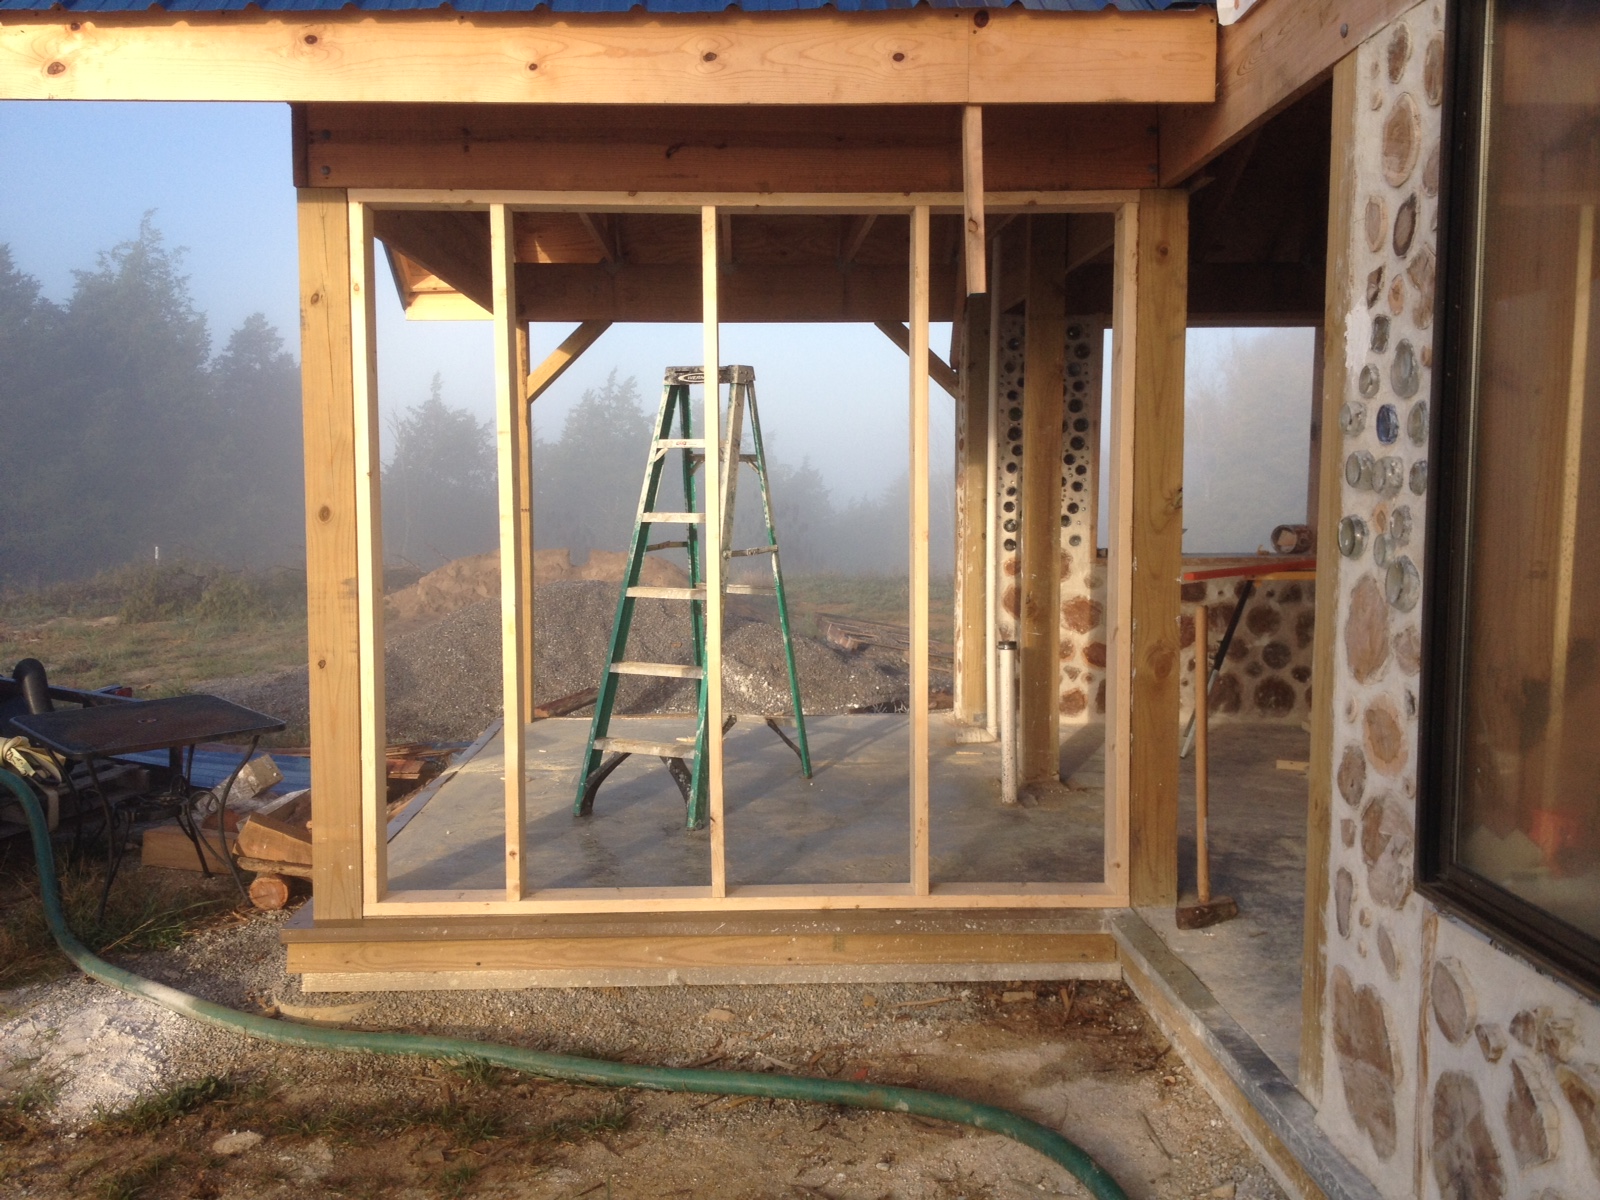
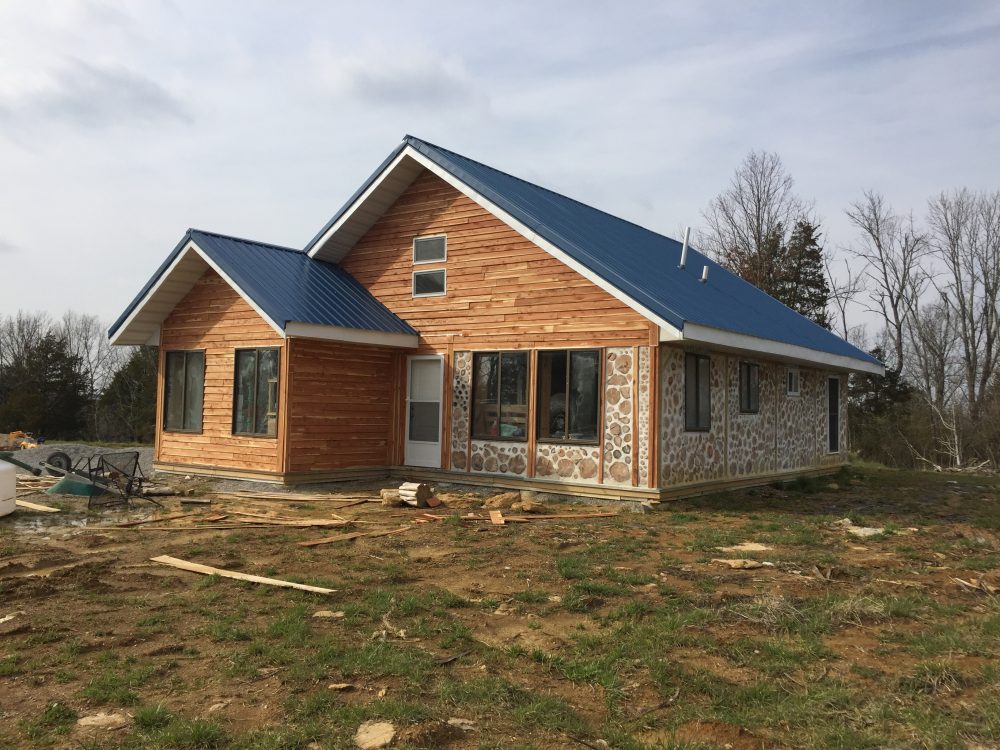
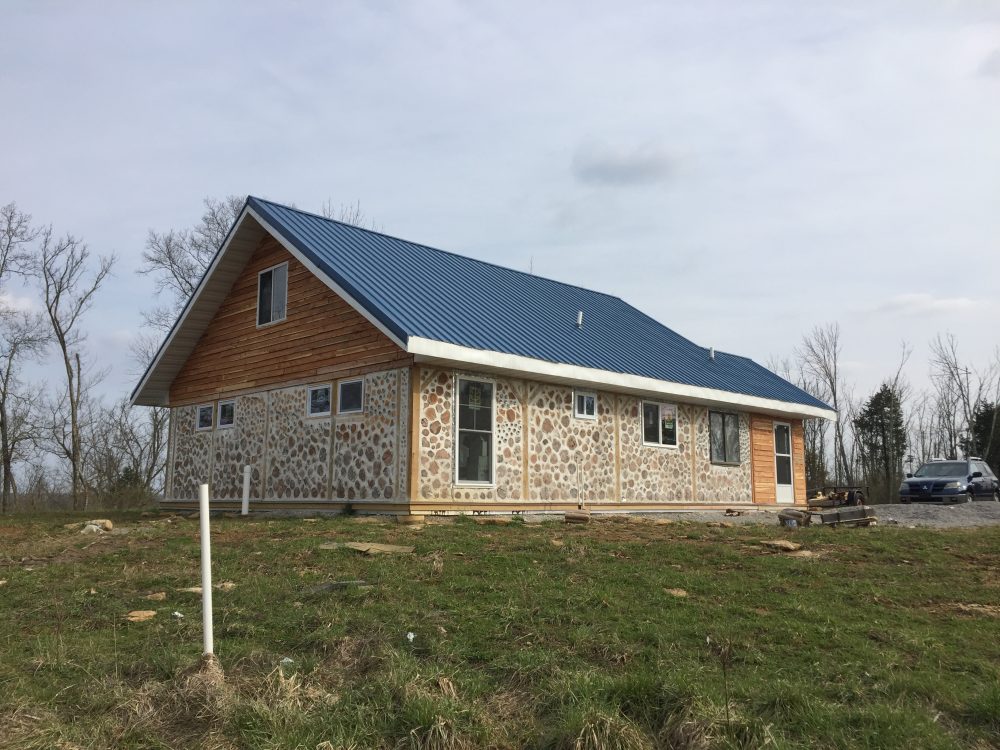
We are building our own home by hand. While most of our walls are made from cordwood masonry, there are large portions that have regular stud framing such as the gable ends and the mudroom on the front of the house. You can see the mix of stud framing and cordwood masonry in the shot below:
Why have any siding at all on a cordwood house?
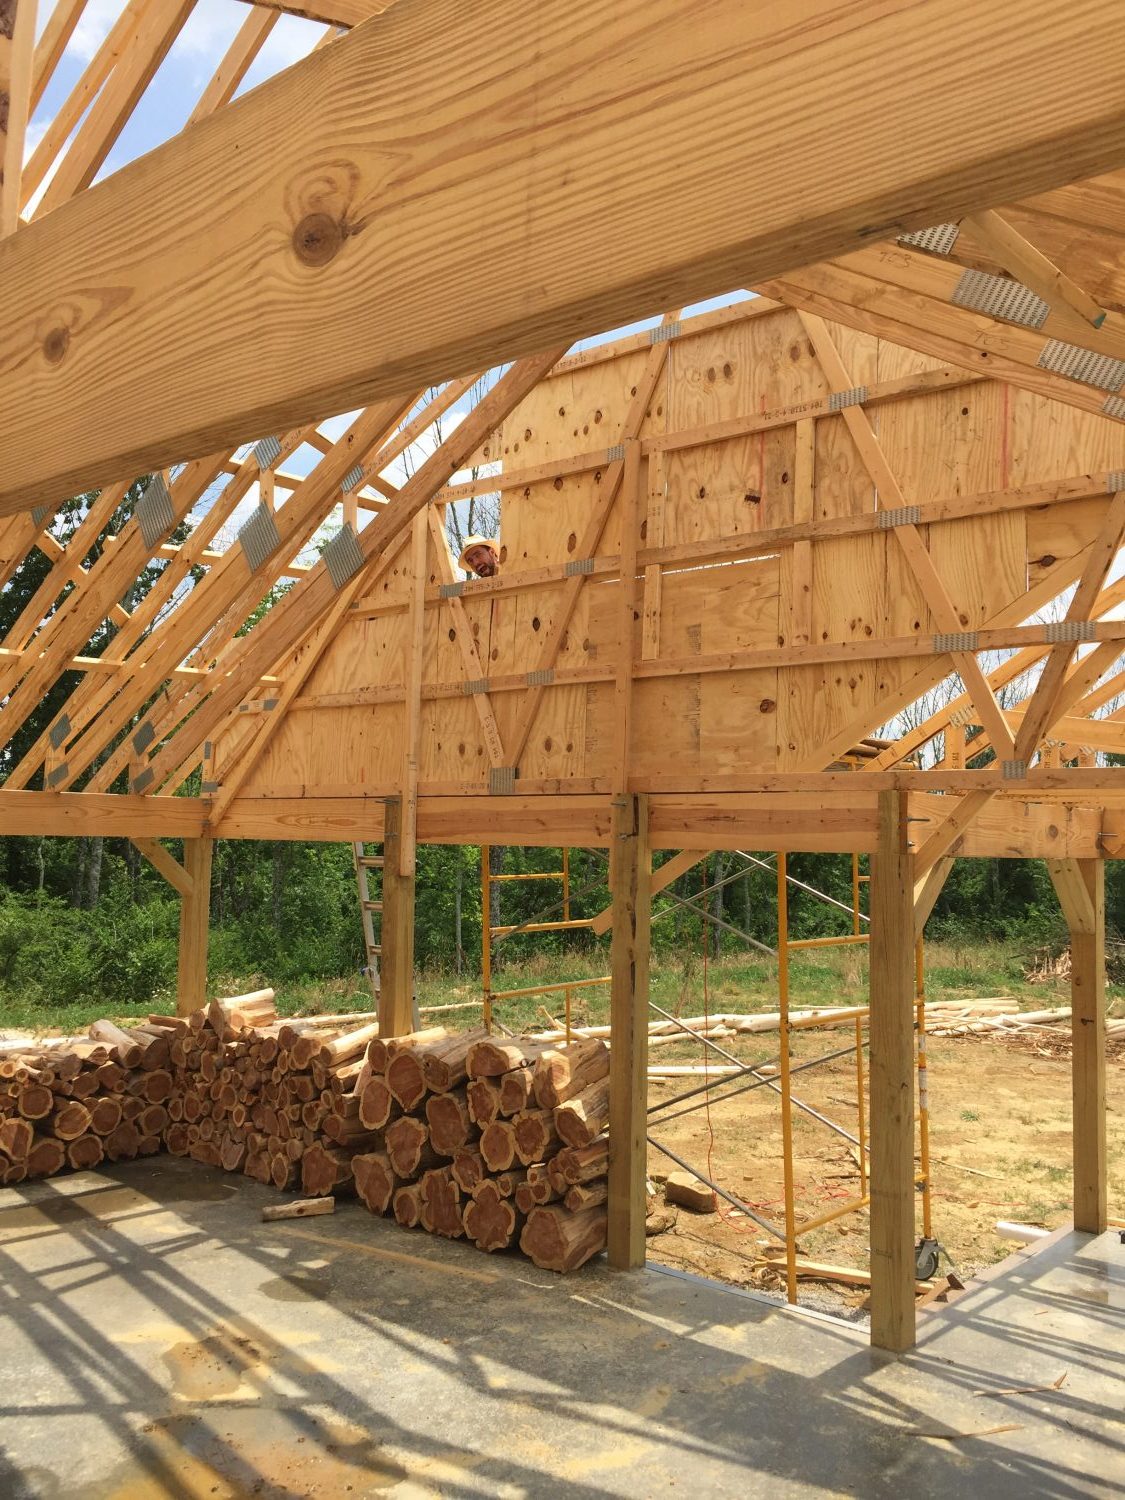
The gable ends of the house are built with standard trusses, so we had to sheathe and side those out of necessity. Shown below: trusses and sheathing from the inside, plus a goofy husband.
We chose to stud frame the mudroom on the front of the house for two reasons:
- To maximize the square footage of the space. This room is only 8×12 and will house the laundry, pantry, and solar components. Our other cordwood walls are 16 inches thick, which eats up a lot of floor space for a small room. 6 inch cordwood walls are possible but would have been tough to insulate to code. We could have done a cordwood veneer over the sheathing, but…
- We ran out of logs! Whoops.
So we chose to stud frame, sheathe it, and cover it in cedar siding!
Complete Guide to Finding and Installing Cedar Siding for Cheap
Why you should use cedar siding
Both western cedar and eastern red cedar are naturally resistant to pests and rot. In the time since we have finished our siding, I have watched many carpenter bees approach our siding and quickly leave. Other bugs seem to be steering clear as well.
This type of siding is beautiful with its natural variations in color. It weathers well and can stand up to the elements, making it a solid investment for your home’s exterior.
It is highly versatile and can fit many applications. You can use cedar boards as a lap siding, cut into shingles, or lay vertically as board and batten.
How to source cedar siding for cheap
Chances are if you’re reading this, you’ve probably gone to the big box websites and have seen how expensive commercially prepared cedar siding can be! I’m talking upwards of $10 per 11/16″x6″x8′ board or $90 for a 25 square foot bundle of shakes. When you have a lot of square footage to cover that adds up in a big hurry. Here are some lower-cost options:
1. Check Craigslist for bundles of cedar boards
In our area, Eastern Red Cedar is practically a weed. Lots of people in the area who own their own portable sawmills will go out, mill some cedar trees, and sell the boards in bundles on Craigslist. You can also check area classifieds and on bulletin boards at grocery stores and gas stations.
We got our first bundle of cedar boards for $300 and it was almost too much for our truck to haul. There were some boards we couldn’t use, but we got most of our siding out of that first bundle.
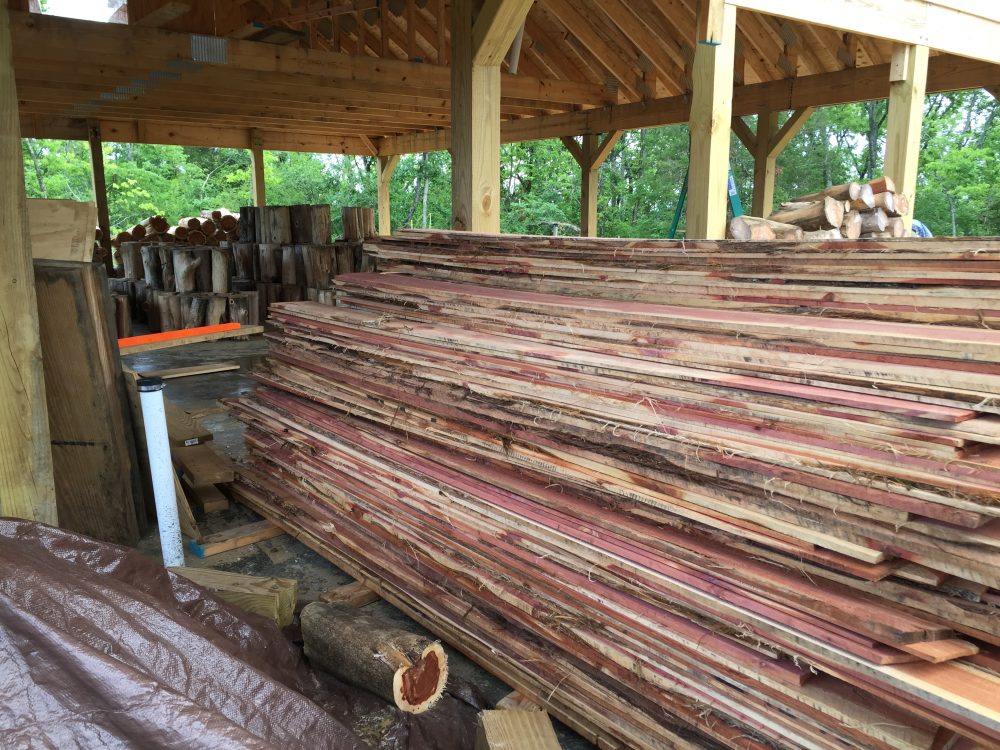 To finish the job, we bought an additional 70 boards from a different Craigslist listing for $2 per board. In both places, boards were about 1/2″ thick, 6 inches wide and 8 feet long. Picking boards individually instead of getting a bundle meant that we could hand-select the good ones and avoid wasting material.
All in all, we spent about $450 to side roughly 530 square feet, which comes out to be about $0.85 per square foot. Wow!
Related: 9 Ways to Get Building Materials Cheap or Free
2. Visit a local sawmill or lumber yard.
Get away from the big box stores and search for reputable, local companies that carry the cedar boards you’re looking for. These places will likely offer you a much better product for a more reasonable price. Even if you end up paying more, you’ll get a better quality AND be supporting a local business.
3. Mill it yourself
If you already have your own sawmill like a Woodmizer, or even a chainsaw mill like the Granberg Chainsaw Mill and access to trees you can cut your wood basically for free.
If you don’t have enough trees on your property, you can check Craigslist for listings where people advertise things like “FREE CEDAR – you cut and haul”. People in our area list free trees all the time, especially cedar since it’s EVERYWHERE.
4. Hire a sawyer to cut and mill your trees for you.
Again, if you have access to cedar trees on your property, the cost of hiring a sawyer may be less than what it would be to simply buy the boards. You can start your search for local sawyers on the Woodmizer website here.
Of course, if you happen to have a friend with their own Woodmizer or a similar portable mill, you may be able to mill your own lumber for the price of gas and a few pizzas.
Related: 7 Reader Suggestions for Getting Materials on the Cheap
How to Prepare Cedar Boards for Lap Siding
We chose to make our cedar boards into lap siding as opposed to shingles or board and batten. Shingles would have looked nice but would have required far more prep work to make usable shingles. Board and batten would have meant extra prep for the batten pieces, plus the boards themselves were a little too “rustic” to provide the clean lines you typically get from that style. Lap siding was a much easier and more forgiving for DIYers like us.
1. Assess your boards
Look for any knots, cracks, splits, thin spots, and live edges. Use the straightest, uniform, solid boards you have. Discard other pieces to your scrap pile for future projects.
2. Square the ends of your boards.
Mark the ends with a speed square and cut them with the saw of your choice.
3. Determine how much of your board you want showing and mark it off with a pencil.
For example, if you want 5 inches showing of a 6 inch board, use a speed square to mark a straight line across the board at the five inch mark. The remaining inch is what will be under the next lap when you go to install it.
How to Install Cedar Lap Siding
To install the siding, you will need:
- Stud framed walls with plywood sheathing and house wrap, ready to be sided
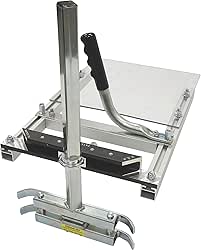
- Nail gun and air compressor (save yourself the hassle and get it complete here)

- Stainless Steel Nails (sized and gauged for your nail gun – it is important to use stainless steel and NOT coated or galvanized. Those will not play nice with the cedar and you will have corrosion.)
- Level
- Speed Square
- Ladders and/or scaffolding, if you’ll be installing at heights
- Saw to cut angled pieces if needed (ex: against an angled roofline – we used a circular saw)
If you don’t have these tools already and your budget is tight, I would suggest borrowing them or renting them if you can. However: if you are like us and you are planning to build your own home, I highly suggest you go ahead and purchase them outright. You will need these tools beyond this project. You will save by buying them instead of renting.
Steps:
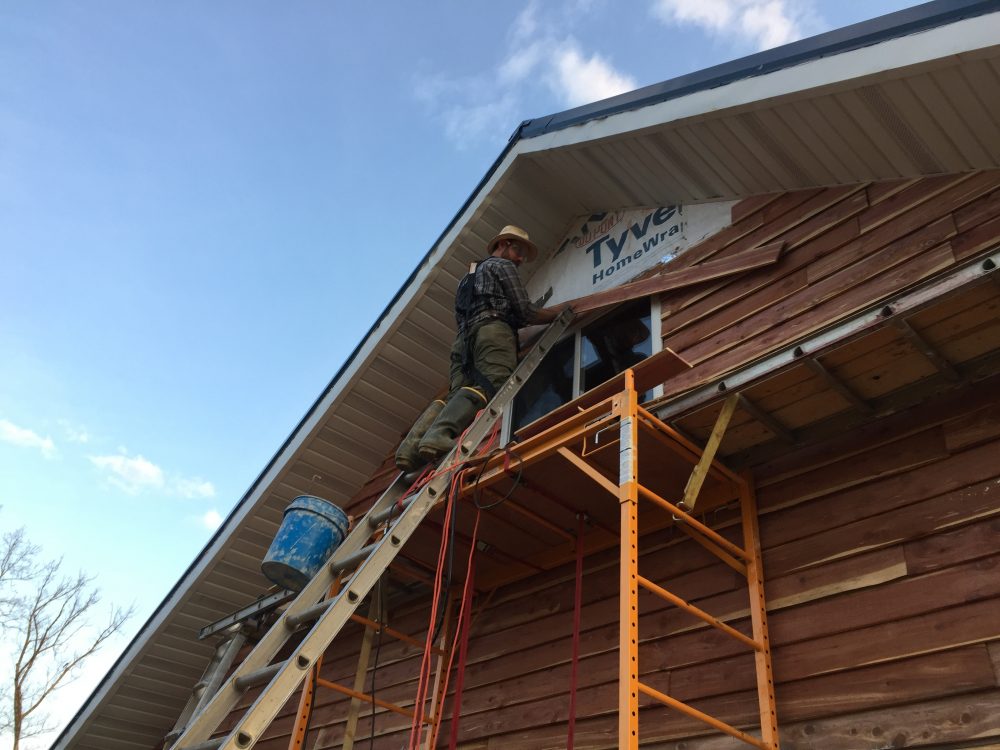
1. Starting at the bottom of the wall, take one of your pre-marked boards and lay it against the wall with the lap marking at the top.
2. Make sure your board is level and square.
3. Use your nail gun to nail every few inches or so across the top of the siding, underneath the lap, until fully secure.
4. Measure, mark, and cut boards to meet the length of your wall as you go.
5. To start a new row of siding, lap a board over the previous row so that the bottom of the board is in line with your marking.
6. Continue in the same manner from the bottom of the wall all the way to the top.
7. BE SURE TO STAGGER THE POINTS WHERE THE BOARDS MEET FROM ROW TO ROW.
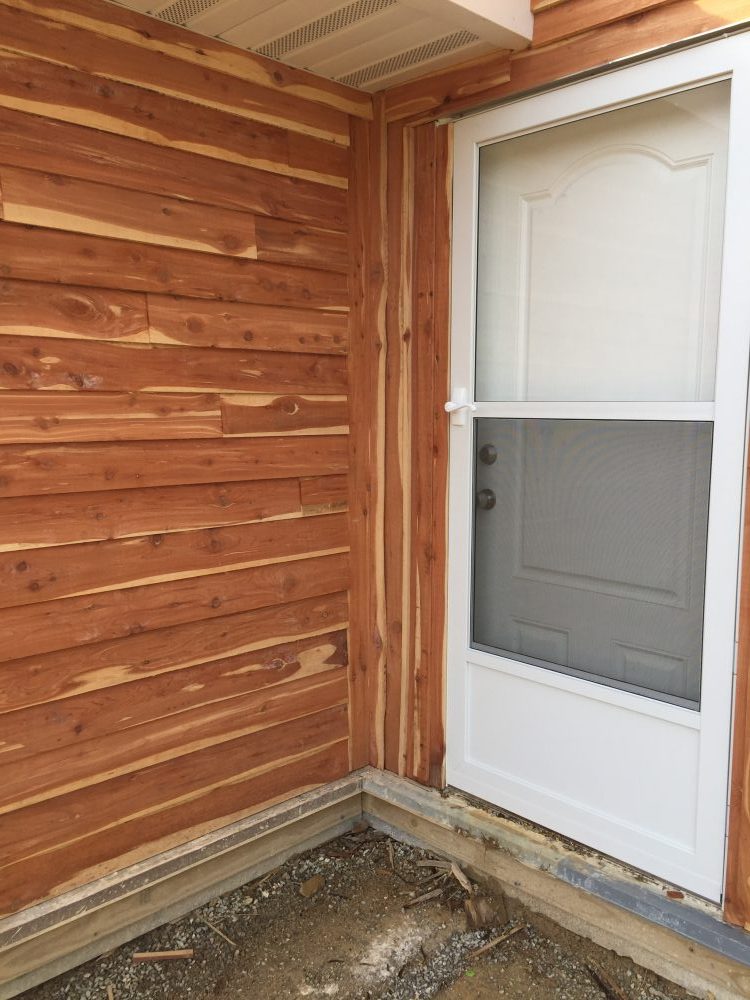
Our finished product looks like this:
Considerations
- If you are looking for a highly polished siding for a luxury home in a neighborhood with an HOA, our DIY version may or may not be for you. Using rough cut lumber lends a more “rustic” look and may not fit in that kind of setting. Of course, you can get prefab cedar siding and shakes – they just cost a lot more!
- HOWEVER, if you are like us and you are building a home where you have more freedom to determine your aesthetics, this is a GREAT option for you. Our home is on 16 acres as far away from the road as you can get, so it can’t be seen by anyone who could complain (but really…why would they? It’s pretty!).
- If you choose to buy rough cut cedar like we did, be sure to look for boards that are of a uniform thickness and width through the length of the boards. We ended up having to discard a lot of boards because they had too much variation in thickness and width.
- Mark completed this job solo, but recommends working with a partner. He managed to complete this job without me being there, mostly out of necessity. However, any job is easier with a working buddy! It likely would have gone much faster and have been less frustrating had I been available.
I hope that helps you on your journey to a fantastic siding job of your own. If you want to see more of our building and DIY adventures, check out our progress reports here and check out our other tutorials here
Ready to learn more?
Subscribe below for a free PDF owner-builder quick start guide, as well as access to all the free resources in our Members-Only Resource Library:
Learn more about our off-grid cordwood homestead project here. Like this content? Be sure to share it! Join us on Pinterest, Facebook, and Instagram for more building and homesteading goodies that don’t necessarily make it to the blog. Thanks!
You young folks are truly amazing, tenacious, talented, and most of all energetic!
Thanks for sharing this info! How did you seal or stain your cedar to keep that beautiful golden look?
Thank You!
Thanks! The short answer is we didn’t. We’ve let it weather naturally, so it actually looks a bit different now than it does in these photos. The areas that are less exposed to the elements have retained much of the golden reddish color, but the other parts are quite a bit lighter now.