Disclosure: I sometimes earn products or commissions from affiliate links or partnerships on my blog. I only recommend products and services I trust to serve you. Learn more.
I’ve fielded a lot of questions in various Facebook groups over the past several weeks about common myths and misconceptions about cordwood masonry. In this post, I hope to address some of the most common concerns people had and provide helpful information for all of you curious cordwood enthusiasts out there.
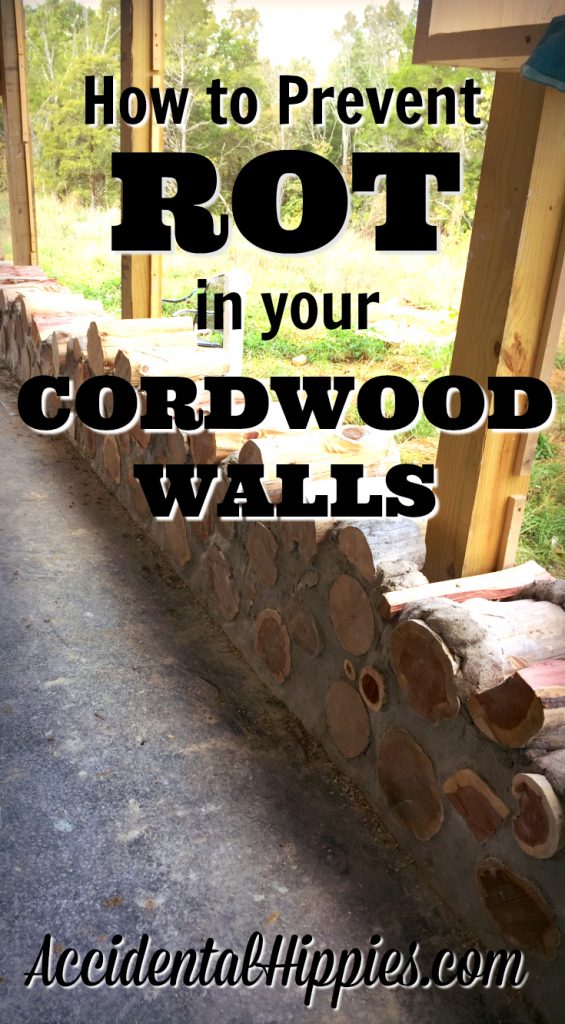
Common Cordwood Concern: The wood will rot!
I usually hear this followed by:
You can’t put wood and concrete together!
Or:
That wall wouldn’t last a second in [LOCATION] because it’s so humid!
Rob Roy addresses this extensively in his books The Sauna and Cordwood Building (you can get them on Amazon through my links, or head over to cordwoodmasonry.com to get them straight from Rob himself).
Here’s the deal:
The wood will rot when moisture is allowed to sit against it. This is because moisture provides the perfect breeding ground for fungi and bacteria. In a cordwood wall, the logs are laid with the end grain OUT instead of running lengthwise like a standard log home.
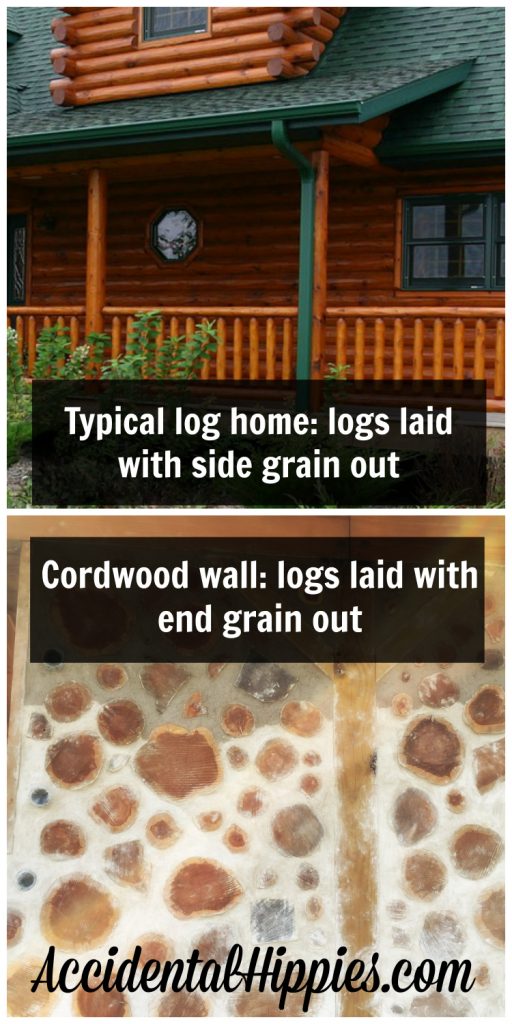
The end grain will wick moisture and allow the logs to dry after getting wet. The log ends may become quite wet in a driving rainstorm, but they dry out in a matter of hours or days depending on the weather (obviously it will take longer to dry if it remains humid as opposed to being hot and dry).
The reason most people say you can’t mix wood and concrete is because they have experienced rot with fence posts, pole barns, or similar structures.
In these cases, rot occurs because the concrete traps water against the wood, which promotes the growth of mold/fungi and bacteria.
For this application, you are absolutely right that wood and concrete don’t mix, but just like a properly built fence, properly constructed cordwood doesn’t allow water to become trapped.
The reason most people say you can’t build cordwood in humid environments is because they assume the moisture in the air will rot the wood in the mortar.
I understand this concern. Again, following best building practices and taking your local building codes into consideration will help keep a cordwood building rot-free in humid climates. There have been cordwood buildings successfully constructed in humid areas like Georgia, Hawaii, New Zealand, and Chile.
You will avoid rot in a properly constructed cordwood building by following these basic principles:
1. Use softwoods instead of hardwoods.
Softwoods are the best choice for cordwood building because:
- They are less prone to expansion and contraction compared to hardwoods
- They have higher R-values for better insulation
The logs are surrounded by mortar. Hardwoods are more prone to expansion and contraction than softwoods are. Extreme contraction of a hardwood log can leave gaps between the logs and the mortar. This gives moisture and the associated mold, bacteria, and fungi room to get into the gaps and propagate.
On the flip side, if a log expands too greatly, the swelling could push apart the mortar and buckle the wall. Both of these scenarios can and have happened to cordwood buildings constructed with hardwood logs.
Softwoods, on the other hand, are much more stable, forgiving, and less prone to experiencing these failures. That isn’t to say they will NEVER experience these problems, but most problems can be prevented by following the principles in this list.
Good wood choices for cordwood building include:
White cedar
White pine
Red Pine
Red Cedar
Yellow Pine
This is by no means an exhaustive list, as there are hundreds of species of local softwoods that vary in each area. Rob Roy has a greater list with R-values and shrinkage here.
2. Remove bark from the logs.
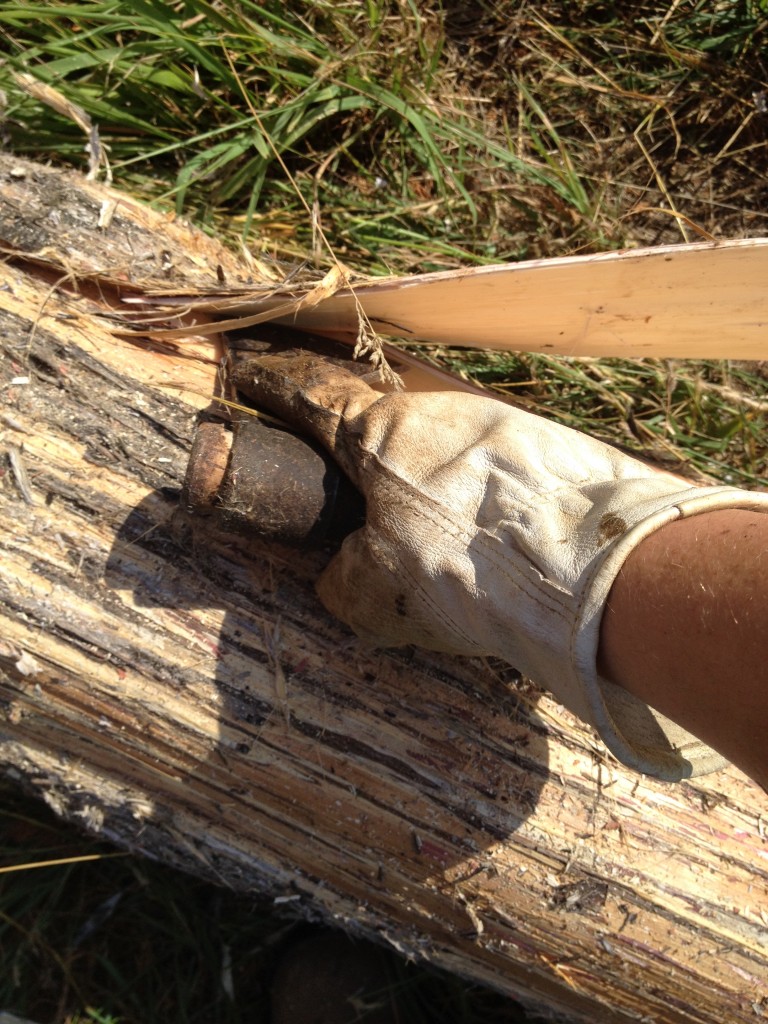
The bark provides the perfect place for bacteria and fungi to take hold, so don’t give them the opportunity! Remove the bark as soon as you fell a tree and it is a much easier task.
Here I am removing bark with a tomahawk! My husband preferred using a knife, others use draw knives but we really didn’t prefer using ours unless the bark had dried onto the tree.
Read also: How to prep cedar logs for cordwood masonry
3. Dry the logs to +/- 12% moisture content.
Measure your moisture level with a moisture meter like this one that we use. It’s inexpensive and lets you have more control over the building process.
Drying your logs ensures that they will be stable in the wall. This lessens the chance of rot or air infiltration from contraction, while also lessening the chance of cracking your wall due to expansion. Stack your logs off the ground, under cover from the elements and let them dry to roughly 12% moisture.
I say roughly because if you’re planning to build a cordwood house in the middle of an actual rainforest, your ambient humidity is higher and therefore you can probably stand to dry your logs to a higher moisture percentage.
Depending on your local climate and the time of year you prep your wood, drying can take a matter of weeks or months. In our hot Kentucky summers when the humidity was low (if you consider 50% humidity “low”), our logs dried to between 12-16% within 2-3 weeks.
When it was very warm and humid, it took anywhere from 4-12 weeks. For logs cut closer to the cold, wet weather of fall and winter, it took about 6+ months.
In a perfect world, you should let your logs dry and season for a year. You can build with them sooner if needed; just know that you’ll probably need to seal around the logs after a year or more of cycling through the seasons. You can accomplish this with specialty compounds like Log Jam or Perma-Chink.
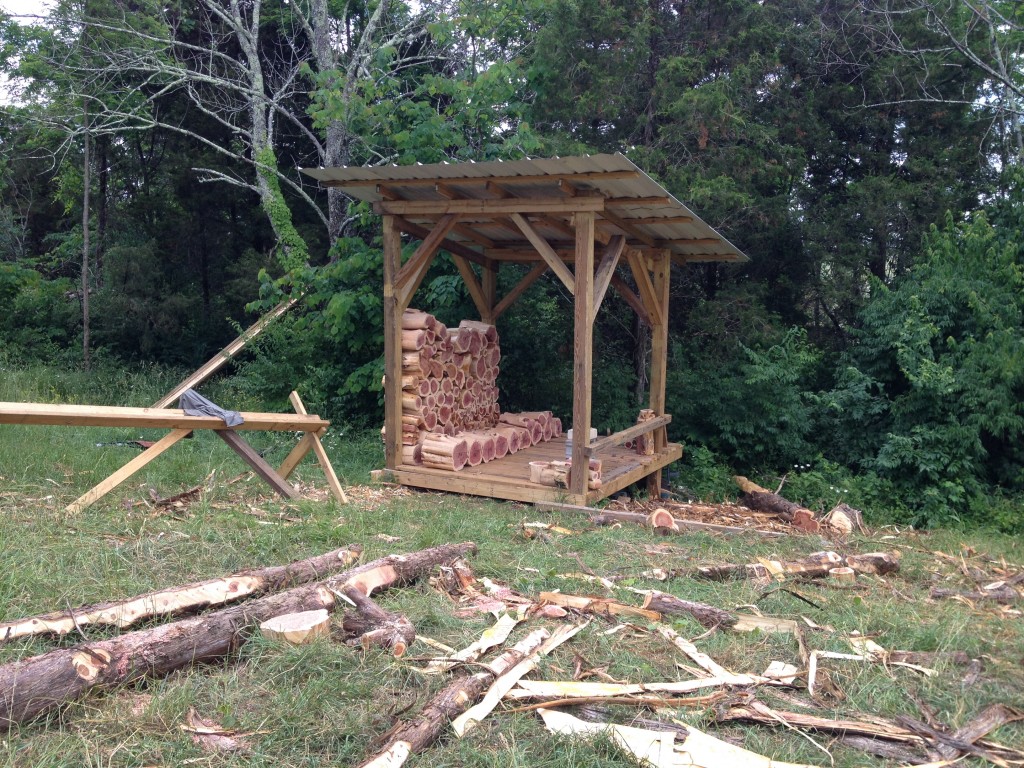
This is the shed we built out of materials from a little pole barn that was sitting on our house site when we bought the property. We left the sides open to let the air blow though. The wood dried just fine here and the large overhangs kept out the majority of the driving rains.
4. Elevate the cordwood from the ground as much as you reasonably can.
This can mean anything from a few inches to a foot or more on top of a concrete block or stone foundation wall. We built directly on a concrete slab, but the slab is currently above ground level by roughly 8 inches. Eventually, we will add a drain around the perimeter and build up a slope away from the house.
5. Build under the protection of a roof with adequate overhang.
A longer overhang shields the cordwood from the elements a bit better than the standard overhangs your typical stick-built house comes with, which range from 6-12 inches.
A good starting point for a cordwood roof overhang is 16 inches, but I’d recommend going out as far as you reasonably can. Our overhang is 24 inches; we were able to simply ask our truss builder to add 24 inch overhangs to our standard trusses for surprisingly little extra money.
Still worried? Build a design with a wrap-around porch!
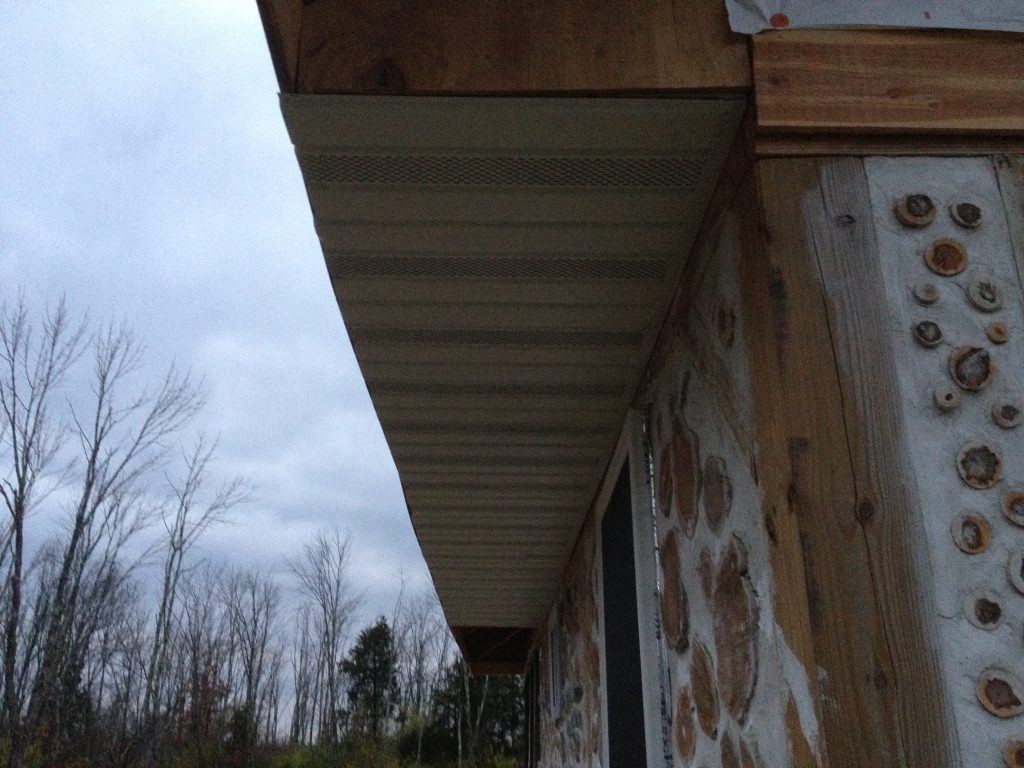
6. Keep wood from touching.
This means keeping at least 1-2″ of mortar between each log you place in addition to not letting the logs lay up directly against your posts if you’re building in a post-and-beam frame like we did. You can see the spacing we kept in basically all of our cordwood photos.
YOU CAN SEE MORE PHOTOS IN THE GALLERY HERE
7. Provide good drainage around the house.
Even if you don’t build with cordwood, do this anyway:
- Slope the soil away from the house
- Use rocks, shrubs, and other designs to help prevent rainwater from splashing against the house from the ground
- Run a drain around the perimeter of the home
8. Don’t use logs that have signs of rot or pests inside.
There were quite a few logs we were unable to use. Some had little rotten parts. Others were so rough on the end grain that they seemed likely to develop moisture problems. And once, we actually picked up a log to use and heard buzzing inside from a carpenter bee that had gotten itself stuck! A few of these logs had salvageable pieces that we could trim and use for “false logs” against our posts, but others were ceremoniously chucked into the burn pile.
9. Use a termite shield around your foundation.
This is one of those issues I see over and over again and I just have to shake my head a bit.
A. You should probably be doing this anyway no matter WHAT kind of house you’re building.
B. You can ask, “Won’t termites eat that house?” about any standard stud-framed house too. Termites will eat your wood studs and joists as surely as they would eat logs in a cordwood wall. And given how little substance there is to a stud wall and how much more room there is for them to hide behind exterior veneers, I’d wager that termite damage to a traditional home would be far more devastating.
C. As long as you have a termite shield and you follow the other guidelines to make sure water doesn’t sit against your cordwood walls, termites shouldn’t be a problem. Again to cite Rob Roy, he has an excellent reply to reader worries about termites roughly a third of the way down this page here.
10. Do NOT seal the logs!
Part of what makes cordwood rot resistant is its ability to wick away moisture via the end grain. When you use a water sealer or stain, you actually make it more likely to retain moisture and experience issues over time unless you go through the process of sealing the logs year after year.
When you seal the logs, you inhibit their natural ability to keep dry AND trap yourself in a cycle of maintenance. Save yourself the trouble and let the logs be.
Of course, our cordwood home is still very new, so if we DO happen to experience any issues with rot or pests, I’ll be sure to update you with any details. Until then, I’m going to enjoy how remarkably strong and efficient our walls actually turned out.
2020 update: four years of cordwood walls and still no issues with rot or pests. In fact, the only pest issues we’ve experienced were ants coming in through the small gaps around the window frame in the kitchen, and NOT the cordwood at all. We eliminated the ants and sealed all gaps with caulk or a chinking compound called Log Jam. We haven’t had any problems since!
————-
For more thorough information for all you cordwood enthusiasts out there, I highly recommend getting both Cordwood Building by Rob Roy and Cordwood Construction Best Practices by Richard Flatau, both of whom are respected experts in the field of cordwood masonry and have lived in their own cordwood houses for 30-40+ years.
Ready to learn more?
Subscribe below to get access to a free PDF guide all about how we built our house from start to finish, as well as all the free resources in our Members-Only Resource Library:
Learn about our off-grid cordwood homestead project, click here. Be sure to join us on Pinterest, Facebook, and Instagram for more building and homesteading goodies that don’t necessarily make it to the blog. Thanks!
We’re researching building a cordwood cabin. We’ve come across your blog in our research. We have a question about the sawdust/lime insulation. Will it settle in time leaving no insulation higher in the wall? We thought, maybe cellulose would be the better choice, but wouldn’t that settle over time as well?
Good question! To answer your question, if you pack it in right it will not settle. Sawdust/lime is more compact than traditional cellulose. Cellulose tends to lose its fluff over time and settle downwards. The sawdust doesn’t seem to have this problem. There is actually a little odd part of our cordwood wall that we never capped (in our living room…getting ready to build a shelf onto the top and cap off that insulation. The sawdust in the wall is at the exact same level as it was when we put it in there nearly 3 years ago. When you put it in, you pour in a little bit at a time as you build up the wall and then sort of poke it into all the crevices around the logs until it won’t pack anymore. We used our mortar pointing knives to poke the insulation down in and fill the voids. Since the material is already somewhat dense and you pack it in densely, the chance for settling or shrinkage is pretty minimal. If it’s still a concern, there are several lovely examples of people using spray foam insulation (super expensive and not as natural) OR building a “double cordwood wall” with a solid layer of foam insulation in the middle with logs on either side. It makes for a super tight and well-insulated home, especially in northern climates. Hope that helps!
Thank you for replying! Glad to know the sawdust stays put. Can’t wait to start our build.
Not a problem. Best of luck to you on your build. Let me know if you ever have any questions!
Hi! Great info here, I appreciate your sharing. I’m wondering, you built your cordwood home in 2015….how is it holding up in 2019? Would you do it again or would you lean towards a different building type? Thanks!!
It’s holding up rather well! We started the home’s structure in 2016 and moved in at the end of 2017. Since then the cordwood has behaved beautifully! None of the logs are showing any signs of rot or wear, and it performs exactly as we’d hoped in terms of keeping us temperature stable during the heat of summer and cold of winter. We like it so much that we’re planning another building on our property within the next few years, and hope to be able to start teaching others the technique in person soon. Thanks for your question!