Disclosure: I sometimes earn products or commissions from affiliate links or partnerships on my blog. I only recommend products and services I trust to serve you. Learn more.
If you want to build a cordwood home that will last for generations, it is vital to prepare your logs correctly. In this post you’ll learn exactly what to do to prep logs for cordwood building.
Cordwood masonry is a beautiful style of building. Walls are constructed so that short lengths of logs face with the end grain out instead of lengthwise like in traditional log homes.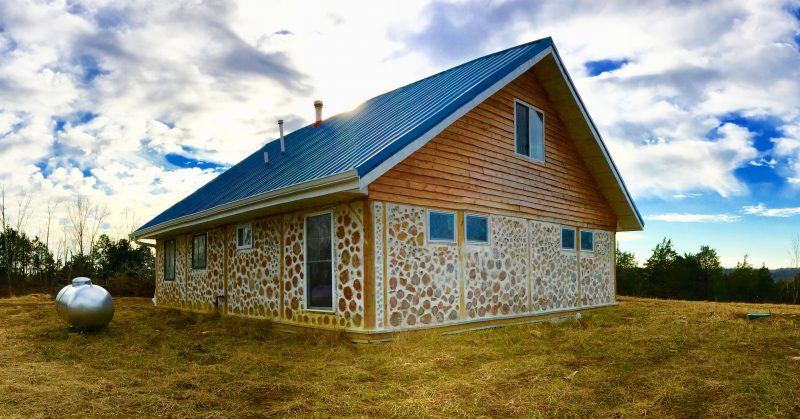
The benefit to this is that you are able to use all parts of the the tree. You are also able to use logs that might not be suitable for traditional building.
But in order to build cordwood walls that will last and not rot out, it is important to prepare your logs correctly. We’ll take you step by step through the process of preparing logs for cordwood masonry construction.
How to Prepare Logs for Cordwood Masonry Construction
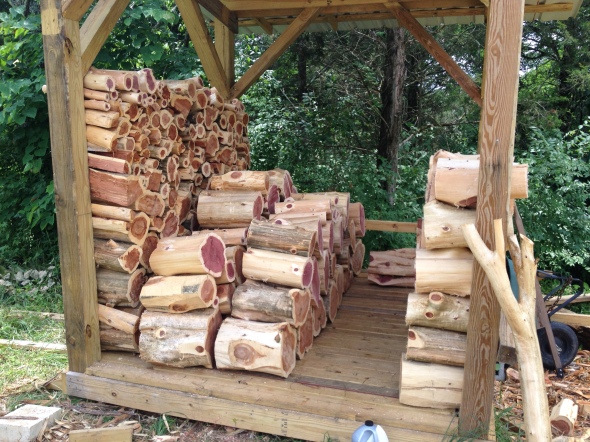
We used all Eastern Red Cedar for the walls, cut to 16 inch lengths to create a 16 inch thick wall.
While we used cedar, you are safe to use most any softwood. Avoid hardwoods, as they are prone to expansion and contraction, which may buckle and destroy a wall. There is a lot more detail about that here.
Once you’ve chosen your trees, you can start preparing them.
Cutting Down the Trees
Scout out a suitable tree. Here, we’re looking at it being a reasonable size (not too small) and reasonably located (we can get to it to remove it with the truck, not covered by brush, etc.)
Clear the area around the tree. This is mostly for safety. If the tree starts to fall in a different direction and you need to run out of its way, you’d better be sure there isn’t anything for you to trip over along the way. Here’s Mark clearing some brush around the tree with a machete:
.
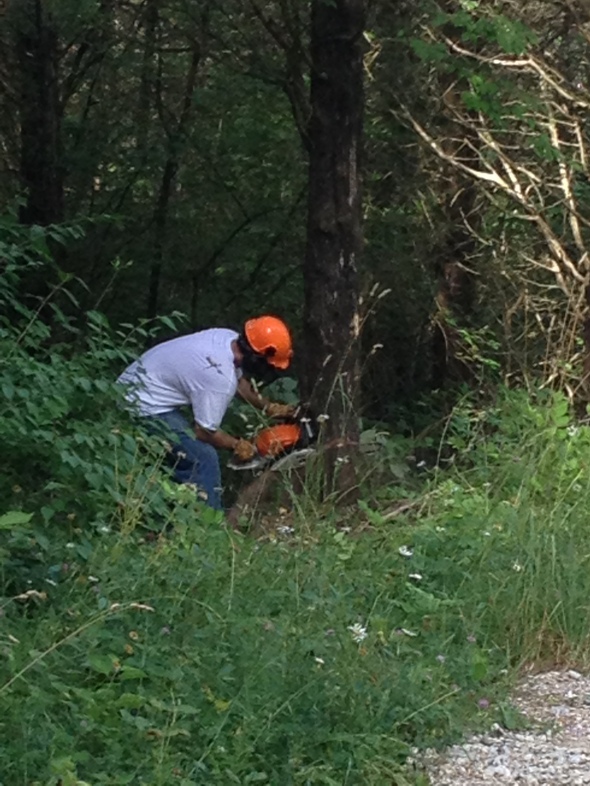
Cut down the tree. This is Mark’s territory. He assesses how it is likely to fall and then cuts it methodically with his chainsaw.
Limb the tree. Using the chainsaw, remove all of the branches and top of the tree. If any branches are a few inches in diameter, remove the little branches/twigs from it and save it for use.
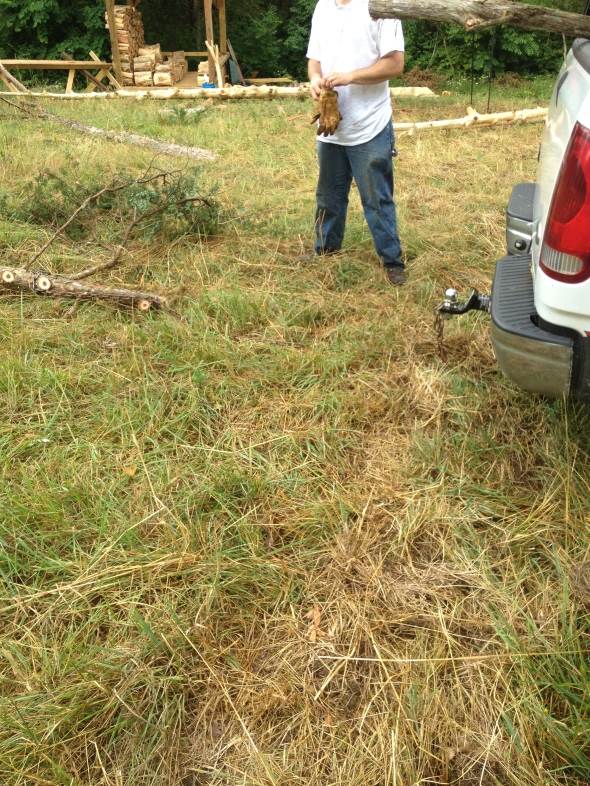
Drag the tree to the work area. We loop a chain around the end of the tree and attach the other end to the hitch on the truck. We then “tow” it to the work area. Here it is in all its glory!
Debarking the Trees
Start peeling the tree! This is important to do as soon after felling the tree as you can.
Once it is down, the sap will start drying and will act as a glue, holding the bark tightly to the tree. When it is freshly fallen, the bark will practically peel itself.
We’ve been using a tomahawk and a knife with ease. If you debark the tree soon enough after felling it, you won’t even need to use a drawknife or power tool like the Log Wizard.
This is a drawknife similar to what we have. We only really use it if we’re prepping wood in the off-season and the bark is stuck tight.

This is a Log Wizard, which attaches to your chainsaw. We don’t personally own one but have hard great things from other folks about theirs.
I preferred peeling bark with a tomahawk. It works best to come in from the side and pry it off along to the grain rather than trying to shave it off against the grain of the bark. This allows you to pry off big sheets at a time!
Cut The Logs to Fit Your Wall Thickness
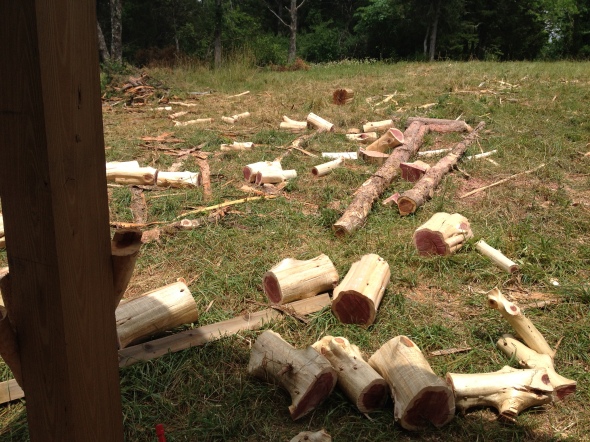
Cut the tree in equal segments. We’ve been propping the debarked trees up on the older logs to get them off the ground while we cut.
We chose 16 inch cordwood walls, so my job has been to measure each segment, mark it with a knife, and then let Mark cut it with the chainsaw.
We also use this as an opportunity to clean the log up from any stick-ups or spots of sap we missed during the limbing process.
The logs then have to spend a period of time drying to about a 12-16% moisture content. We measure this with a simple moisture meter like this one.
Several of our earliest logs from only a few weeks ago are already to this level because of how hot, dry, and windy it’s been. Other newer logs are closer to around 20%.
They tend to be around 35-40% when they are first cut. According to many other builders, Eastern Red Cedars tend to dry quicker than other species of wood, and so far that seems to be true.
How the Prepared Logs Behave in Cordwood Walls
If your logs have been correctly debarked and dried, you shouldn’t have to worry about rot, checking (where the logs split down the side), or shrinkage.
Why? A properly dried log will not shrink dramatically within the mortar of the wall. This means there is less room for moisture to sit, which keeps everything dry and avoids attracting fungi and pests.
If your logs are still a bit “wet” when you build though, watch how the logs behave over the course of a year or two. If there is shrinkage as you progress through the seasons you can always use caulk-like products including Permachink or Log Jam to fill in the gaps.
There are loads of other ways to help protect your cordwood walls beyond making sure your logs have been adequately seasoned. Read all about it here.
Once you know how cordwood works, you’ll definitely want to check out our building process more in-depth. We have each of our building progress reports here.
You should also definitely check out how our cordwood house handled the winter for our first year living in it. It might surprise you!
Ready to learn more?
Subscribe below to get a PDF guide detailing everything that went into building our cordwood house from scratch. You’ll also get access to our free Members-Only Resource Library:
Check out our homestead progress reports and find out more about our cordwood homestead project here. You should also join us on Facebook, Twitter, and Instagram. I’m always pinning lots of great ideas on Pinterest too! Thanks for reading!



Wow. What a lovely house. I would love to build my own house. Hubby isn’t too keen.
Thanks! It’s a dream that took us a LONG time to get to, and really it all started as Mark’s dream. I wasn’t on board for years because I didn’t think we could do it, but over time I saw how much it meant to him and started looking into what it would really take. Now I’m doing the heavy lifting right there with him! It definitely requires both parties to be committed to it or it would never work. There is always the middle ground of being your own contractor and doing some of the easier work on your own as you’re able. You still save a boatload of money and get the satisfaction of a house you want but without the stress of doing basically everything yourselves. There are lots of ways to go about it, and if it’s something you really want to do one day, then I hope he can see the validity of that and work with you towards a shared goal. Good luck!
Emily. My man and I just stayed in a cordwood guest cottage near Lake Placid and we were hooked! We are in the process of researching, purchasing books (Rob Roy), watching utube, looking at property. Your site is perfect for us and we cannot thank you enough for your explanations.
Lorie
Awww I’m so glad we’ve been able to help you! Good luck in your preparations!!
Love this building
I’m going to build one of this house
In my farm in Bijagua Costa Rica
Is a rain forest area, I would like more information with the foundation , do I have to dig a ditch ? I also want to make the floor with slices of wood ,
how do I do it ?
I will be so happy if I can get some help from you to start at my new house
I’ll send you an email to get some more information from you!
I have an idea to build a home/ vacation cottage inspired by a traditional stone Irish cottage, but using the cordwood method. After erecting the structure and letting the logs dry further, I would use hand-held sander/ grinder to shape the exposed log ends inside and out to appear to irregular shaped smooth stones. I would then paint the walls white inside and out. I would be looking for a kind of an “old-world” look. I saw a tool somewhere that looked like it would make short work of softwood log ends. It was a sander/ grinder made in Sweden that was about $300 to $400! I’m sure I would go through lots of sandpaper occasionally touching the mortar?
Since sealing the ends is not a good idea, the challenge may be finding a paint/ stucco/ whitewash that still breaths, and adheres to both the wood and mortar?
Also, it seems like painting a breathable substance on cordwood building in this manner would solve the one flaw in this method I read about, which is small gaps between the logs and mortar occurring from shrinkage and small critters and water getting in? If it was painted white in this fashion, after 5 years or so one could just spend a day calking the gaps, then painting over? Then you would not need to worry the look of the caulking on your natural wood and the mortar? This of course if one would like the look of this.
Of course, I would be completely a beginner at this, and this is all hypothetical!
I think that could be a very interesting thing to do! One thing you could explore is using a lime wash (aka old fashioned white-washing). We used a lime putty mortar and on some of the log faces that we neglected to clean off right away, the color is definitely lighter there and is often mistaken from afar as stone. It shouldn’t affect the ability of the wood to breathe and should help it ward off insects as well. You’ll want to test this out though before building a larger structure. Try out a small test building first, like a small shed/playhouse/doghouse/etc. and see how well it works over time. Good luck!
One other thing to think of is that on the exterior of your cordwood, I would avoid rounding the edges as this introduces more “entry points” in your end grain. You could do this to the interior without much problem, but I would be wary of doing it on the exterior surfaces that are exposed to weather.
Thanks, I did not think about the end grain issue. I may mock up a wall at least, when I move back east where there are actual trees, (I currently live in the prairie in a neighborhood:)
Can I use old fence posts rather than freshly cut trees?
You can, but it really depends on a lot of factors. What species of wood are the posts? Are they cedar or a similar softwood, or a hardwood? What condition are they in? Is there any rot? Were they ever treated with any type of chemical treatment? The answers to these questions will determine whether or not you can safely use them. If they are cedar posts that were never treated and show no signs of rot, then you might be able to use them. If they are post oak or another hardwood, ever had chemical treatments, or exhibit any signs of rot, I’d say no.
Yes they are cedar, never been treated. I can cut off the bottoms that were in the ground.
Thanks for this website. Fasinating construction.