Disclosure: I sometimes earn products or commissions from affiliate links or partnerships on my blog. I only recommend products and services I trust to serve you. Learn more.
Radiant heating systems can be a comfortable and efficient way to heat a home. We’ll walk you through the basics and show you how our radiant heating system works in our cordwood home.
When we were in the planning stages of our cordwood home-building project, we looked at a wide range of ways to heat and cool our home. We knew there was a significant chance our property would be “off the grid”, so we ruled out systems that ate up large amounts of energy such as electric forced-air furnaces.
The idea of installing a radiant heat system inside of a concrete slab became more and more appealing as we nailed down our design. Now that we’ve installed it ourselves and lived with it for multiple winters, how has it performed? Here’s what you should know if you’re considering radiant heat for your home.
QUICK NAVIGATION
Why did you choose radiant heat?
How much did your system cost?
Did someone else install it or did you DIY?
Where did you get your system?
How warm does radiant heat actually make your house?
Why didn’t you choose solar water heating?
Why didn’t you choose an electric water heater?
How do you save propane AND solar energy with your system?
What advice do you have for someone who wants to DIY their radiant heat system?
Should I work with a company or source parts myself for cheaper?
What is radiant heat?
Radiant heat means “using a heat source in the floors (or walls) to radiate heat outwards through the air”, as opposed to a forced air system that blows warm air through a series of vents. The radiant source can be electric elements, but the amount of power to run such a system was prohibitive for us off the grid, so we opted for a “hydronic”, or water system.
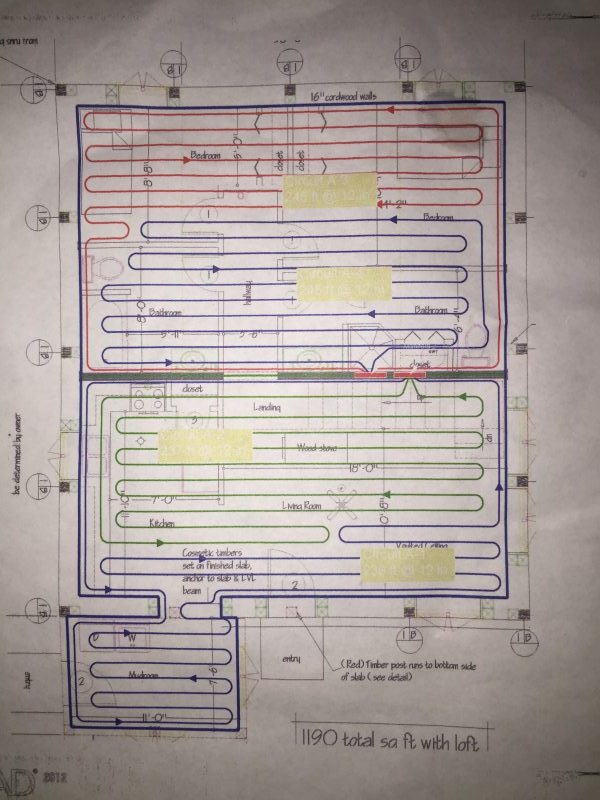
Here’s a quick view of it:
Yes, that looks insane. Yes, it is in our master bathroom. No, we didn’t plan carefully enough for where it would go. You can read all about how to plan ahead for that kind of thing here.
Why did you choose radiant heat?
First, it made sense to go ahead and install the tubing before we poured the slab just to have it as an option. You can’t go back and install anything in your slab after it’s done, obviously, so we jumped on the opportunity while we had it.
Second, Mark was adamant about not having forced air. Forced air systems blow allergens and other fun stuff through your vents. They’re also quite loud. Most people are used to hearing the whoosh of air through the ducts and the sounds of the furnace. I didn’t realize how much we were used to that background noise until we moved into our home and found how quiet radiant heat is!
I have noticed that Mark’s allergies have all but disappeared while living in a home without forced air. It is not something I have personally struggled with, but I have noticed how much easier it is to breathe. The air feels “cleaner”.
Third, it helps us when we can’t use the wood stove. The original thought was that one day we will be old and not want to deal with wood heat. The reality is that there are a lot more situations NOW where we can’t use the wood stove. When we go out of town in the winter, the radiant heat keeps the house at a stable temperature to avoid freezing pipes. It’s also helped when we home absolutely exhausted with no gusto for starting up a fire.
We find that the wood stove provides us with a more aggressive type of warmth, but that the radiant allows us more freedom. We enjoy having both options.
How much did your system cost?
All totaled it was around $7500. That includes every single component, including the tankless water heater. You can read more about the different costs from our home build in this post.
How is your system set up?
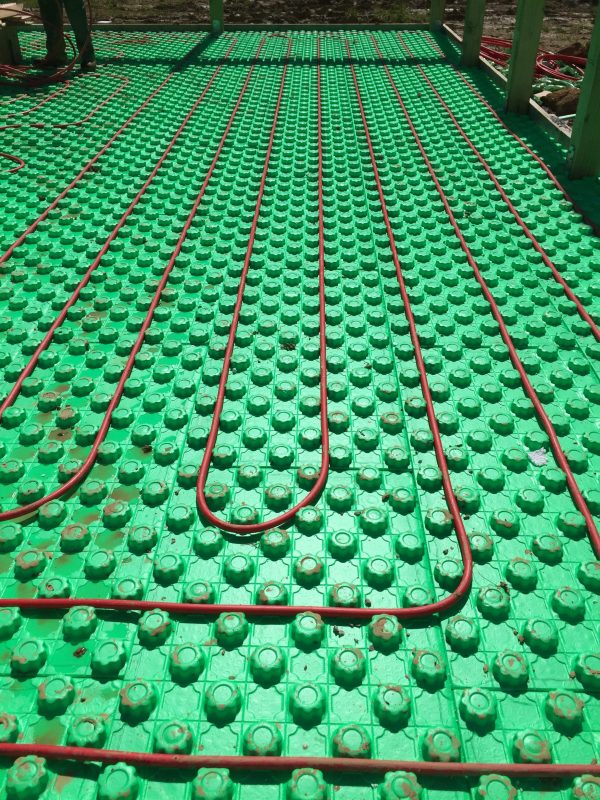
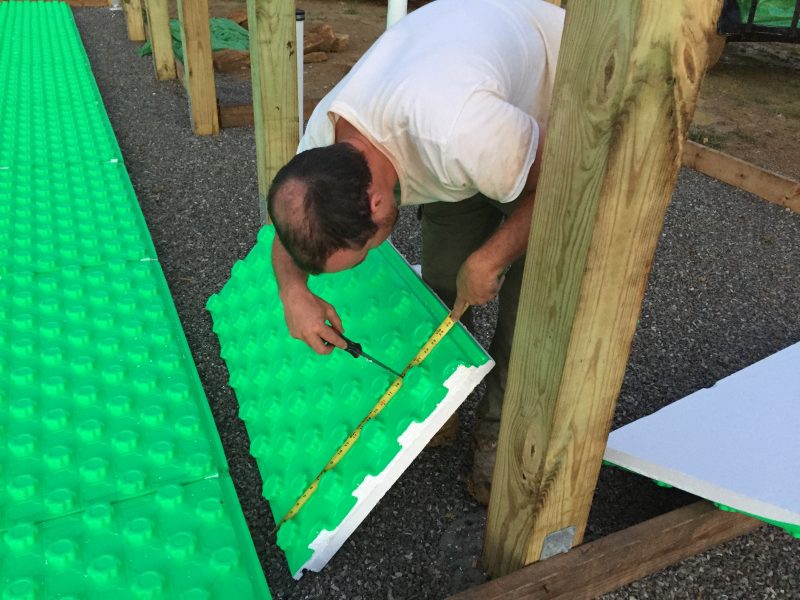
Our radiant system consists of water in PEX tubing that runs through our concrete slab. We laid the pipes in place using a product called Crete-Heat, which is an insulation, vapor barrier, and locking system all in one that holds the pipes in place without having to tie them to rebar. Using this system allowed us to avoid rebar all together and use a fiber reinforced concrete for our slab.
It is a closed loop system, meaning that the water in our floor does not interact with our drinking water. An open system was not an option in our area.
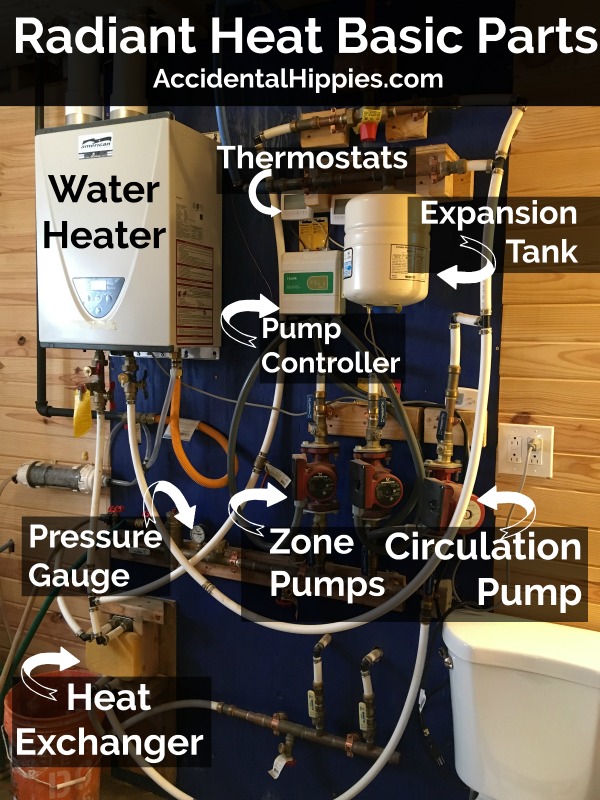
We heat the system with our 180,000BTU tankless propane water heater and push the water through via AC electric pumps.
We opted to have two heating zones: one for the front half of the house (living room, kitchen) and one for the back half (bedrooms and bathrooms). Having two zones means that we can set the bedrooms to a different temperature than the front rooms.
Did you have someone else install your system or DIY it?
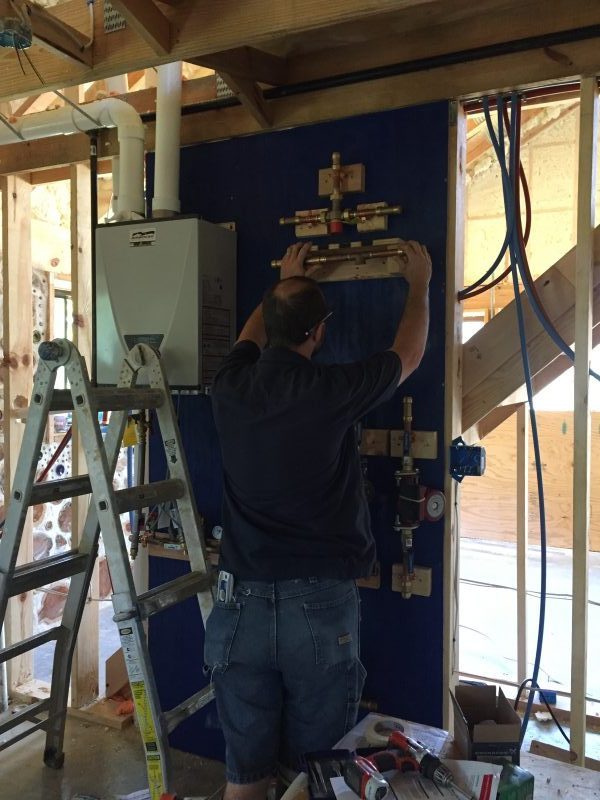
We installed the system ourselves and did not hire this portion out in any way. I will say that this is NOT a project for the novice DIYer, but it isn’t impossible either. The hardest “technical” part was creating the layout and assembling the pipes and other manifold parts.
That said, the actual hardest part was unrolling ungodly amounts of PEX tubing at 3:00 in the morning because we are stubborn. Stick around for THAT fun story.
Where did you get your system?
We put together a DIY package with Radiantec, a company that specializes in radiant heating systems for people who want to install it themselves. Overall, we were very impressed with their level of service, competence, and affordability.
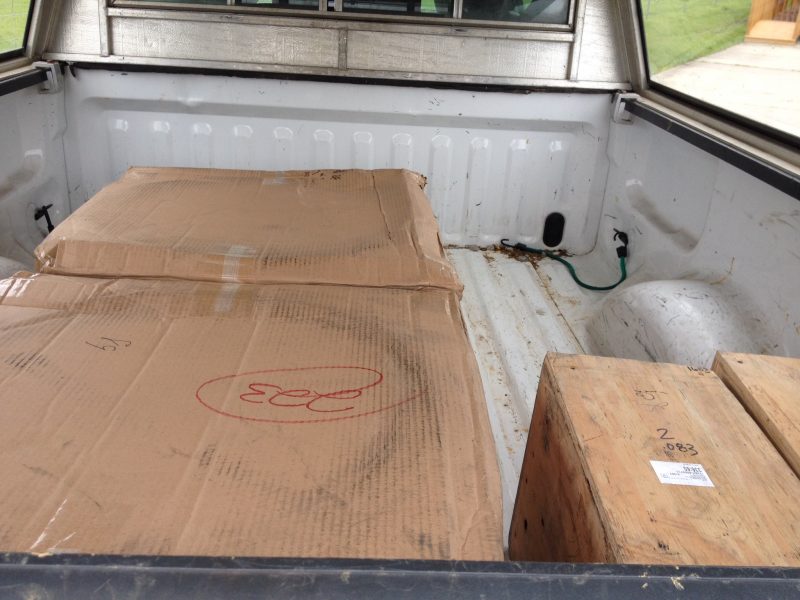
We sent them the floorplan of our home and they sent us back an installation mockup and price quote. Since our build was spaced out, we were able to pay for the first half of the system when we installed it in 2016:
And then pay for the second half when we installed it in 2017:
Are your floors warm?
This is probably the biggest misconception people have about our radiant heat. Imagine it like a swimming pool: if the water temperature says 76 and you get in, you experience that water as being really cold because your body temperature is more like 98. Our floors are the same way. If we set the floor thermostat to 76 it still feels cold to the touch, but the surrounding air warms and feels more comfortable.
How warm does the room get with radiant heat?
Using the previous example, if we set the floor temperature to 76, for us it’s more likely that the air will be about 10 degrees or so below that, around 66 degrees. Since our walls are cordwood, they have an immense thermal mass and I wager that our radiant system has to sort of “fight against” the influence of the walls. I cannot speak to how the same radiant system would perform if our walls were stud-framed.
The thermostat will let the water temperature go all the way up to 82, but we tend not to run it that high because we don’t want to use so much propane.
Why didn’t you choose to do solar hot water?
At the time, it was a matter of system cost and practicality. We weren’t entirely convinced we could create an array of solar heaters big enough in our budget to provide hot water on demand for our radiant AND regular use (i.e. bathing, washing dishes, etc.). Propane was a fairly inexpensive way for us to ensure our needs would be met.
Of course, as our homestead evolves and we seek out more sustainable options I certainly couldn’t rule out solar heating!
Why didn’t you choose an electric water heater then?
Any appliance with an electric heating element uses a TON of energy. It would have been possible for us to use an electric water heater, electric furnace, and electric range off the grid, but we would have had to install an enormous solar power system. Simply put, we didn’t have the money for that starting out.
We have plans to expand our system in the future and could potentially switch to more electric appliances over time. Until then, the propane works great.
Update: We expanded our solar power system in the fall of 2020, but not by nearly enough to go all-electric. Read more about how and why HERE.
How much propane does it use?
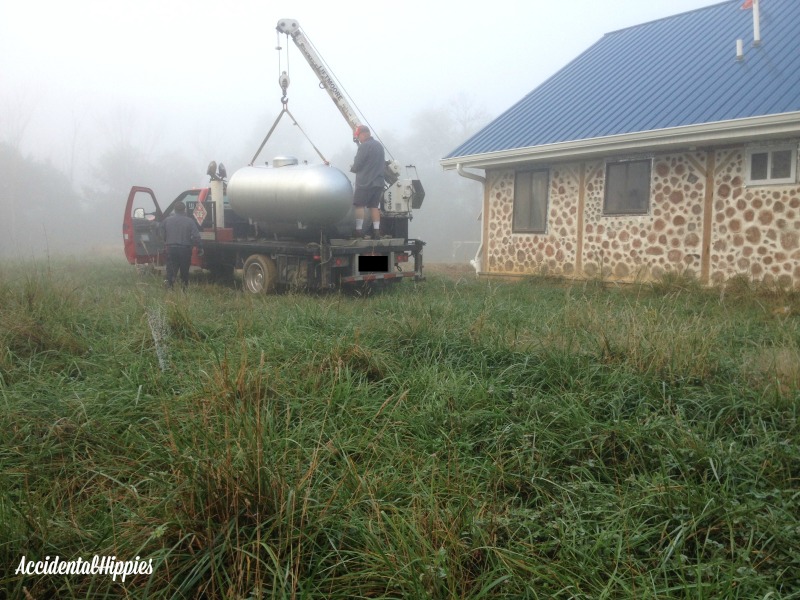
It’s hard to say because we have one large tank to service the house and several propane appliances. We use propane to heat our wash water, our radiant water, power our kitchen stove, and run our refrigerator.
Our tank is 500 gallons. “Full” is actually only to 80% capacity, or 400 gallons. We had it filled at the beginning of August (2018) and at the time of this writing (March 2019) are sitting just below 40%. That means we’ve managed to use around 200 gallons for ALL of those appliances in a span of just shy of 8 months. That’s an average of 25 gallons per month.
2023 Update: Our usage has stayed roughly the same each year we have lived here! We still only fill up once a year and use propane at about the same rate.
This year we turned our system on in the first week or so of November and unplugged it in mid-March. Last year we had snow through part of April, which made for a longer heating season. Every year will be different so our usage will vary.
How do you save propane AND solar energy with this system?
It’s already a fairly efficient system, but we wanted to see if we could make our second winter here even more “effective” than our first.
From 2019 to 2022, we set our radiant system on a timer to run only during the peak sun hours, about 9:30 am – 3:30 pm. This meant we could avoid using up extra battery power for the system at night. The immense thermal mass of our cordwood house tends to hold on to the radiant heat for a LONG time.
We’d set the thermostats up to about 76 (real air temp around 66) and let the system run up to that. Generally, once the thermostat reached the set temperature, the system would go to standby. If it was a brutally cold day with subzero temperatures, the system might cycle on and off more often, but on most days of a standard KY winter, the system might not even pop back on before the timer turned it all off.
The routine was radiant during the day and a fire at night and in the early morning. This routine seemed to have saved us solar energy, propane, AND wood.
In the 2022/23 heating season, we tried something different.
This winter hasn’t been very *wintery*, so it might be skewing our data a bit. But for the times it has been pretty seasonal, we’ve been finding a few things:
- The radiant system only really pops on a few times a day no matter the outdoor temperature.
- When it does turn on, it only runs for a couple of minutes at a time.
- In our two-zone system, only one zone ever really turns on at a time, so we aren’t using as much power as it could potentially draw.
We abandoned the timer and just let it run when it likes, and honestly, if it pops on overnight it usually isn’t for that long and doesn’t draw enough power to put much of a dent in our battery levels, so we just let it ride.
What advice do you have for someone who wants to install a DIY system?
1. Create a dedicated space for your manifold, water heater, and other elements.
Your system is going to take up a fair amount of wall space in your home. If you’re designing a home from scratch, you should look at layouts that provide a dedicated space for your home systems. It’s one of the issues I point out in this post about creating your perfect homestead layout. Spend some time trying to get a visual of a nice clean radiant install, and allow more space than you think is necessary.
Check out these homestead house plans that have dedicated spaces for utilities just like this.
2. Double-check that you have enough of the materials you’ll need.
This is true whether you’re sourcing materials yourself or working with a dedicated company as we did. Here’s a story to illustrate why:
As we were installing the Crete-Heat insulation, we got to the end and realized we didn’t have enough. And yet, Radiantec assured us that everything was delivered in the exact amounts we needed, so what happened? In short, they assumed we were taking the standard route of putting blue board insulation under the cordwood walls, so the Crete-Heat they sent us only covered the area within the walls.
We never thought to double-check that with Radiantec, and we paid for that oversight. We were about 150 square feet short, and we were working hard to finish installing the system so the inspector could look at it early the next morning!
There was only ONE dealer near us who sold Crete-Heat, and they were 2.5 hours away.
Accounting for travel, loading, and driving through for dinner, we ended up nearly 6 hours behind. But we HAD to get it finished. So we worked well into the dark of night laying the insulation down. Sleepy and utterly exhausted, we began unrolling the PEX tubing around 1:00 am. This is normally a fairly frustrating job, but the level of frustration we had at this point was beyond. We finally gave up around 3:30 am, having only completed one zone of our heating system.
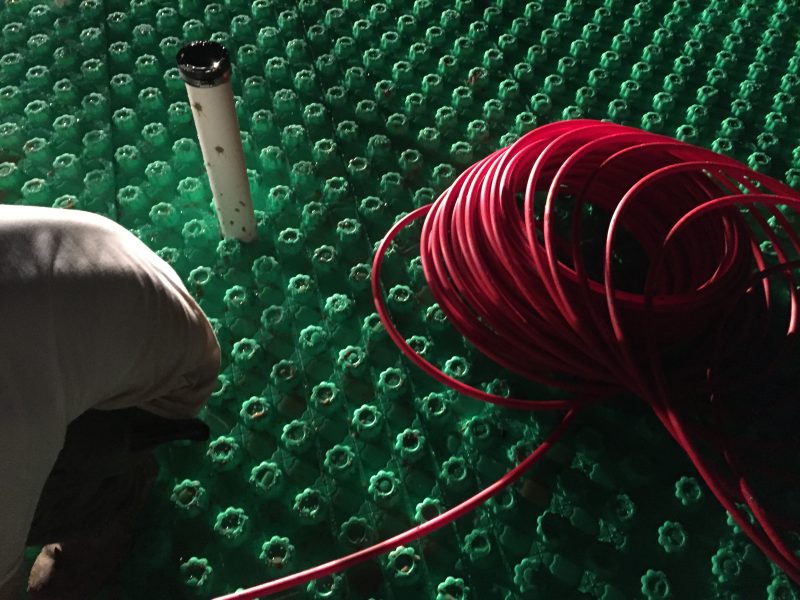
I snuck in this picture because I knew I’d want to remember it, but we were exhausted and mad the whole time.
The next morning, Mark went out super early (after about 2 hours of sleep) and began installing the next zone. That bit of sleep was key to finding a trick in getting the PEX to lay flat in the Crete-Heat. With that, he installed most of the rest of the PEX. Our inspector showed up, and said, “Oh, you’re doing fine! Just finish the other zone like you did the first one and it’ll be good to go.” He used to install radiant systems and spent time commiserating about the difficulty of unrolling PEX.
That’s it. No pass/fail. Just encouragement.
That was among the many reasons why working with a building inspector was actually not so bad. In fact, it was pretty good.
Would you recommend buying a DIY kit vs. trying to source parts yourselves?
YES. Unless you yourself have immense expertise in designing this kind of heating system, leave that up to professionals. There’s a certain amount of comfort in knowing that you have everything you need for a self-contained system to just WORK.
If you’re going to go the DIY route, work with a company that has a history of expertise and quality customer service. In our case, we really enjoyed working with Radiantec. And no, they didn’t pay me to say that. In fact, I’m fairly certain they have no idea this post exists…yet.
Radiantec did a great job of telling us the level of skill you’d actually need. When Mark created our system with them, they said, “if you can do a bit of plumbing you can install our systems,” and they were right. He had to learn how to solder copper pipes and had a few questions about pressure and components, but they answered them with ease.
Everything they sent us has held up fabulously for two winters now without any issues at all! It’s a bit of a learning curve if you’re used to a forced air system, but the purchase was well worth it.

GREAT article!!!!!! Thank you!
Thanks! Hope it helps!
Informative article. I got a quote from Radiantec and was very pleased with the pricing, and the fact that they included a layout with the quote. I hadn’t thought about the allergy part, but that is a big consideration for me. I like the idea of not having allergens blown around by forced air. And thanks for sharing the oops moments so we can learn from them.
Thanks! Important to share those “oops” moments for sure. Hope it helps!