Disclosure: I sometimes earn products or commissions from affiliate links or partnerships on my blog. I only recommend products and services I trust to serve you. Learn more.
Looking at installing your own off-grid solar power system? It’s exciting, but it’s hard to know where to start, especially on a small budget. In this post, I’ll show you how we created our original off-grid power system, how we expanded it, and the lessons you can learn from our mistakes.
$24,000.
That was the cost our local power company quoted us for the privilege of running power lines (and then paying a monthly bill) to our peaceful, idyllic homestead property.
We love that our property can’t be seen from the road, but its distance from the nearest power hookup meant we needed to figure out how to create our own off-grid power. So we did! And for a fraction of what the cost of power lines would be.
We started out with a fairly small solar power system and thrived for several years. But we knew we wanted to expand our capabilities, so we got to work.
If your goal is to install solar power and even live off the grid I’m going to show you how we managed on a small solar system and how we created a bigger, more robust off-grid solar power system for our little house far from the road.
Off-Grid Solar Power: From 1.14 to 3.26 kW Fully DIY
- Our Original 1.14 kW System
- Why We Decided to Upgrade
- Our Expanded 3.26 kW System
- Why We Built a Separate Solar Shed
- STEP BY STEP: How We Completed the Upgrade
- Why We Pursued NABCEP Certification
- Lessons Learned
Our Original 1.14 kW Solar Power System
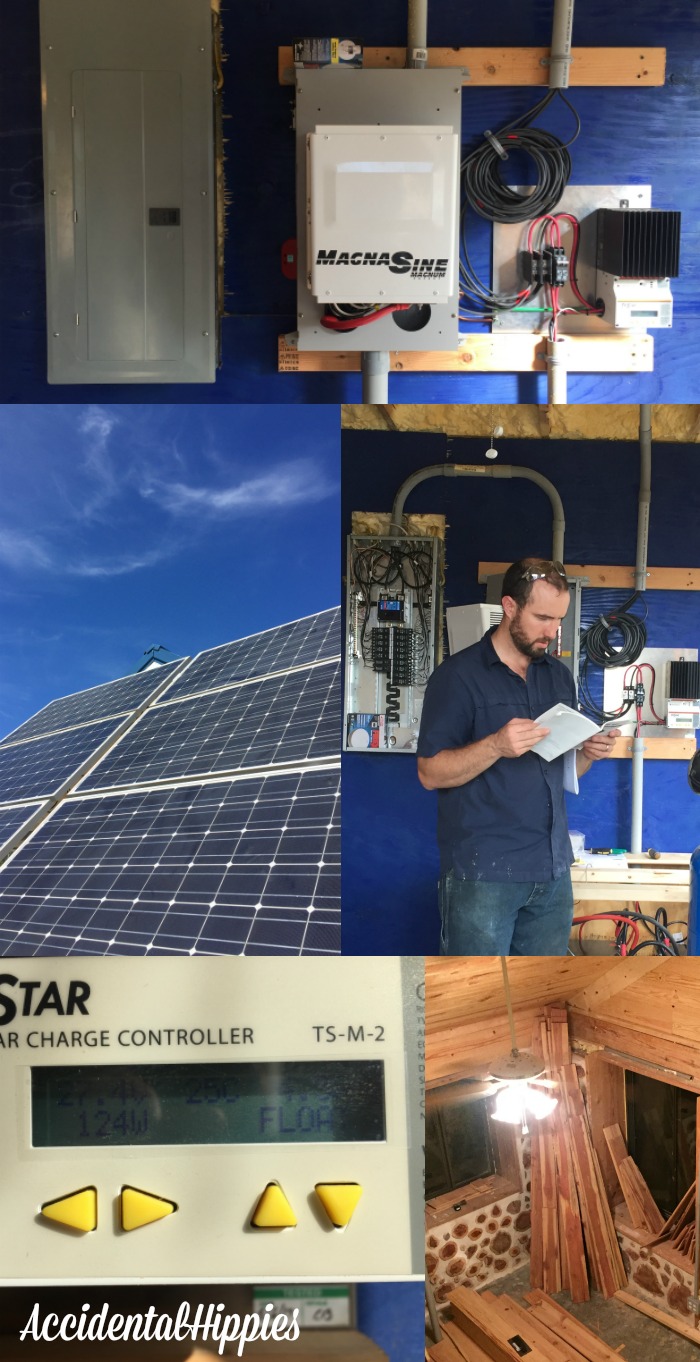
Specs:
- 6 solar panels capable of producing 1140 watts
- 1 Morningstar TriStar TS-M-2 charge controller
- 1 MagnaSine MS4024 4000-watt inverter
- 4 UB8D batteries wired to produce 500 amp-hours of power at 24 volts
- Total system cost (equipment, extras, permits, labor, etc.) = $9,500 in 2017
The original version of our solar power system came from a company called Mr. Solar. Overall, our experience with them was pretty positive. They had someone help us through the design of our system based on the specs we gave them.
We originally found them by doing internet searches like “off-grid home power systems”. Many different companies offer packages already bundled for sale. In fact, our original system was based on whatever version of this bundle they had at the time. We used that bundle as a starting point when we began designing our system with one of their reps
Why We Decided to Upgrade
We had been getting by with our 1.14 kW system from 2017-2020 relatively well. We could actually run quite a lot with it! But a system that small posed some drawbacks:
- We had to run the generator fairly frequently in the winter to keep the batteries full enough.
- The panel wattage vs. our battery bank meant we were likely undercharging our batteries, which shortens their lifespan.
- We couldn’t reliably run even a small air conditioner in our hot summers.
Air conditioning might sound like a frivolous luxury to some folks. But in reality, lack of A/C in hot environments can be a serious health hazard. And while the thermal mass and passive solar of our cordwood house help keep it naturally cooler than most homes, that can only get you so far.
We wanted to be able to run A/C for a few reasons. Chiefly, to create a more hospitable environment for when we have summer visitors, especially our parents. But also, we ourselves wanted to be more comfortable (or to at least take the edge off)! Living off the grid doesn’t have to be miserable!
Related: What Does it Actually Mean to Live “Off the Grid”??
So to accommodate all of that, here’s what we did:
Our Expanded 3.26 kW Solar Power System
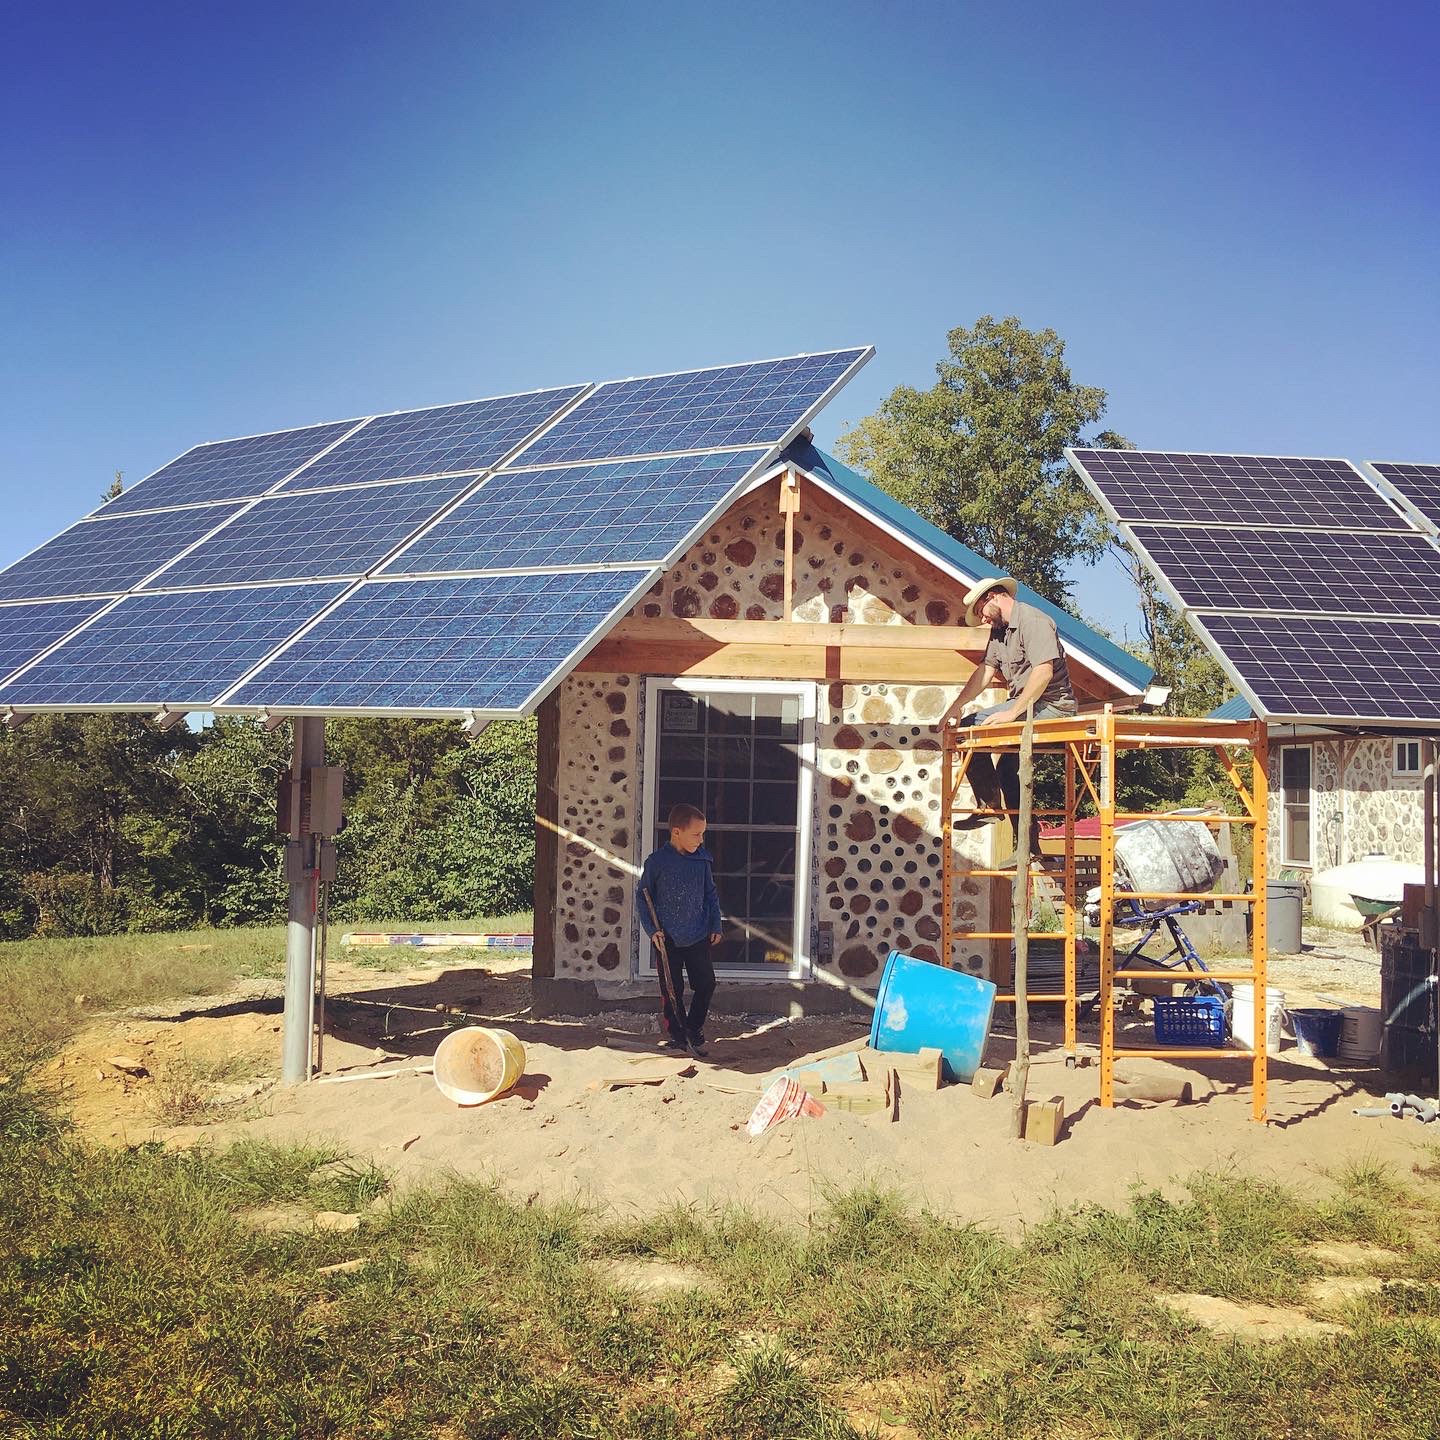
- 15 solar panels capable of producing 3,255 watts
- 1 Morningstar TriStar TS-M-2 charge controller, wired to the original six panels
- 2 Schneider Conext MPPT 60 150 charge controllers, wired to the nine new panels
- 1 MagnaSine MS4024 4000-watt inverter (the same inverter as before)
- 4 UB8D batteries (same as before, but we replaced the original batteries as part of our project)
- Total Cost (new equipment, wire, conduit, equipment rentals, permit, etc.) = $4500
The story of this expansion begins with the good folks on this blog’s email list. I casually mentioned when I published this post that we would likely be upgrading our system in the future. I got a reply from a reader who lives just a few hours away from us. They said that they would be getting rid of 9 235-watt solar panels, two Schneider charge controllers, and an adjustable pole mount and were wondering if we’d be interested in buying it.
After researching and running the numbers, we decided to check it out. Long story short: their equipment was a good fit for us and in great shape, so we bought it all! It was fun getting to make some new off-grid friends in the process too. The adventure of driving three hours south to meet perfect strangers about some solar panels is one I’ll not soon forget!
Related: How to Get the Best Recycled or Reclaimed Building Materials
Why We Built a Separate Solar Shed
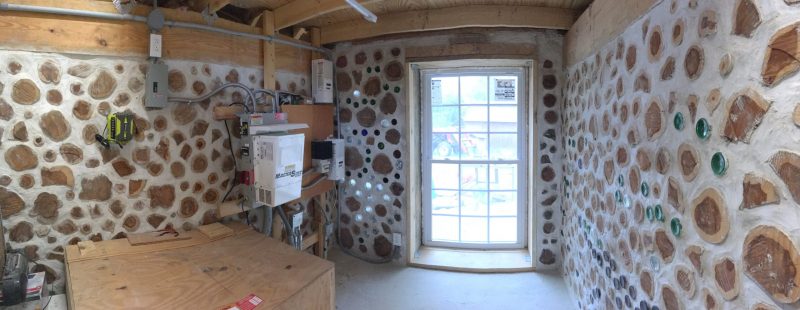
Up to this point, we’d had all of our solar components in the mudroom at the front of our house. This solution was okay, but we decided to build a dedicated shed for our solar equipment. Why?
- It would free up space in our mudroom to make it a more functional area.
- It would relocate our original six panels away from the front of the house (visual appeal).
- Housing the solar components in a separate structure helped us avoid the cost of complying with additional code requirements for “Rapid Shutdown”.
- Removing the inverter from the house helped get rid of the constant low “hum” (unexpected perk…we didn’t realize how much background noise it made until it wasn’t there).
- We wanted to build with cordwood again and intended to host a clinic. But then 2020 happened and it turned into an online cordwood building course instead.
- And since it was 2020, so we figured we might as well build something if we were both going to be home all the time! We managed to get most of our lumber before the shortages and price inflation got REALLY bad, but we still had to pay quite a bit more for standard lumber than we did during our home build. We also found it nearly impossible to find certain sizes and grades of lumber when we needed it.
You can learn more about how we built the shed itself in this post.
How We Completed the Upgrade
Once we had the cordwood shed completely built and the mortar had cured, we started the process of moving everything over from the house to the shed. Obviously, each step has numerous sub-steps and could get super detailed, but the basic process looked like this.
1. PREPWORK.
Before we could move all of our existing solar equipment to the shed, a few things needed to be in place. First, we mounted the nine new solar panels so they could be ready to hook up the moment everything else could be put in place.
We also built a wall frame to hold our inverter and charge controllers level and steady. This was an important step for making sure we could secure our equipment with our cordwood walls.
We also ran the wiring from the shed to the breaker box in the house during this time. This involved pulling a bundle of wires through the conduit that runs from the shed, under the ground, up the side of the house, into the attic space of our mudroom, and down into the breaker box. Pulling this wire was a bit of a pain due to the number of bends in the conduit AND the fact that we could have used bigger conduit. I’ll tell you more about why this is important in the Lessons Learned section.
Either way, having the space and the wire ready to go was vital for the next step.
2. Disconnect all of the equipment from inside the house and cut power to everything for the day.
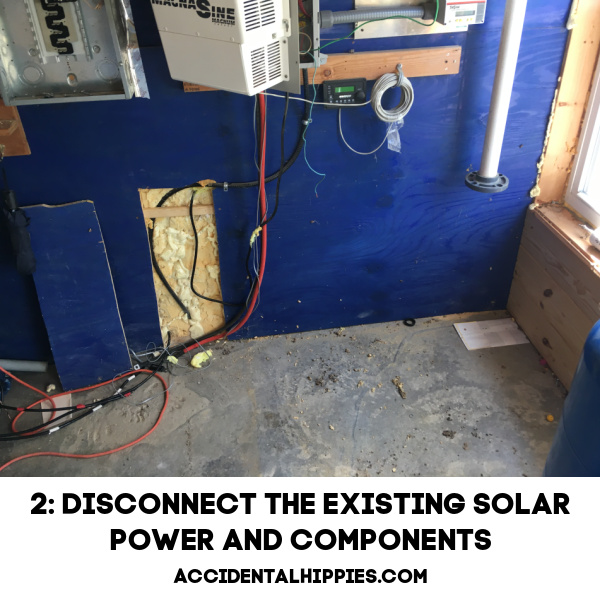
It was game on from this point forward. If we wanted to have power to the house by sundown, we had to start early and push to get everything moved and wired up. It might sound as easy as simply moving it from Point A to Point B and hooking everything up, but in reality, it isn’t so simple. This was a dawn to dusk project.
3. Move the inverter and charge controller to the shed. Mount everything to the wall.
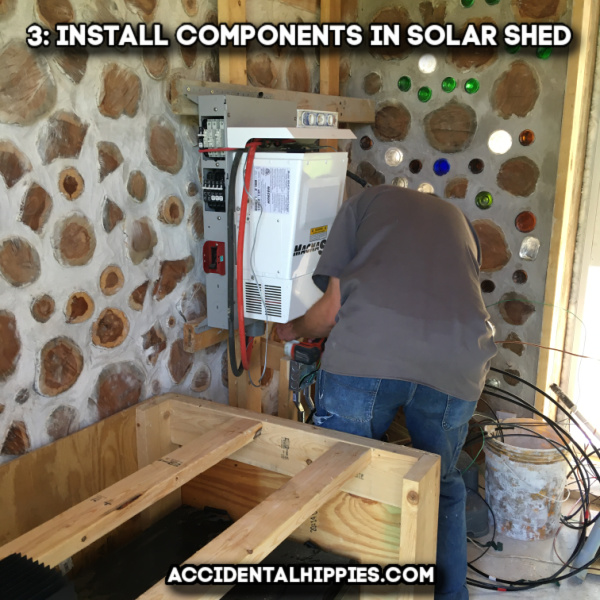
Again, this sounds simple, but these components are often quite heavy and/or awkward. Having multiple hands to help is ideal, and anyone helping should be able to lift well over 50 pounds. Communication and listening are also critical, as one slip could have sent an expensive piece of gear crashing to the ground. Luckily, none of that came to pass. It was hard, but we got it all fastened in place!
4. Move the batteries and the battery box to the shed.
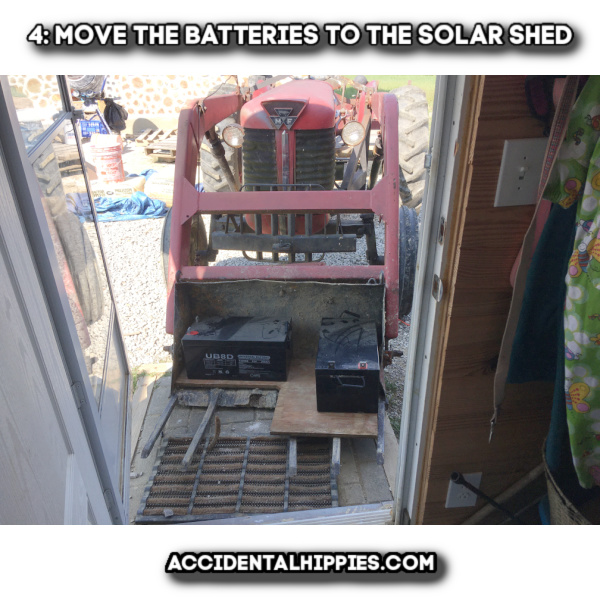
Our UB8D batteries weigh nearly 160 pounds each, and we have four of them. I personally cannot lift them. My husband, Mark, can lift them but they are at his upper limit. So we used our tractor to help relocate our original batteries to the shed. We ended up getting brand new batteries a few months later because it was clear the old ones wouldn’t reliably hold a charge through the winter. In both cases, having safe ways to move the batteries was a must.
5. Rewire everything (easier said than done).
Larger gauge wire is often difficult to bend and manipulate. Reaching wires through awkward spaces can be frustrating. Running out of “knockouts” in a breaker box is problematic. Even with lots of preplanning, there are so many ways for this part of the project to push your nerves to the limit. Fortunately, we managed (through lots of grunting and cursing) to get everything wired up and functional by nightfall.
I don’t have any pictures of this part of the process because it took both of us and all four hands to get it done. I also know better than to snag photo ops when tensions are running high, and oooooh they ran high during this part of the project.
6. Relocate the 6 old solar panels to the new solar pole in front of the shed.
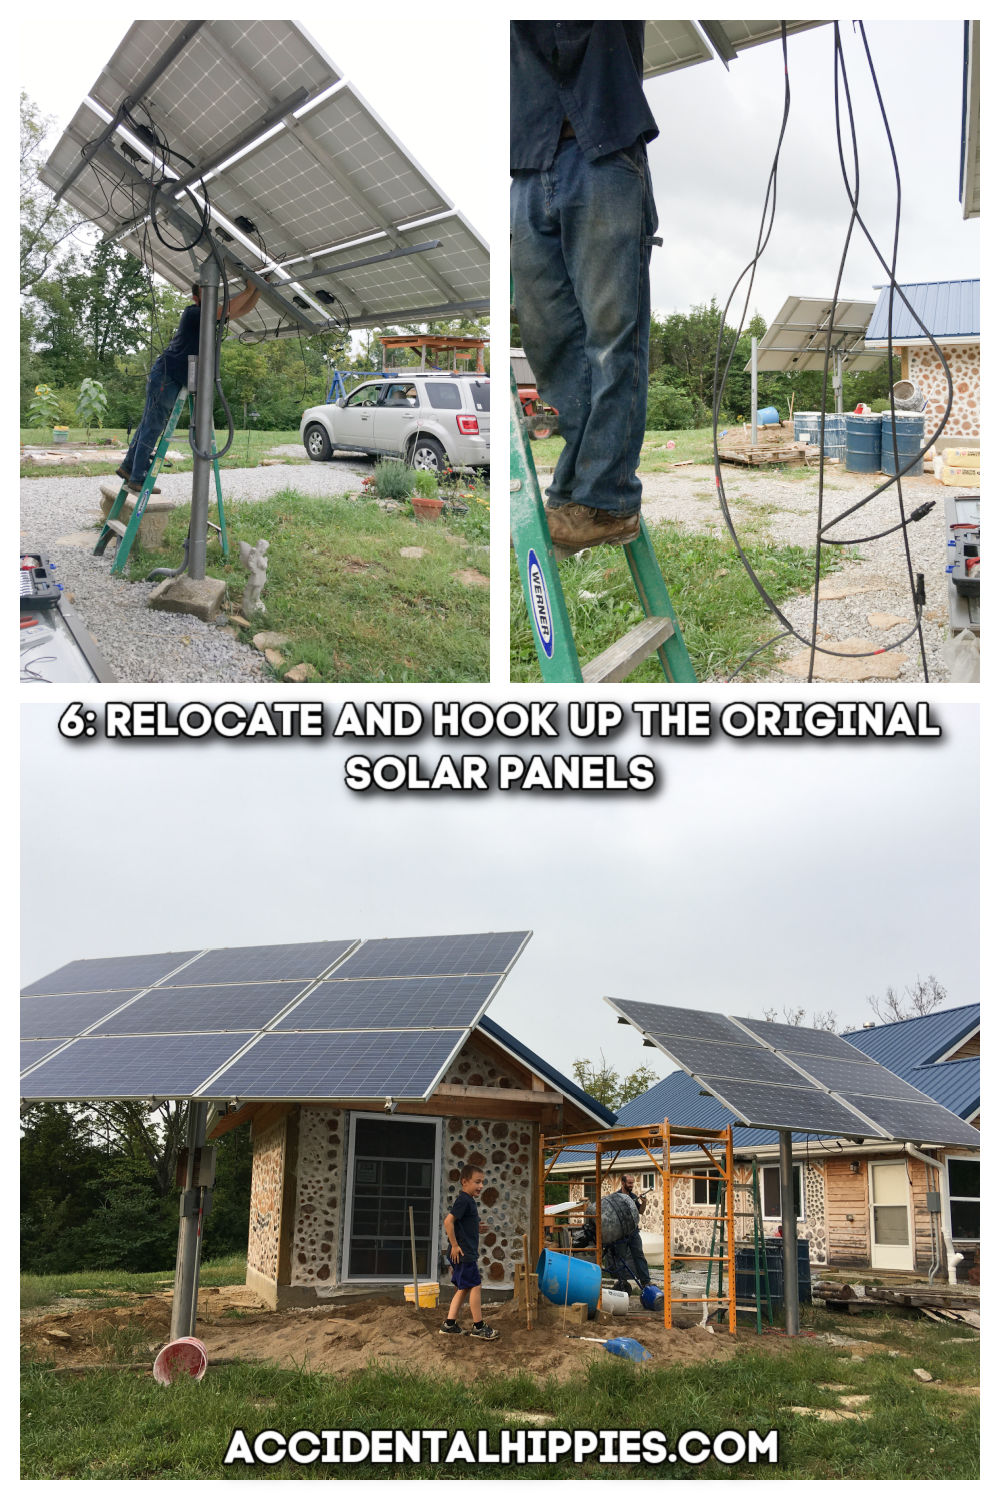
Moving these panels was an entire day’s worth of work on its own, so getting the other nine online first gave us power and lets us rest a bit between big jobs. First, we removed the panels, then disassembled and moved the mounting rails and brackets. We reassembled everything in order over on the new pole. We later pulled the old pole out of the ground with the tractor.
7. Get our work inspected and approved.
Our building itself didn’t require a permit, but our electrical work did. I had mentioned that my husband, Mark, took classes and received NABCEP solar installer certification. Why did he do that?
Our inspector managed to find a small bit of the National Electrical Code about “qualified installers” and determined that a certified installer needed to install the system. The NEC requires that “qualified” individuals install solar panels, but it doesn’t actually say what makes someone “qualified”, which usually results in differing opinions among code officials. You can find out more about that in this helpful PDF guide from Clean Energy States Alliance.
We honored our inspectors interpretation and worked to comply in the best way we could; the solution worked for everyone! There are a lot of mixed feelings about inspectors out there, so I encourage you to dig into that process here:
Natural Homebuilding and the Code
What Owner-Builders Need to Know About Working With Building Code and Inspectors
Why we pursued NABCEP certification
Knowing what we knew from the first system install and the extra we had to pay for it to be compliant, it was cheaper AND more viable for Mark to take solar installer courses through Heatspring and sit the exams to become a certified installer than it was to pay someone to do it for us.
Not only that but there are not many installers in most areas willing to take on a small off-grid job like ours. Most solar installers are doing grid-tied residential work OR large industrial installations. We even live in an area with multiple solar companies, but most wouldn’t give us the time of day. We were lucky we could even connect with someone the first time around.
So getting certified not only satisfied our inspector, it gives us crucial independence in the face of few technicians even willing to look at a system our size. It means that, if something goes wrong or we want to change/expand in the future, we have the knowledge and ability to make it happen.
Lessons Learned
No project ever goes exactly as planned. There were times where we couldn’t get wires to move the right way or go where we needed them to. We had to get creative on the fly. We thought our project was sunk for a moment, but we made it through.
Our key takeaways were these:
- Run a larger size conduit than you think you need. In most cases, just because the requirement is a certain size doesn’t mean you have to only do that size — it’s just the minimum. When in doubt, allow yourself some wiggle room and size up, even if it costs more. It’ll give you more flexibility to fish the wires through.
- Give yourself extra. Beyond just running bigger conduit, consider where your conduit enters your space relative to the devices you’ll need to hook up. Evaluate placements that allow you greater flexibility in the location of equipment. Also, make sure to leave yourself more than enough wire hanging out at your connection points so you have plenty to work with.
- Study your options. There were points in this project where knowing about different devices/hookups/etc. on the fly helped us solve tough problems that could have ruined us. I credit all of this to Mark, who has spent years studying and working with electrical and PV in ways I just haven’t. Follow his example: read everything you can, watch videos, take courses, talk to professionals, and learn everything you can so that you can get yourself “unstuck” when you need to.
So there you have it! A complete look at how we went from a 1.14 to a 3.26 kW off-grid solar power system.
There’s so much to learn (and even more yet to write about it). You can continue your journey by checking out some of the posts below! Also, be sure to subscribe below to get our free Beginner’s Guide to Going Solar in our Member’s Only Resource Library.
Read these posts to learn more:
- How to Get Started With Home Solar Power
- Helpful Solar Resources for Beginners (coming soon!)
- What We Do (and don’t) Run on 1.14 kW of Solar Power
- How We Run A/C on Solar Power
- Solar Power for Beginners
- How Much Solar Power Do You Need?
- Solar Power in the Winter
- How We Built Our Cordwood Solar Shed
Learn more about our original cordwood homestead project here. And be sure to join us on Pinterest, Facebook, and Instagram for more homesteading goodies that don’t necessarily make it to the blog. Thanks for reading!