Disclosure: I sometimes earn products or commissions from affiliate links or partnerships on my blog. I only recommend products and services I trust to serve you. Learn more.
One of the most important things you need to determine when you want to buy a rural or off grid property is how you will get your water. Learn the basics of how we use our home’s roof for rainwater harvesting, as well as what is involved to use that water in the house.
Updated October 2025
When it comes to water sources for your property, there are many options. You could dig your own well or use a natural water source from your land like a stream or spring.
But for our purposes, we’re going to focus on the type of system we chose to use on our off grid property. We’ll show you exactly how we set up our rainwater harvesting system and how it works. You’ll also learn important points to consider before installing your own system and learn what it’s like for us to live with cistern water off the grid.
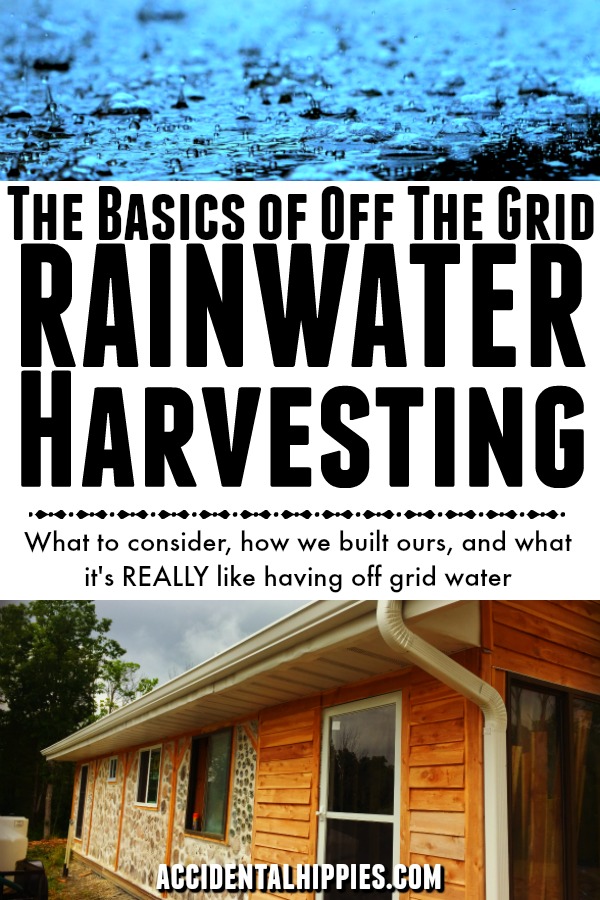
Rainwater Harvesting Basics
First, how does our rainwater harvesting (or catchment) system work?
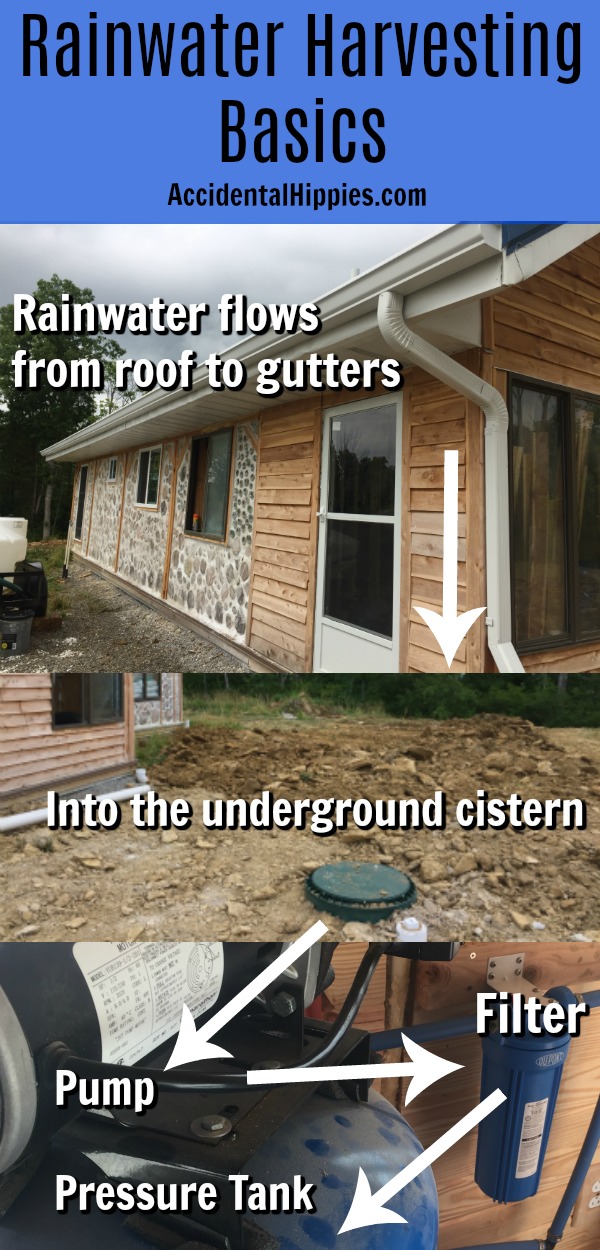
- Rainwater falls onto our roof.
- Rainwater flows through the downspouts into an underground concrete cistern.
- A shallow well pump pulls water out of the cistern through a small pipe.
- Water flows through a filter.
- Water enters the pressure tank, which provides adequate water pressure to fixtures in the house.
- We use water at our sinks, toilets, showers, and tubs the way you would in any standard home.
- As water is used, the pressure in the tank decreases. When the pressure meter reaches roughly 30 psi it will kick on the pump to pull up new water from the cistern and bring the tank pressure up to about 50 psi.
“But I heard that states are making it illegal to harvest rainwater!”
This is one of those things you see in alarmist social media posts, but in reality, there is no big conspiracy to control rainwater. There’s a lot more nuance to it than that.
It is true that some states, mainly out west, have laws regulating or in certain cases prohibiting the capture and usage of rainwater. Most of these laws are rooted in a deep history of property rights spanning decades or centuries in those states. There are also usually issues of water management due to the prevailing climate of those states.
But the vast majority of states either have no laws on the books or even encourage residents to harvest rainwater. The city we used to live in had a rain barrel program for homeowners in their jurisdiction.
How to check rainwater harvesting laws in your state
First, you can check out this post that explores the legality of rainwater harvesting here.
You can check the most official listing of rainwater laws by state by visiting The National Conference of State Legislatures. They only list states with statutes on the books but they provide links straight to relevant government websites for more information.
Second, Acer Water Tanks has one of the most comprehensive listings of laws (or lack thereof) for each state that I’ve found. I’m not an affiliate for them, but this list is one of the easiest to interpret and includes links to applicable state agency websites.
Check with local code officials
Even if your state doesn’t have laws regarding rainwater harvesting, cover yourself by checking with your local building code officials BEFORE you spend thousands of dollars installing a system. There are sometimes instances where local areas have their own laws (for example, New Orleans has statutes dating back 100 years that were meant to control yellow fever). Following local codes will keep your system AND building project legal and safe.
Related: Natural Builder’s Quick-Start Guide to Dealing With Building Code
Parts of a Rainwater Harvesting System
The Roof
Consider the material options for your roof carefully before you build. In general, you should avoid asphalt shingle roofing because the chemicals in them tend to leach into the water. The dissolved organic carbon, or DOC, in them isn’t necessarily a bad thing, but when combined with chlorine can create compounds known to cause cancer. Even after these compounds naturally dissipate, there are still often things like zinc, copper, moss killers, and other potentially dangerous things in the shingles.
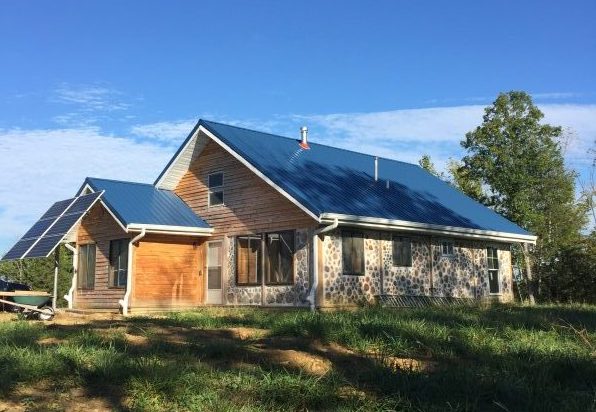
We opted for a metal roof since they tend to have lower levels of the above compounds, plus they tend not to harbor fecal bacteria from birds or other environmental contaminants. They also typically last a LOT longer.
Consider your roof’s size and harvesting capacity.
For every 1 inch of rain and 1,000 square feet of roof, you capture about 620 gallons of water. This means that each square foot captures about .62 gallons per inch of rain.
How much will your roof be able to capture? Simply take your roof’s square footage and multiply by .62.
______ square feet x .62 = __________ gallons per inch of rainfall
Our roof is roughly 1543 square feet. By this math, we are able to catch about 656.66 gallons per inch of rain.
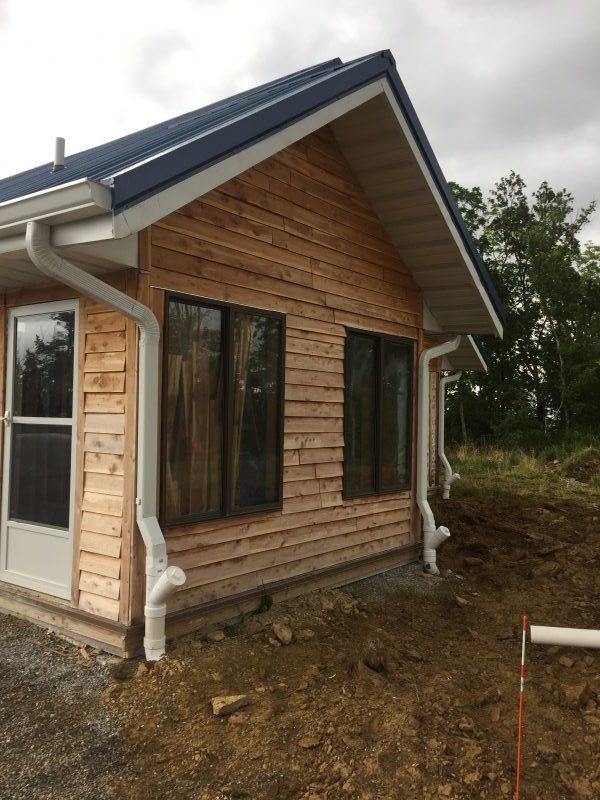
Gutters and Downspouts
The gutters and downspouts channel the rainwater down to your cistern. For the time and cost, we opted to hire our gutters out rather than purchasing components and doing it ourselves. The cost was only a marginal difference and we got 6″ seamless gutters crafted for our house on site.
Pro-tip for off-gridders like us: if you hire this out, make sure they have an adequate generator to power their gutter machine. We didn’t have our solar system up yet, and our generator was only a 2000-watt unit. The gutter machines can take over 4000 watts to run, so we ended up having to rent a bigger generator for the day. Ask ahead of time to avoid this headache!
Options:
- First Flush Diverter: Many people opt to install devices called “first flush diverters” on their downspouts. These devices divert the initial water from a rainstorm to avoid sending the dirt and debris from the roof down to the cistern. This can be very helpful if there’s been a long dry spell to avoid contaminating water more than you have to. We don’t currently have any installed, but we will probably look into it at some point.
- Gutter Guards: These are typically screens that sit over the gutters and prevent larger matter like leaves and sticks from getting into the gutters and creating clogs. Definitely a good idea, especially if your roof has a lot of trees overhead.
- Downspout Filters: These are a nice option if you don’t want to waste water with a diverter and either can’t or don’t want to install gutter guards. We recently purchased these and so far they’ve been a pretty decent way to prevent the bigger items like leaves and large bugs from entering the tank. It won’t keep out the finer sediment, but that’s fine. The only thing with these kinds of filters is that you have to make sure to open the little hatch and remove the debris from time to time.
Cistern
There are lots of options for cisterns out there, from plastic tanks to preformed concrete, buried or above ground.
For cost-effectiveness and longevity, we chose to purchase a 2500-gallon concrete tank from a local concrete company. Our friendly excavator dug a great big hole for us with a backhoe.
The tank was placed into the hole, sealed, and plumbed.
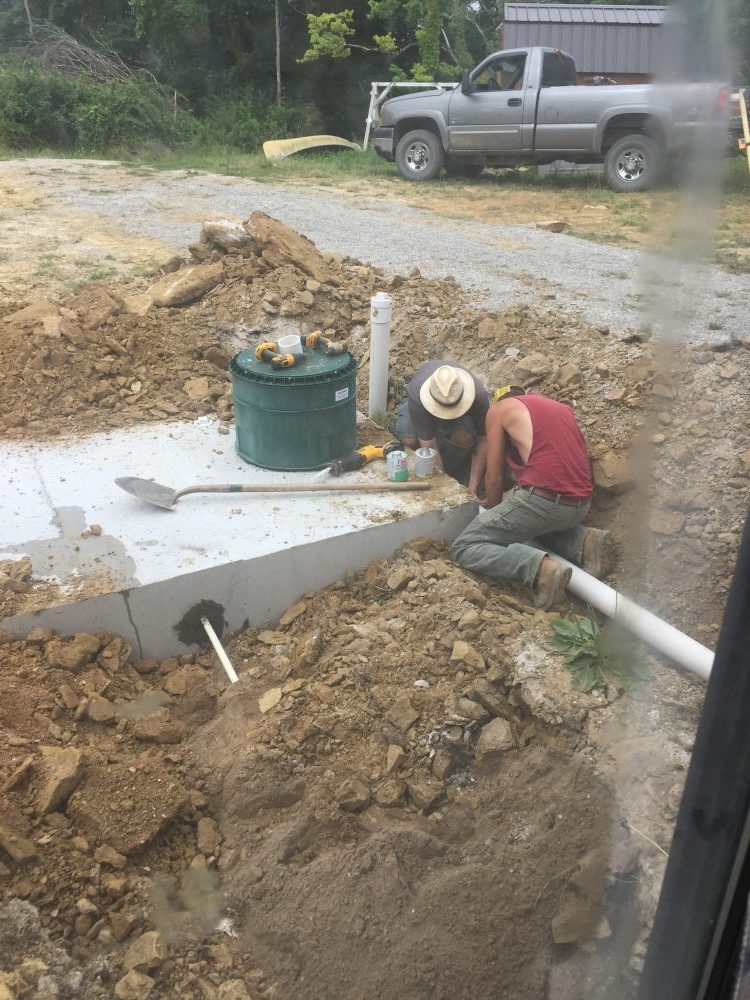
They backfilled the tank, and we filled it with some water from a nearby filling station to keep the tank firmly in the ground while it settled. If there is nothing in there to weigh it down, a tank can “float” back up if the ground is rained on after backfilling.
Well Pump
To get the water up out of the cistern, we have a 1/2 HP Wayne shallow well pump. It sits in our mudroom, which is right next to where the cistern is outside our home.
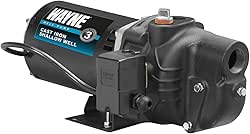
The only real pros to this pump for being off the grid are that it is relatively inexpensive and easy to set up. We didn’t think beforehand about the power draw it would take to run it. The starting load is well in excess of 2000 watts and threw our generator into overload. The pump is easily the biggest power draw in our entire house, and if I could redo it we would likely go with a slow-start pump (read: expensive) or a low powered DC unit.
Related: How Much Power Do You Need To Live Off The Grid?
Water Filter
There are copious options for filtering your water as it enters your home, and many different choices for different budgets (more to come in another post).


For now, we have 2 Dupont single-stage filters (the exact ones are no longer available, but these Culligan filters are similar) with 20-micron string filters inside. We attempted a much finer .5 micron filter but discovered that our water pump couldn’t run with something small in there. The 20 micron filter does a decent job at getting out the basic particles, but it doesn’t do much about small things like cysts and microbes. Again, we may upgrade to something more robust at a later date, but this works fine for now.
To filter out cysts and microbes for drinking water, we splurged on a Big Berkey water filter. You can check out our original review of it here. Many things have changed since that initial review though, so if you’re looking for something similar to a Berkey, I explored the alternatives available in this post:
READ: What happened to Berkey? Here are your alternatives.
Pressure Tank
Last in line before heading to the fixtures is the pressure tank. We have a Water Worker 32 gallon tank. After the water passes through the filters, it heads into the tank, which provides adequate water pressure for fixtures in the whole house.


When you’ve used enough water from the tank to drop the pressure to roughly 30 psi the pump will kick on to refill the pressure tank. When you’re at a sink or shower you never discern a drop in pressure and service is never interrupted even while filling is in progress. It feels like a “normal” house on city water.
What’s It Like Living With Cistern Water?
As someone who lived exclusively with city water for the better part of 32 years, it is DEFINITELY different.
First, the water quality is noticeably different. At first, I had to create a totally different routine for showering and washing my hair because everything I was used to using suddenly made my hair feel awful. I’m not sure if it was the pH of the water, extra particulate not getting caught by the filter, or something else. All I know is I had to use a strong sulfate shampoo and rinse with apple cider vinegar for a while. That seems to have subsided but, to be honest, I have no idea when that happened or how long it took to adjust.
Mark, my husband, is strictly a lard-based lye soap guy and while he says “my soap feels different here” that’s about the extent of it. I don’t think it’s very high up on his list of things he thinks about. EDIT–he assured me he never thinks about it.
As for dishes and laundry, I haven’t noticed a difference in the quality of those tasks, nor have I worried much about running out of water. We hand-wash all dishes and have a regular high-efficiency washing machine.
Running out of water is definitely something to keep in mind though.
We’ve lived in our house for about 6 months now and in that time we’ve had numerous snows (that YES do melt off the roof and into the cistern) and record-breaking flooding in our area, so our tank is almost always full to the brim. We’re just now approaching summer and this week is the longest dry spell we’ve had in some time.
July 2020 update: We have lived in this house for almost three years now and in that time we have only hauled water ONCE.
October 2025 update: We have had to haul water several times now. Averaged out, we tend to haul water or have it delivered fewer than 8 times in a given calendar year. However, the rate is wildly variable. This year we had devastating flooding in our region in the springtime, and the cistern was constantly full. Then in the late summer and early fall, we had a two-month drought in which we had to haul water several times.
The two of us have lived in this region our entire lives so we know what kind of weather we can get here. The summer and fall can get quite dry, so we’ll see how it goes. Fortunately for us, there’s a water filling station 3/4 of a mile from our house so taking our tank to fill it up is no problem.
Drilling a well to supplement is not a practical option for us, but many people choose to put one in. There are ways to DIY that job as well, which you can read more about here.
And if you want to know what happens to the water AFTER we use it, read more about that here!
Other Cistern Considerations
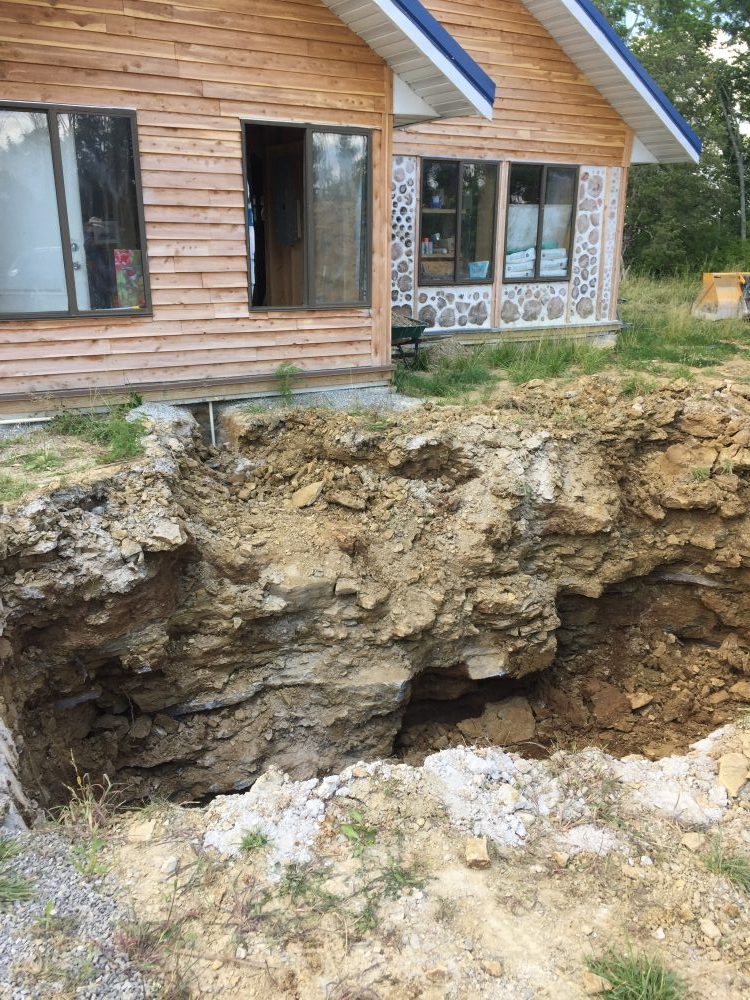
Eight years in, we are just now starting to experience the kinds of issues that can crop up with age. In particular, at the beginning of 2025 we had a brutal cold snap that managed to put a crack in the supply line that runs from the cistern to the house. This was an emergency repair that took the better part of a weekend with a very harried trip to the hardware store and copious digging to fix the line. We also did this entirely DIY, as a Sunday in the dead of winter is about the last time you might be able to get anyone out who can help you.
And now, nearly 10 months later, we had a random hole open up at the very bottom of the tank. How did I know? I keep track of how many inches of water we typically use in a day, which is around 2″ in our specific tank. Suddenly, we started using close to 7″. I knew something was up, so we called a guy to clean and patch the cistern, and he located the leak on a wall near the bottom of the tank. He tried his best to patch it from the inside, but a true fix also required us to bring in our friendly excavator from earlier in this post, dig down a good six feet, isolate the leak, shove it through with hydraulic cement, and then tar over it for good measure.
Both the cistern guy and the excavator told us wild stories about all the cisterns in the area that they’ve cleaned and repaired over the years, so I felt better about how well we’ve actually taken care of it so far. Still though, it’s a stark reminder of just how much more mindful you have to be when you have a cistern instead of city water.
It’s also a good reminder of what it means to choose this kind of rural homestead life. Often, being self-sufficient does require you to do things like lie hunched in a cold, muddy trench in the dark while shoving hydraulic cement into the gaps of a concrete tank, while your 11-year-old shakily holds a flashlight and your husband packs cement into that same gap from inside the tank.
And sometimes, self-sufficiency isn’t so much about the “self” as it is building a community of people who have the knowledge and skills to help you when you need it most. I’m grateful that we are able to do both.
Check out our homestead progress reports and find out more about our cordwood homestead project here. You should also join us on Facebook, Twitter, and Instagram. I’m always pinning lots of great ideas on Pinterest too! Thanks for reading!

following.. We are building a off grid cabin on our farm and it will be off grid run on solar panels and rain water. We spend every weekend and the summers camping there. We love it and hope to retire there one day.
Good for you! If there’s anything in particular you find yourself curious about just let us know. Good luck to you!
What was the cost of the concrete cistern and how did you get it up to the property to be laid? Do they pour it up there or transport it?
Thanks so much for all the insight!
I’ll have to go back to my spreadsheet to check for sure. I want to say the cistern itself was $1500 or thereabouts. It’s precast at the concrete yard and then transported to your building site on the back of a small crane truck.
I just found your site in research for my off grid/ grid attached “my home”.You have some great ideas and experience. I am thankful that your shared. Consider a siphon pump and pressure tank, for your water pump issue. On big rain events you may need a holding tank. Maybe a food grade caged cube?
Avoid containers that you don’t bury or keep insulated they will burst due to expansion.