Disclosure: I sometimes earn products or commissions from affiliate links or partnerships on my blog. I only recommend products and services I trust to serve you. Learn more.
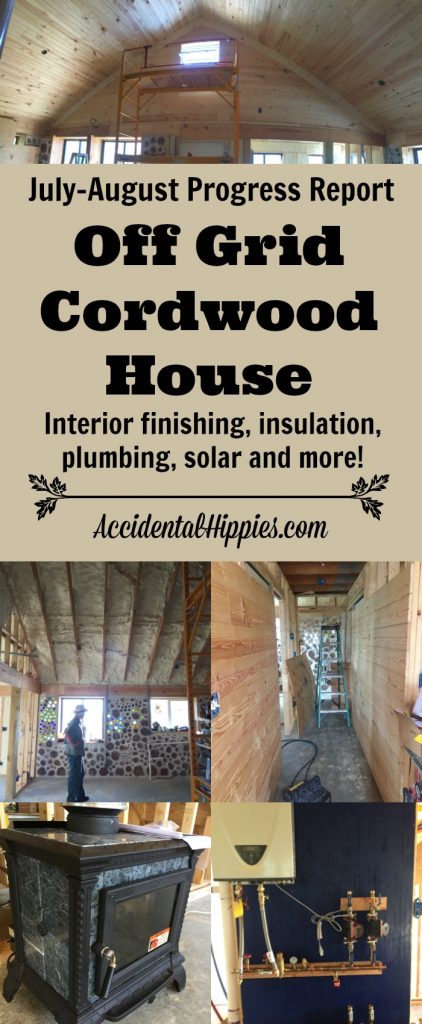
It’s our second full summer building our cordwood house. From insulation to paneling and more, check out everything we accomplished in the months of July and August building our off-grid cordwood house.
There may be affiliate links in this or other posts. This means that we can earn a bit of money from your purchase without it costing any extra to you. We appreciate your support! You can read more about it here.
The month of June saw us completing a lot of little projects and excavation projects like the septic and cistern install. Much of our work for July and August shifted indoors, and we’re delighted to share our progress with you! We keep all of our progress reports HERE, which I highly encourage any of you aspiring off-grid builders to check out if you want to get a realistic look at what it takes to build your own home off-grid and/or with a natural building technique.
So what exactly did we accomplish in July and August?
1. Finished running the wiring for all outlets, switches, and fixtures.
Mark completed his own circuit diagrams and ran all of the wiring himself according to current code requirements. How?
It helps to have previous experience for this job. We ended up needing to rewire our entire house back in suburbia because it had dangerous aluminum wiring. We’re lucky that both of our dads had been electrical engineers and that we have access to several other knowledgable people and resources who could help us learn.
If you’re looking for an easy electrical guide, this is one we kept in our arsenal.
If you are thinking of building your own home, electrical isn’t something to mess around with. Do your research, understand the code, and consult with experts whenever possible.
2. Gutters and downspouts into the cistern
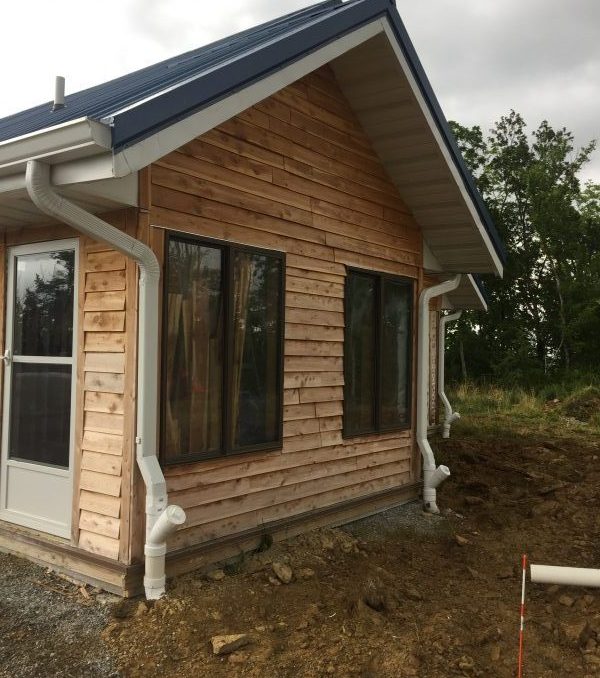
The gutters take rainwater from our metal roof and feed it into the cistern. We installed the PVC pipes and cleanouts ourselves and then had gutters installed.
For just a hair over the cost of us trekking to the big box store to get stock gutters and downspouts, we hired a local outfit to come roll out some seamless gutters on-site and install them for us. Just a note for builders without grid power, we DID have to go rent a 5000-watt generator for them to be able to run the machine that actually makes the gutters. Our 2000-watt Honda generator is a workhorse, but not for a machine with that much demand. Either way, minus the hiccups they had the job done in under 2 hours and worked straight through the rain!
3. Finished plumbing the radiant heat, supply lines, cistern pump, and propane supply lines.
This was a bit of a bear (mostly for Mark) because it required lots of leak troubleshooting and specialty parts. For example, we had leaky supply lines for the tankless water heater so we had to find different ones, and we had little micro-leaks in our black iron pipes for the propane. There can be absolutely no leaks when you’re dealing with propane, so it took a while to find and fix everything. Now it’s all 100% leak free and ready to go!
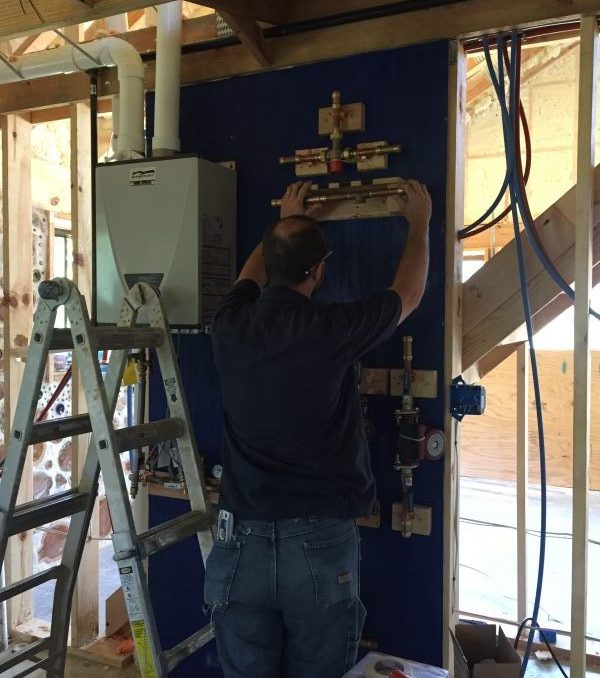
Here’s a shot of Mark working on installing the manifold for our radiant heat system. To his left you see our tankless LP water heater which at 180,000 BTU is powerful enough to run our radiant heat AND provide all of our hot water. These components are located in the master bathroom.
4. Spray foam insulation
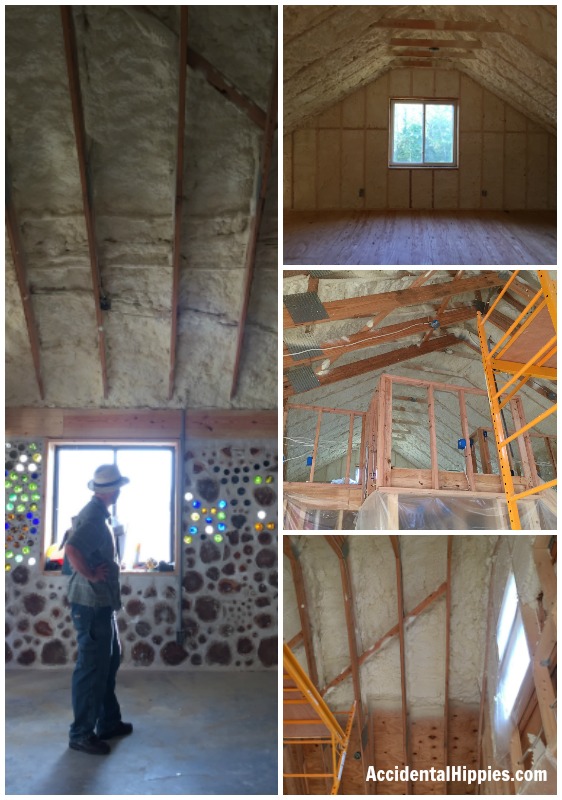
We opted to contract this job out. Spray foam insulation is a careful process that is quite easy for a DIYer to mess up in potentially expensive and catastrophic ways, so again we went to the experts.
Remember when building a house on your own it doesn’t have to be “all or nothing”. Building a house by hand doesn’t required EVERY job to be done by you. Many times, it is safer and more cost effective to hire someone else to do the job, so know your limits and evaluate your options.
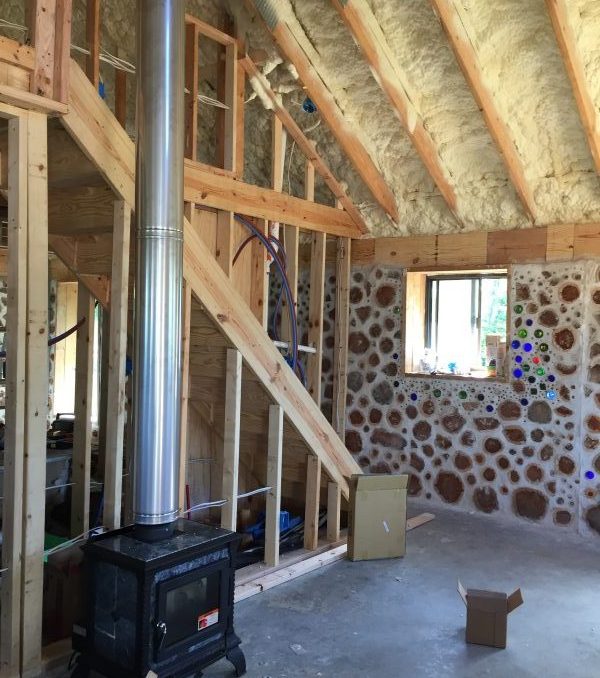
5.Installed the wood stove.
Again, we hired out the installation because it required getting up on our roof and using tools that we just didn’t have available. We sprang for a slightly fancier soapstone stove than we had originally intended, but we’re also looking at longterm value and performance so it made sense to spend a little more now to save energy and fuel in the long run. Soapstone burns slower, longer, and more evenly than cast iron, making it a very efficient and sensible choice when buying a wood stove, especially if you want it to be a primary source of heat.
We had this installed AFTER the spray foam. There needs to be at least a 2-inch clearance between the flue and any combustibles, so we blocked off the flue area on the ceiling with cardboard and the insulation guys simply sprayed around it, leaving the exit area clear.
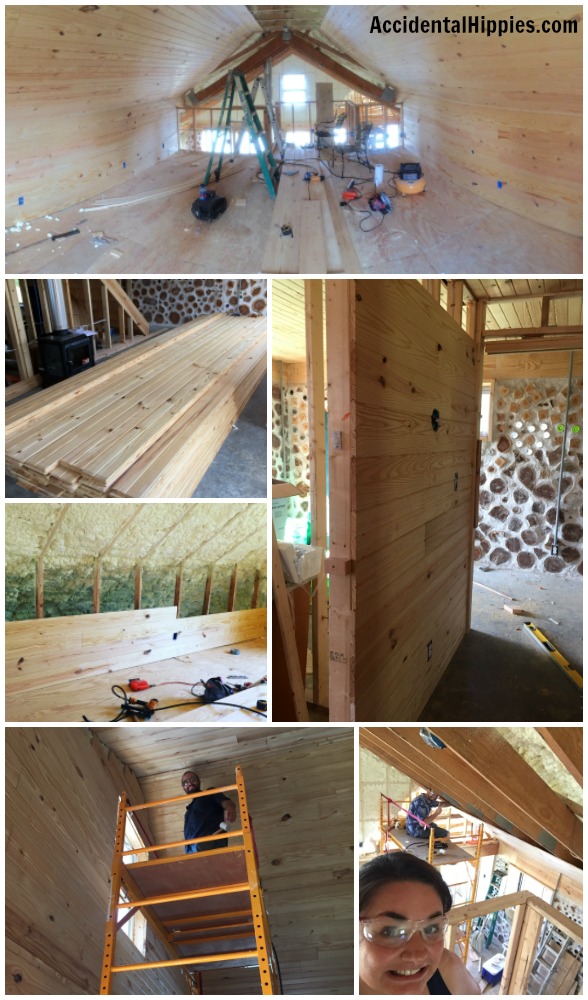
6. Started installing the tongue and groove pine planking.
As of the end of this month we are a little over halfway done with the tongue and groove pine. We elected to do tongue and groove for a few reasons: 1. It is beautiful to look at, 2. It is easy to install, and 3. It doesn’t require taping and mudding like drywall does. Drywall may be more cost effective, but not by much, especially when you factor in the time and level of detail it takes to work with it. With the pine planks you lock them together and nail them in and they’re DONE. No taping, mudding, sanding, priming, or painting. Just DONE. It’s still a work in progress but look at how it’s turned out so far!
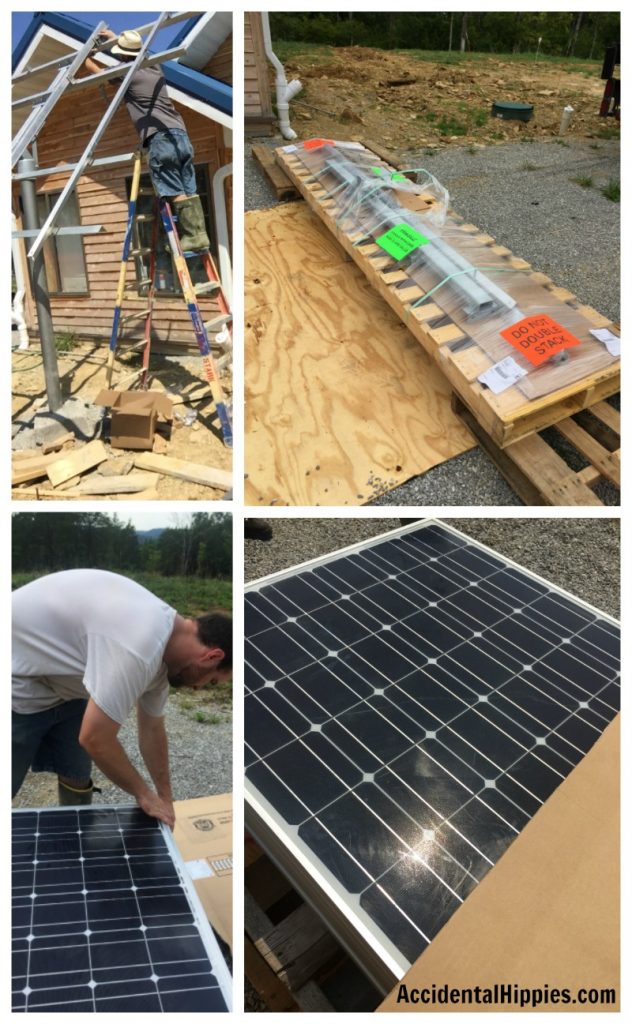
7. Solar components started arriving!
We opted to order a complete system designed for our home by Mr. Solar, a company based out of Baltimore, Maryland. We’ve been working with them for the past year or so to design a system that will run everything in our house without breaking the bank or sacrificing quality.
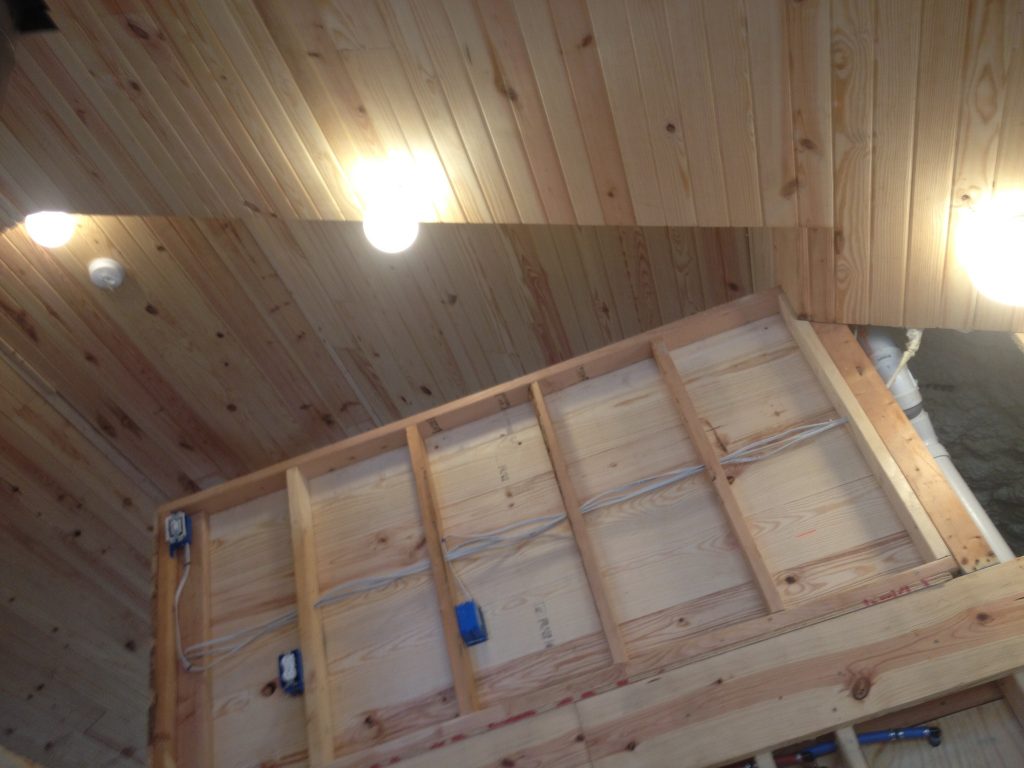
8. Install the lighting and test the power with the generator.
While I worked on the tongue and groove, Mark set to installing our ceiling fans and light fixtures. All those fixtures came from various building reuse centers in our area, which kept our costs low and keeps materials out of the landfill. Score! We wanted to test everything before we hooked the solar up just in case there was an issue we needed to resolve first. Luckily, everything worked great! The solar system is still unassembled so the generator was a good standby for testing these out. We wanted to make sure we didn’t have any major wiring problems before we went ahead and hooked everything up.
What’s next?
We need to finish the walls, including putting up the remainder of the tongue and groove and any tile we might do. This includes areas like the wall behind the wood stove, the kitchen, and the bathrooms.
We’ll finally install the bathroom fixtures we have, as well as build a simple but functional kitchen.
We’ll create a step for at least one entry door. Eventually it’ll be both, but to start we only need one. We scored some awesome free patio pavers from a friend and we are allowed to use those to create our step. Yay for free resources!
We’ll also be working hard to get the solar operational. This includes building a box to house the battery bank, mounting the panels, and connecting all of the system components including the charge controller and power inverter. Having our power system in place is the last BIG thing we’ll need to have a fully functioning house.
And once we have that? We can have “temporary occupancy”, which is a fancy way of saying we can start moving in and stay there while we finish the rest of the house.
What needs to be finished to go from “temporary” to “permanent” occupancy?
We’ll need to bring in some dirt to grade the land around the house. We also need to make sure both entrance doors have entry steps (typically concrete, but again we can use our pavers) to meet code. Finishing room by room will be easier when we can live there simply because we won’t be eating up time to travel to and from the house.
I have been studying ways to build “cheap” since I filed for Divorce in 2004. It’s now 2018 and it seems daunting enough to buy a Bus and do THAT. My son moved July 22, 2018 and my ‘plan’ (go ahead-tell God your plans) was to get a property big enough for 2 small homes. His/ Mine. He moved where his friends are 3 hours away, so now that has changed all of my silly ‘plans’. Not sure where to go- but no family here! :/ God will show me where.
In the meantime, I will wait and carry on until I get the God Smack. I live near Gatlinburg in a small condo. My dream is cordwood with pallet/ cob interior walls, some glass bottles a Must, and pebble stone shower. Architectural antique window, doors.
**Your research, building and posting will save me a ton when the time comes for the BUILD. Thank you both for sharing freely your vast knowledge. You are a true blessing to so many. <3
Wow, learning so much (even from the comments – just learned about another interior wall option from Ailaine above).
I wanted to comment on how beautiful your tongue and groove walls and ceiling are. I never would have guessed the cost to be close to drywall. Plus, I’ve heard drywall materials can be pretty toxic.
Thank you! That was one of the reasons we wanted to avoid drywall completely. The only place we have it in the whole house is under the steps, which is code-required for fire safety reasons. The tongue and groove is definitely more beautiful, as you say!