Disclosure: I sometimes earn products or commissions from affiliate links or partnerships on my blog. I only recommend products and services I trust to serve you. Learn more.
There are many options to consider when running electrical wiring in your cordwood house. Here, we’re going to examine your common options, as well as what WE chose to do, and why.
For those who haven’t followed us yet, we built our own off-grid home out of cordwood masonry. We did the majority of the work ourselves, including our own electrical work. What’s more, we completed all of our electrical work within the oversight of our local electrical inspector. He truly helped us to stay NEC compliant.
For the purposes of THIS post, I’ll only be discussing how we handled the wiring in regards to cordwood walls. I’m going to assume that, as an owner-builder, you will be tackling this job on your own and not hiring it out. And even if you do hire an electrician, they likely won’t have seen cordwood masonry before. Here’s what you need to know.
First, consider the code.
Before you choose a method of running your wiring, you need to have a working knowledge of the current residential electrical code. That isn’t to say that you need to have an expert level knowledge of the NEC, but it DOES mean that you need to understand some basic guidelines and have knowledge of what to place where.
This is especially important for cordwood builders who are required to report to a building inspector. Why? As an owner-builder, you’re already facing a bit more scrutiny than you would if you had you hired a general contractor. But as someone who is also using a natural building technique, you will likely invite even more oversight. Our code officials were fascinated with our project, and used every excuse to come see it. This may or may not be the case for you, but it is wise to arm yourself with knowledge regardless.
Related – Natural Homebuilding and The Code: How to Talk to Inspectors
First, make sure you have a good basic guide to wiring.
The Step by Step Guide Book on Home Wiring has been our go-to resource for almost 10 years now between remodeling our old home and building our cordwood house. We’ve had so many opportunities to survey different electrical guidebooks and this is by far the most straight-forward and easy to understand.
Second, try to get a current code reference.
As of this writing, that is the 2017 version of the NEC. Be warned though that your state might actually be on a different year from the national edition. For example, when we were finishing our build the NEC was on 2017 but Kentucky was still on 2014. Check with your local inspectors to be sure.
You can buy a copy of the 2017 code here. It isn’t cheap, but having a physical copy on site would also have been a huge help. You can also reference it online here for free (though you must create an account). There were instances where being able to quote the code and back it up with the official citation would have been invaluable.
You can also look into illustrated code reference books.
This is not as iron-clad when dealing with an inspector, but it can be easier to navigate for the novice builder. I’ve looked around for some good options and the best ones still have mixed reviews. Most notably, both top picks for residential owner-builders have reviewers mention the lack of clarity on the use of AFCI. AFCI means “arc fault circuit interrupter”, which has become fundamental to the code. For instance, they are now required in almost EVERY circuit of a house, and the lack of mention is worrisome. I’ll link to these two books with that caveat in mind, and hopefully will link something else should a better resource become available.
DEWALT Electrical Code Reference (2017)
Code Check: Electrical (make sure you’re getting the 8th edition for 2017 codes)
Cordwood Wall Electrical Wiring Options
1. Within the cordwood itself.
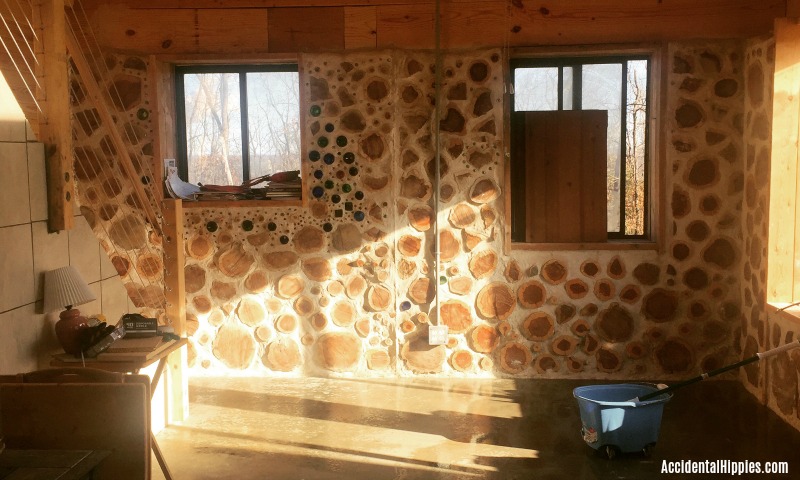
Imagine normal wall switches and electrical outlets. In standard stud-framed homes, those items are typically flush with the wall. If you would like to have your outlets and switches flush with the log faces of your cordwood walls, running your wiring inside the walls is the way to go.
PROS: Easier to place furniture against walls, less likely to get bumped, better looks
CONS: Your electrical layout needs to be completely set in advance – making it harder to change layout options later in the build, harder to change or repair wiring in the future if needed, takes longer and is slightly more complicated to lay your cordwood around your receptacles
Options within the cordwood:
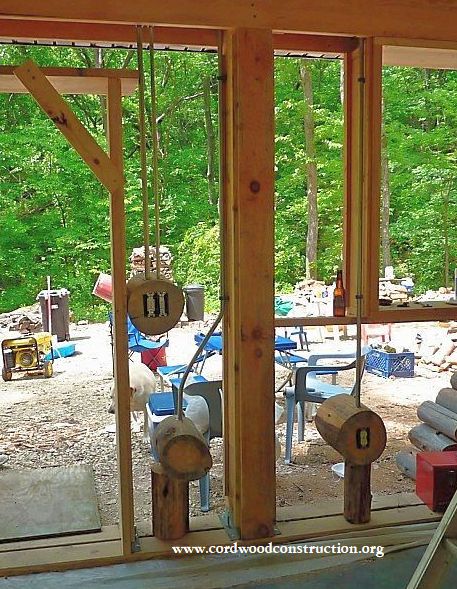
A. Hollow out space for electrical boxes inside logs.
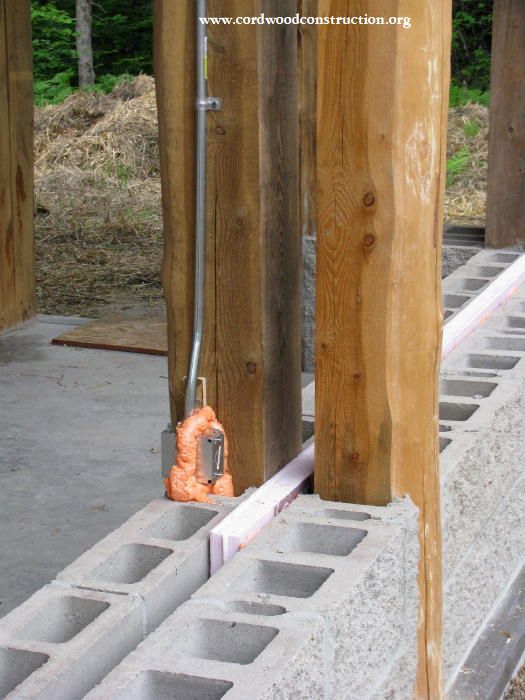
B. Attach electrical boxes to posts.
C. Staple wiring to posts/beams/other framing members with approved electrical staples (following code guidelines for placement)
D. Run conduit through the walls and feed wires through that instead of leaving them exposed.
Cordwood guru Richard Flatau has a wonderfully illustrated post to show some of these options in this post here.
Rob Roy’s book Cordwood Building also has some excellent diagrams, and Cordwood and the Code is a valuable resource for aspiring cordwood builders.
**IMPORTANT NOTE:
Verify with your electrical inspector and/or a qualified electrician the safest and most code appropriate way to run your wiring if you choose to do it internally. For example, some jurisdictions require the use of PVC conduit and prohibit the use of metallic conduit. Others yet may require the use of some kind of conduit and prohibit simply stapling wire to your post and beam framework.
2. Surface-mounted on the cordwood walls.
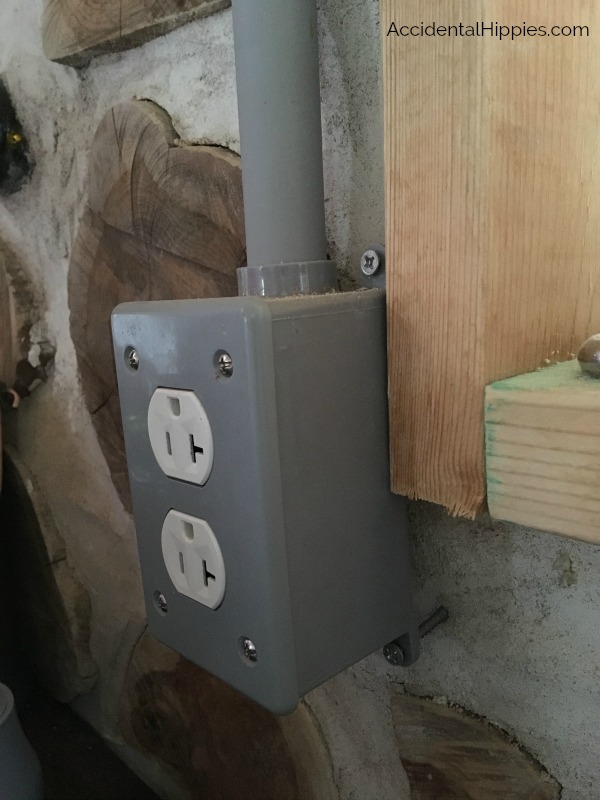
This is the option we chose, as we made some slight modifications to our home’s layout. Seeing how our rooms actually turned out AFTER the cordwood was built and also after we framed up the interior walls informed us on how best to space our receptacles.
Surface mounted wires are encased in schedule 40 rigid PVC nonmetallic conduit. The wires are fed through the ceiling and run to the breaker box NOT in conduit from there. They are stapled to the framing members with approved wire staples at designated intervals.
PROS: Able to make better receptacle placements after seeing the walls in place, easier to repair or change wiring later if needed
CONS: Not as visually appealing, protrudes from the wall
Why We Chose Surface-Mounted Wiring
1. We wanted to make the best possible layout choices after seeing how the interior framing actually shaped the rooms.
Yes, we had building plans drawn up with all of these things clearly marked out. However, there were things about our framing that we changed along the way. We also wanted to be dead sure that our room dimensions actually were what we thought they were before committing to hundreds of feet of wiring.
Imagine that you thought you were placing an outlet at the edge of a room and it turns out that your measurement was a bit off and now your outlet box is trapped behind stud framing, encased in cordwood and rendered unusable because you were off.
2. We wanted easy access in case of future repairs or changes.
This stemmed from our experiences with rewiring our old house. In the unlikely (but real) event that we need to repair a wire or change a circuit in some way, we didn’t want our wires to be encased in 16 inches of logs and mortar. It is much easier for us to make changes with them mounted on the surface.
What should you choose?
It’s really a matter of preference. Ask yourself:
- What do I prefer the look of?
- What is code compliant for my area?
- What are you physically capable of building?
- Do you have access from underneath your structure? Will wires run through pre-placed conduit or will you run from above later?
By no means is this comprehensive, but it’s a good jumping off point. If you haven’t drawn up your house plans yet, these would be good questions to ask your draftsman/architect and code officials before you finalize them. You may find yourself creating different house plans depending on the answers you get.
Getting ready to build your own cordwood house? Get our owner-builder quick start guide below.
By filling in the form, we’ll send you our free PDF guide to help guide your thoughts as you plan your build. You’ll also be subscribed to our email newsletter.
We built our own off-grid cordwood house. You can our complete specs here and read every single building progress update here.
While you’re at it, be sure to follow us on Facebook, Instagram, and Pinterest for more great ideas that don’t necessarily make it to the blog.
Thanks for reading!
